MODULE 4
AN INSIGHT TO PETCLININC APPLICATION
Introduction
This module helps you to play around with the Petclinic Application
Audience
Programmers who have successfully set up the development environment for NIMBUS framework and gone through the basic examples.
Pre-requisites
The developers are expected to have all the softwares mentioned below installed on their system
| Application Name | Version |
|---|---|
Java |
1.8.0_171 |
Maven |
3.5.3 |
Lombok |
1.18.2 |
STS |
3.9.5 RELEASE |
VS Code |
1.14.2 |
Robo 3T |
1.2.1 |
Chrome |
Version 63.0.3239.108 (Official Build) (64-bit) |
Advanced Rest Client |
arc-12.1.4 |
|
Note
|
Above s/w versions are compatible with Nimbus f/w version 2.0.x. The versions are subjected to change. |
Cloning Nimbus Framework Code
take the latest nimbus odss code from github:
-
Go to https://github.com/openanthem/nimbus-core and select Branch as .
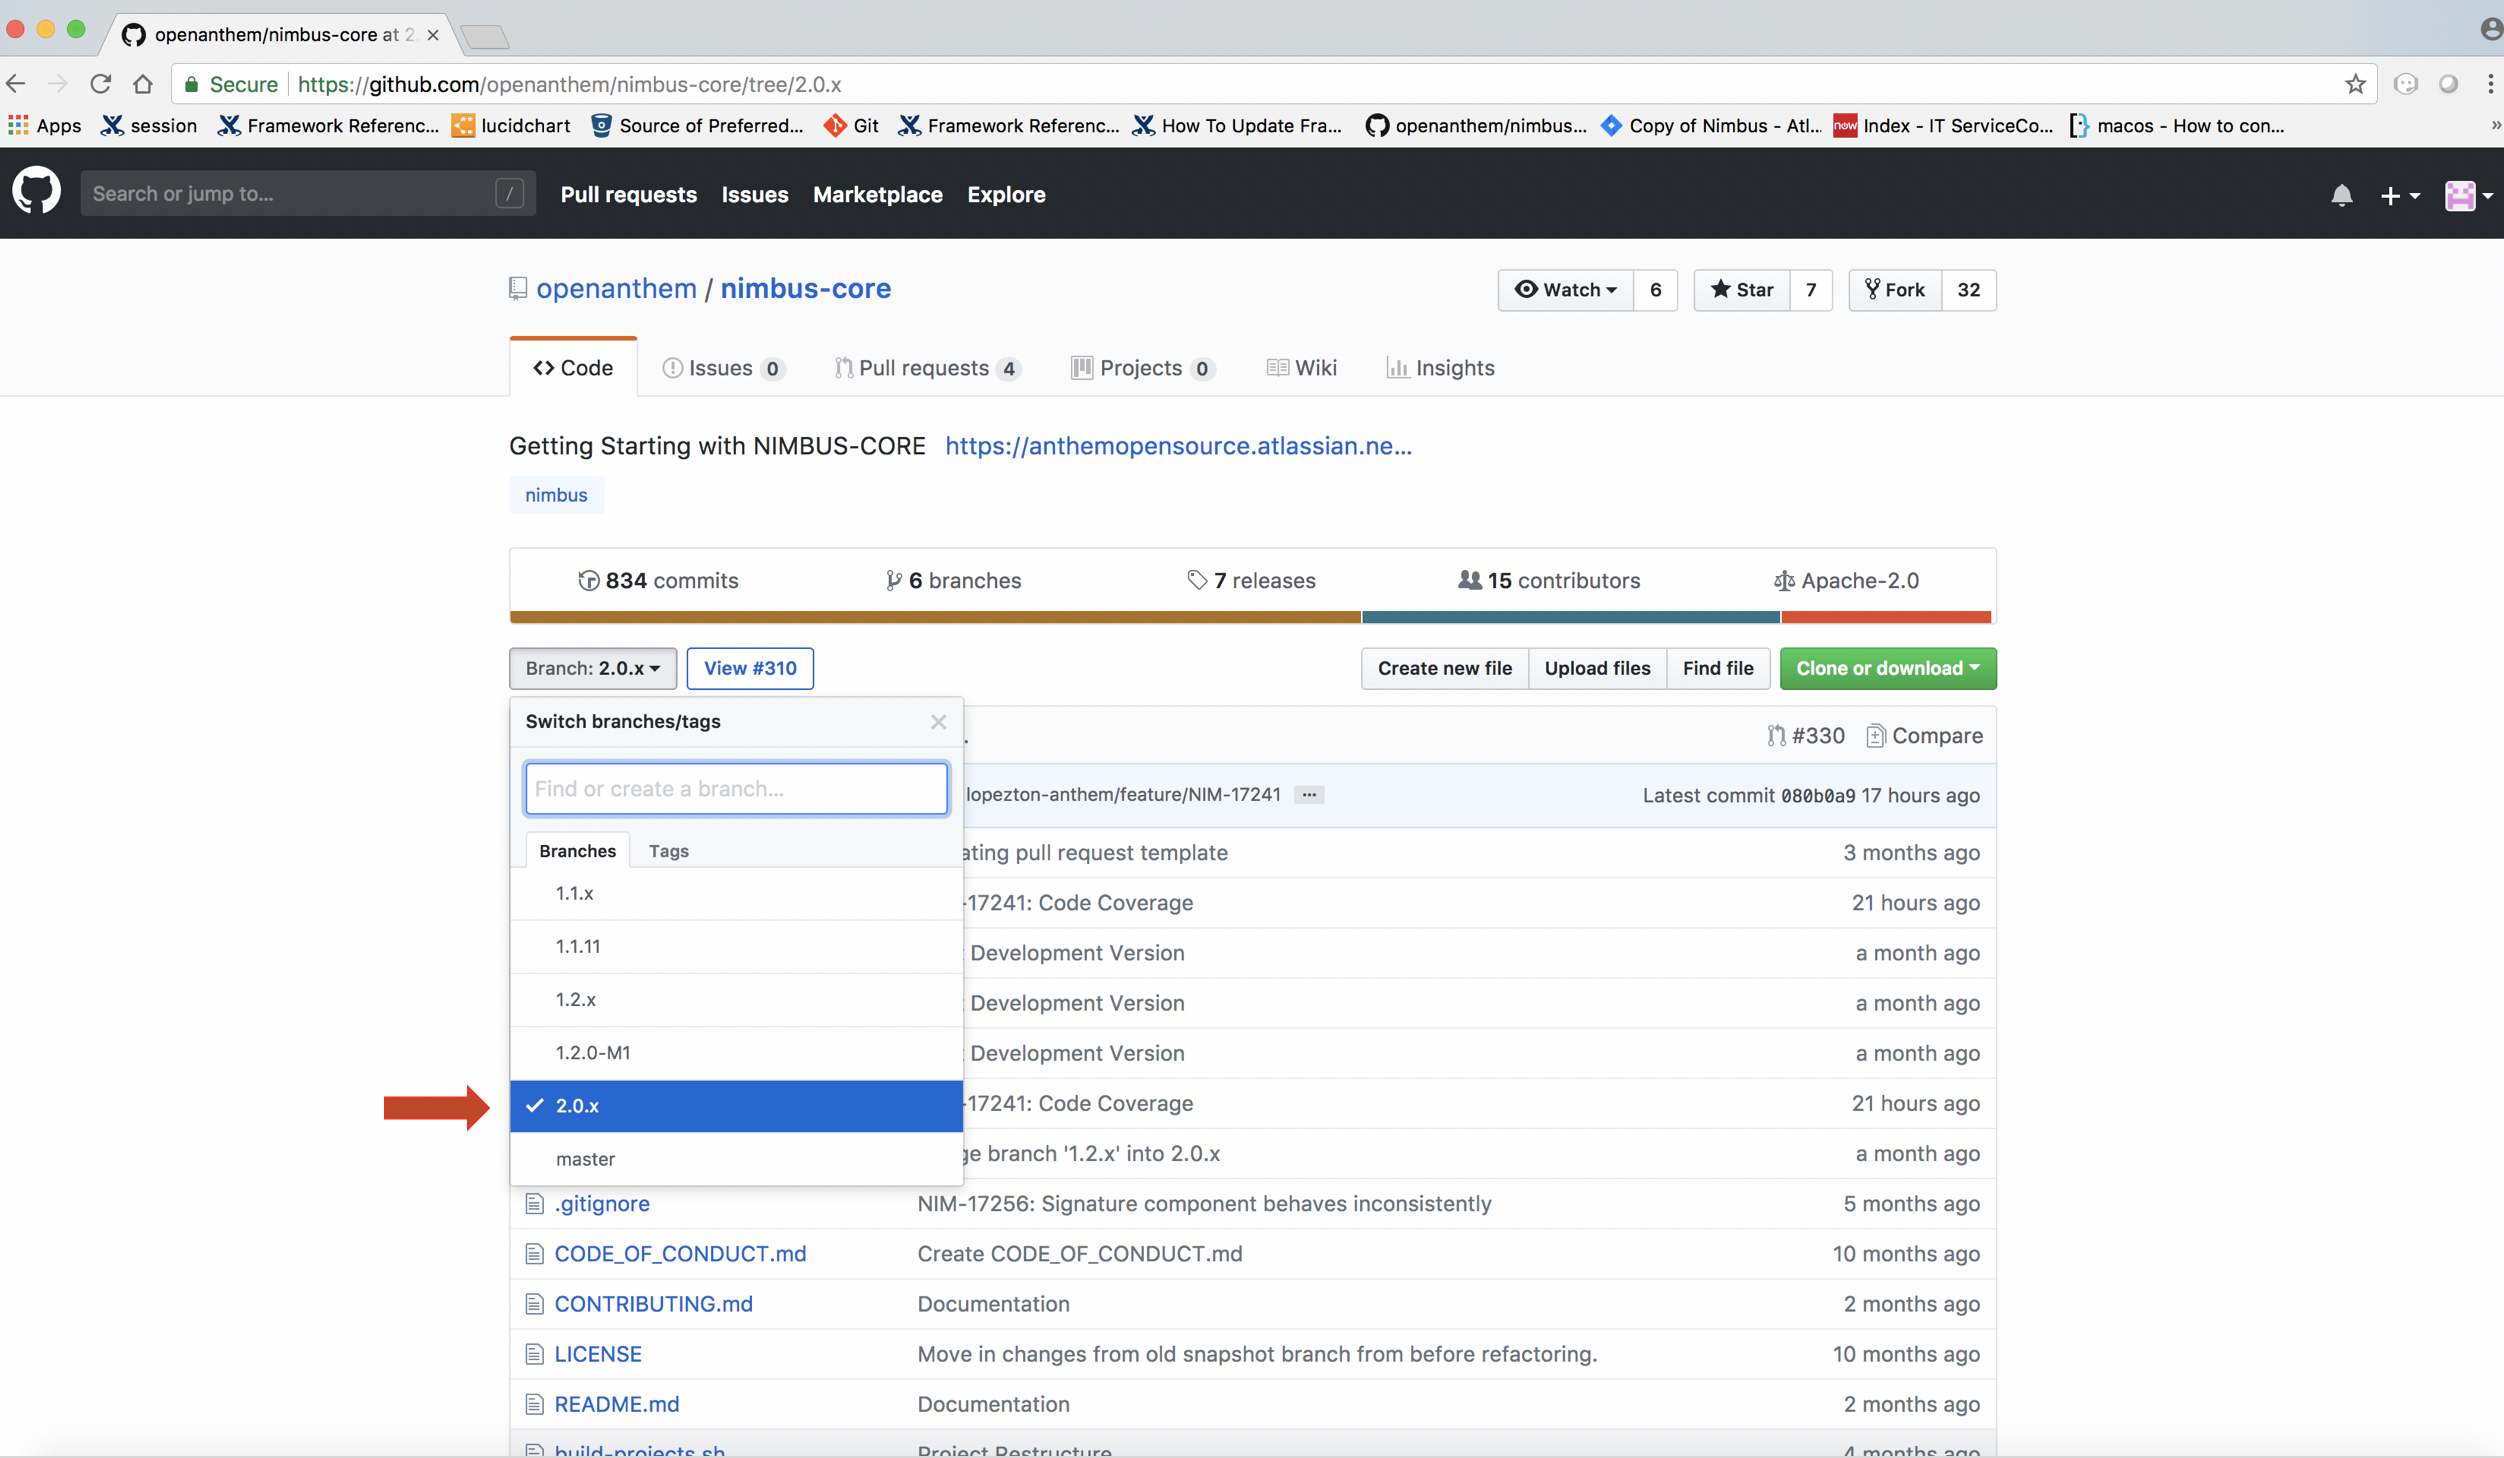
-
Click the button
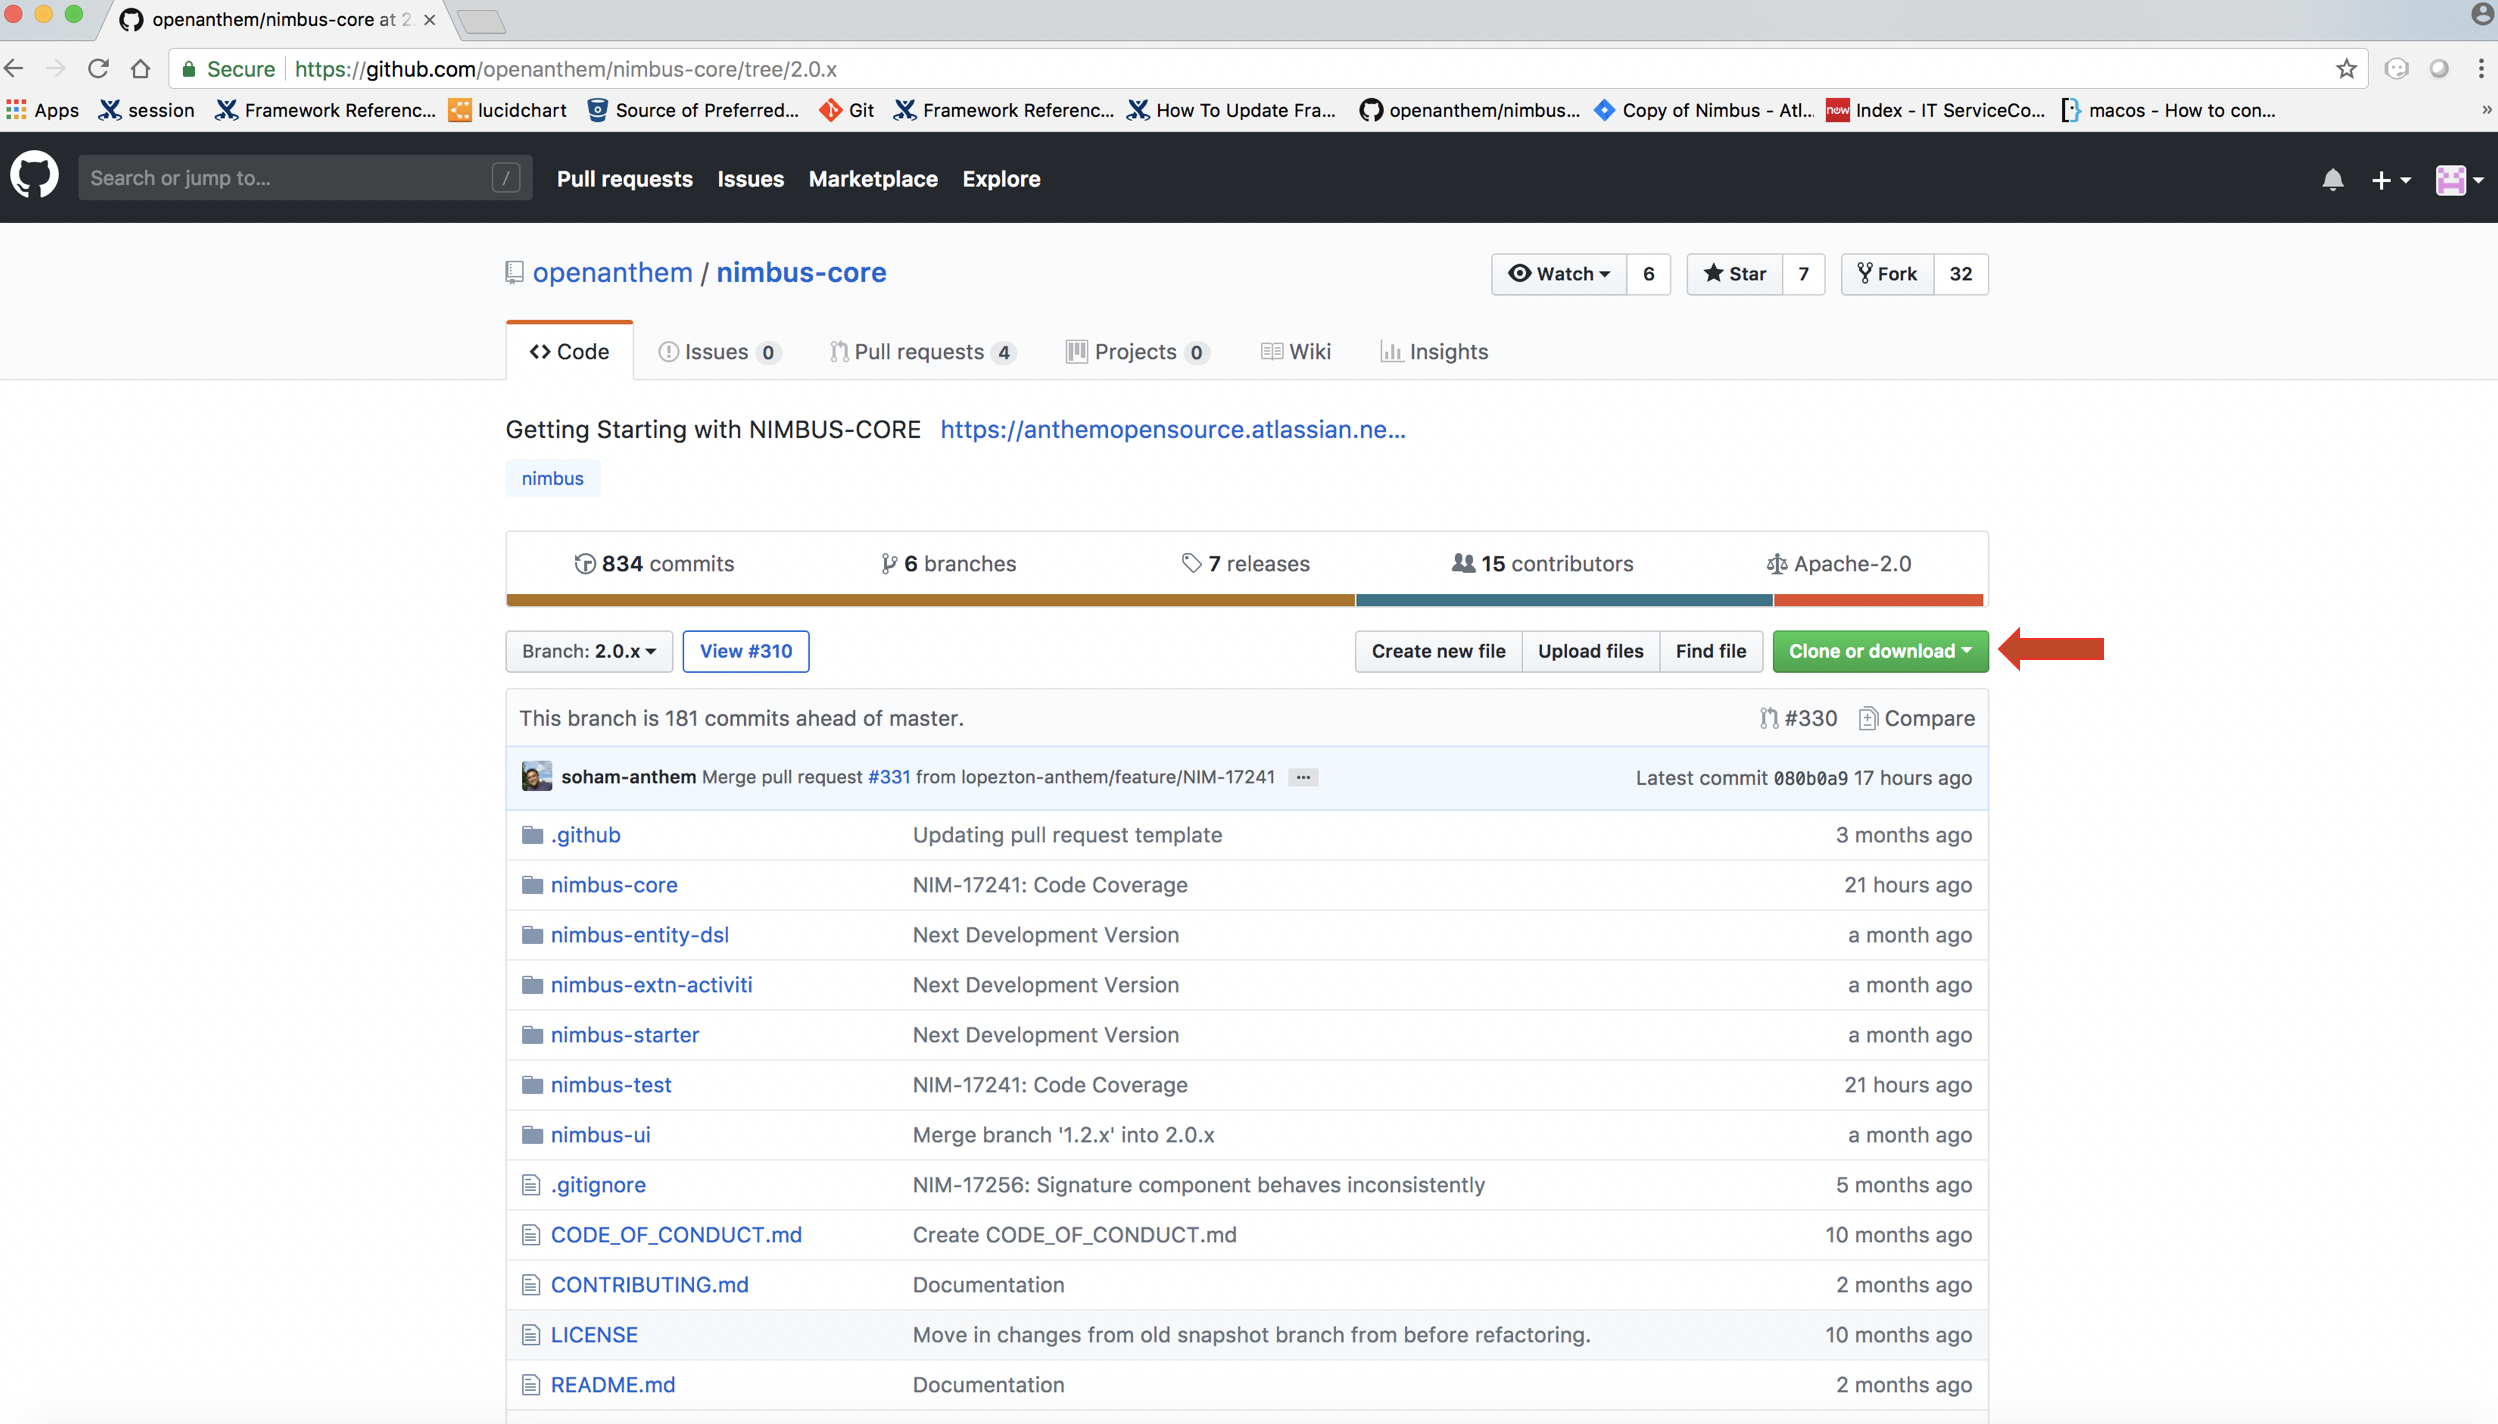
-
Copy the hyperlink https://github.com/openanthem/nimbus-core.git
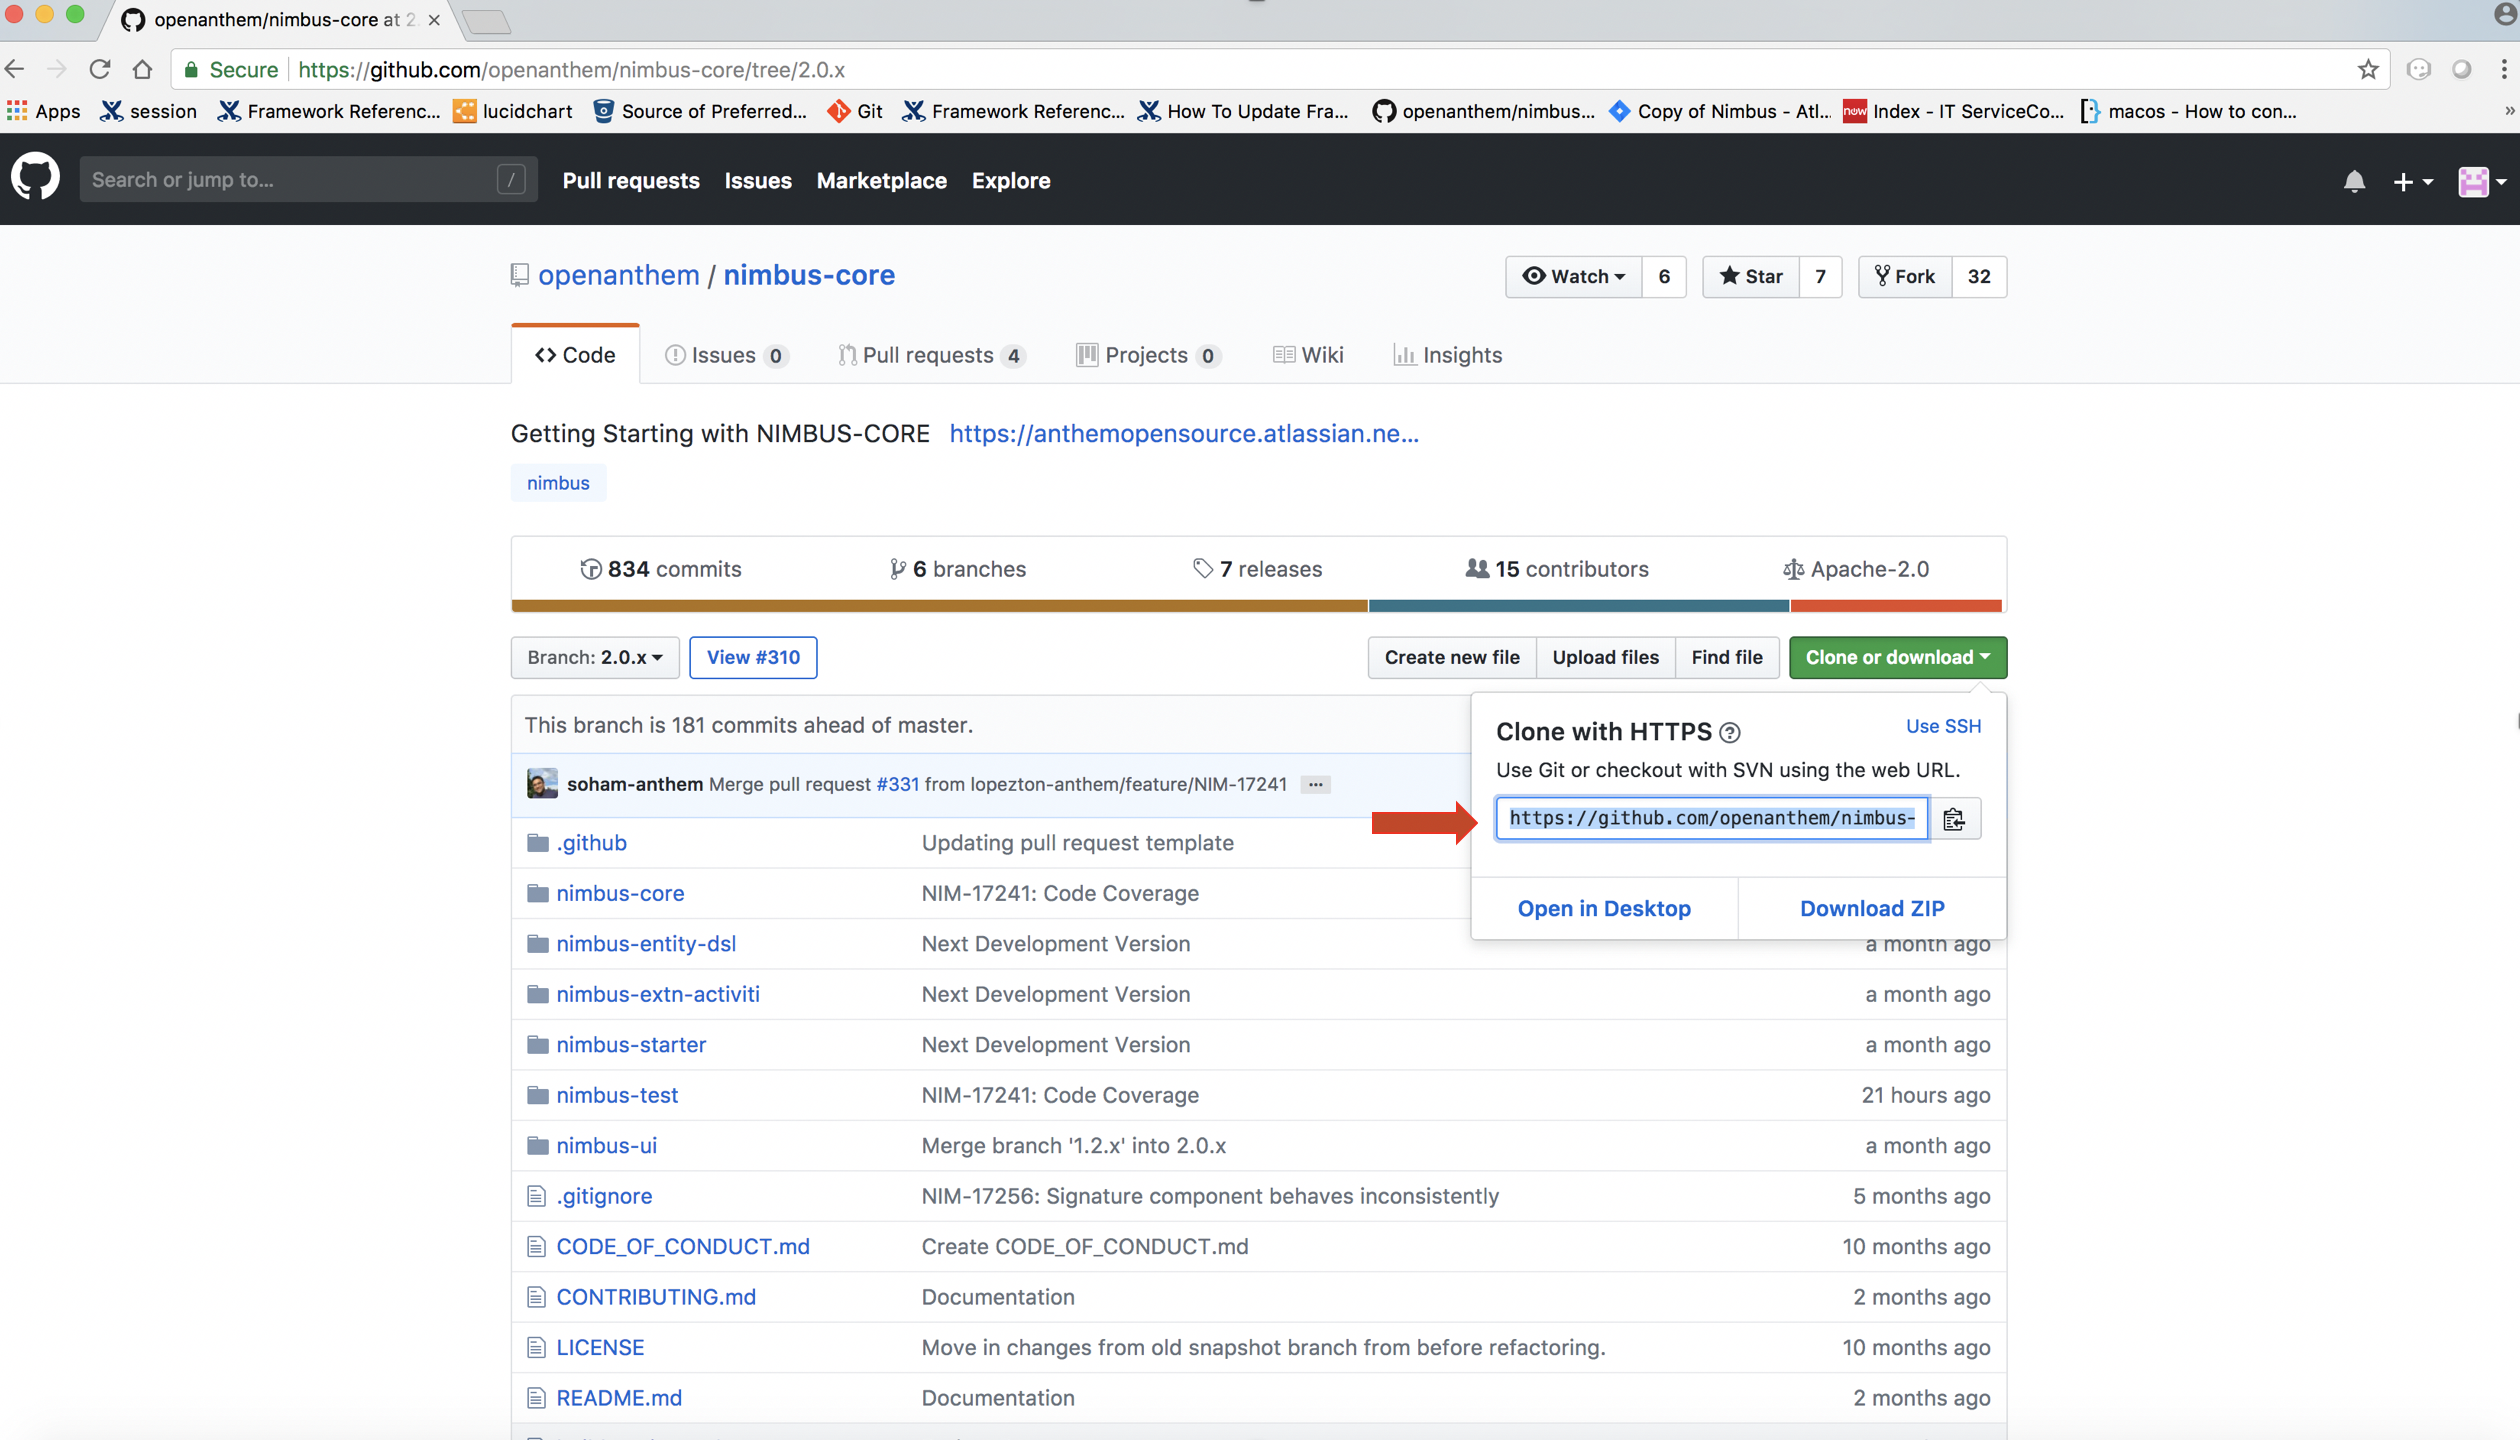
-
Open Terminal
-
Create any new folder in your Desktop. Here, we have created a new folder named
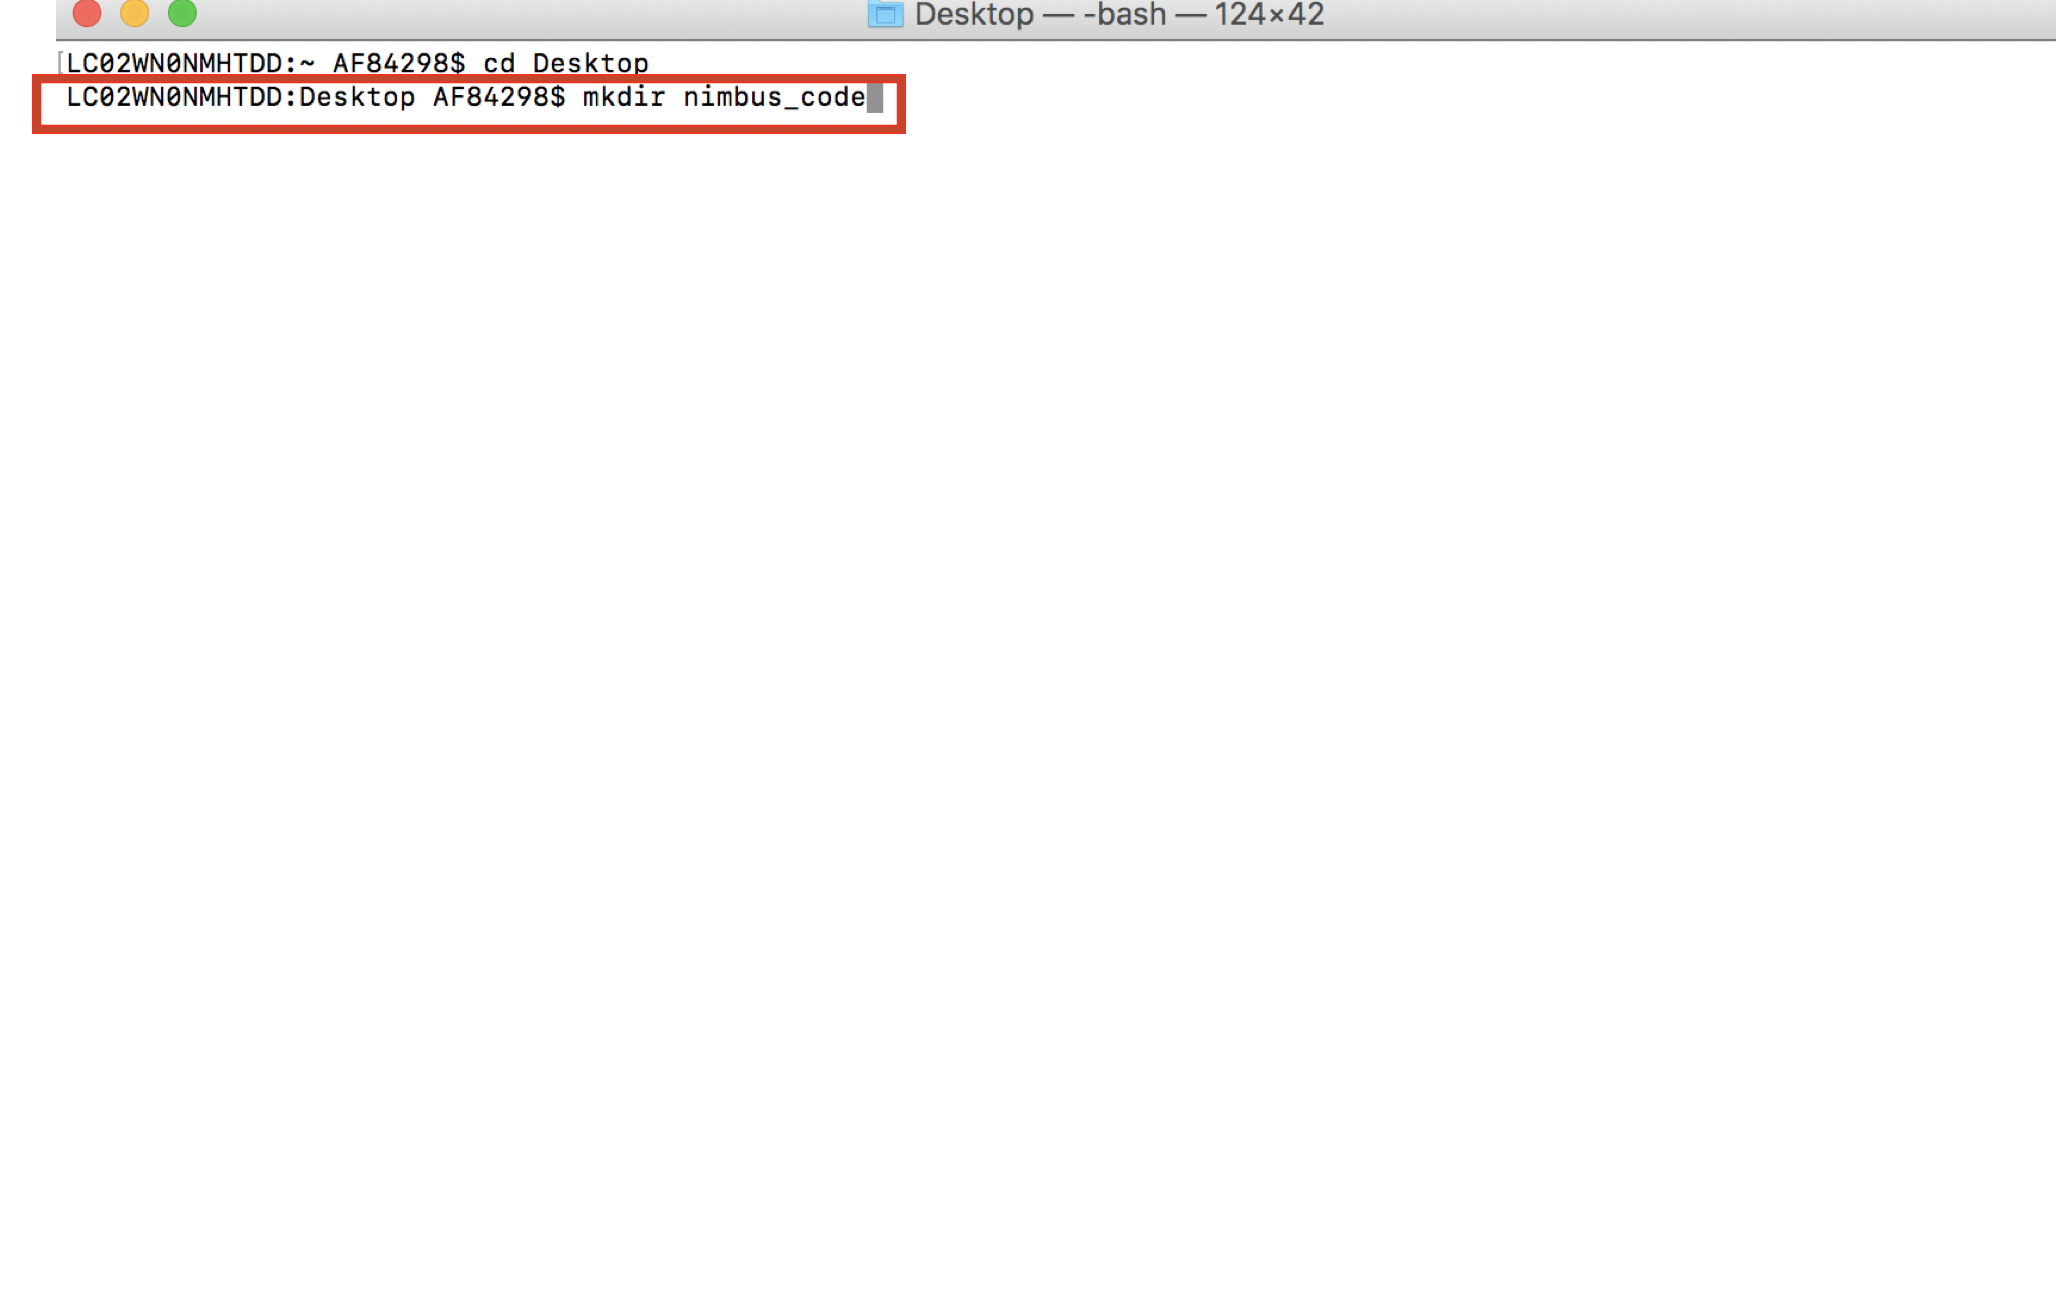
-
Navigate to the folder
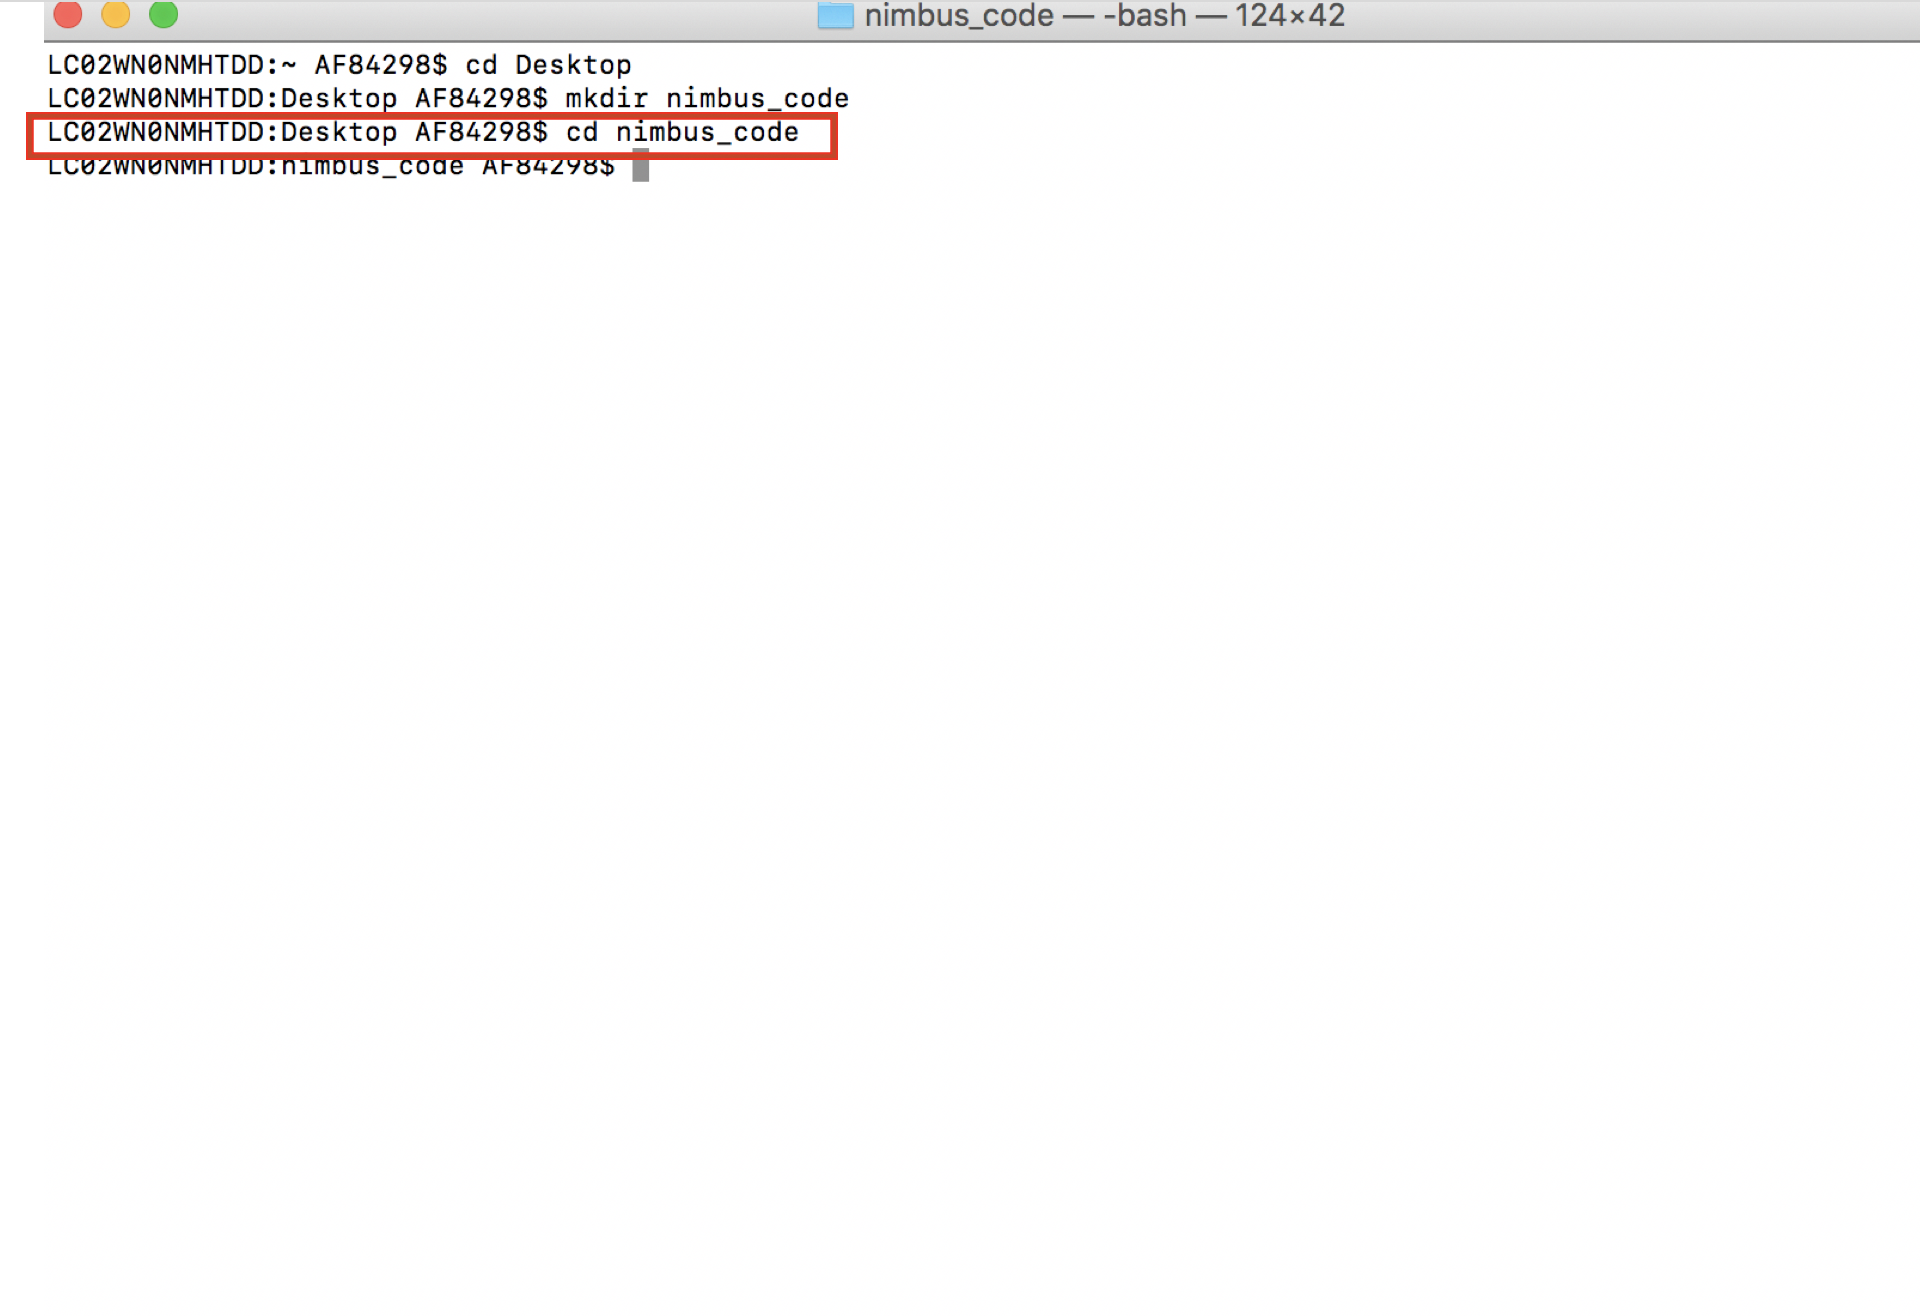
-
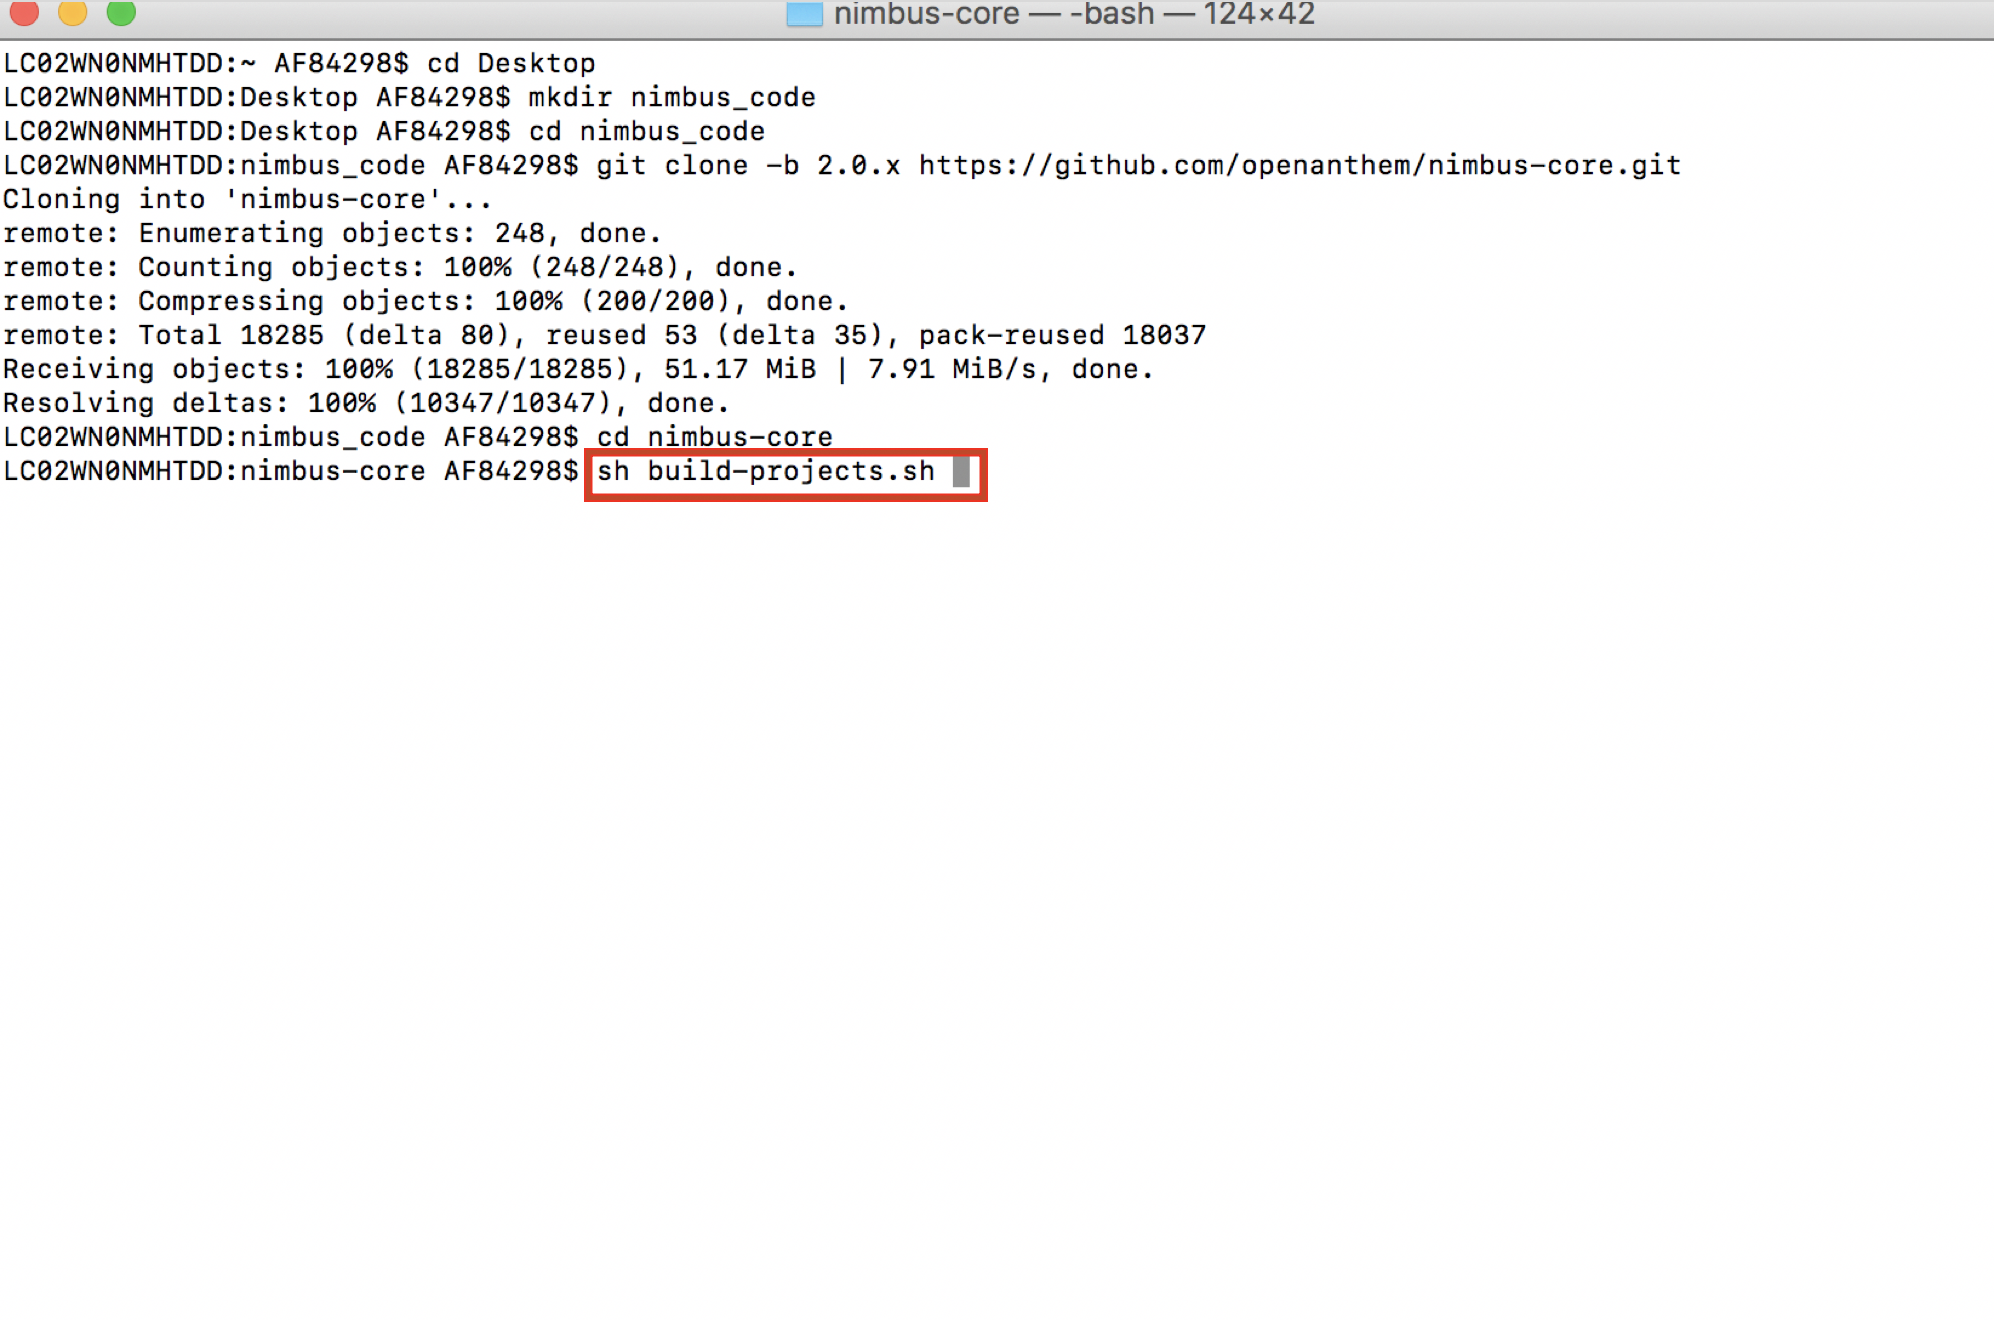
Run the following command
git clone -b 2.0.x
https://github.com/openanthem/nimbus-core.git

-
Navigate to folder which resides in your new folder

-
Build the projects by typing the command
sh build-projects.sh
-
You can see a "##Finished building" message
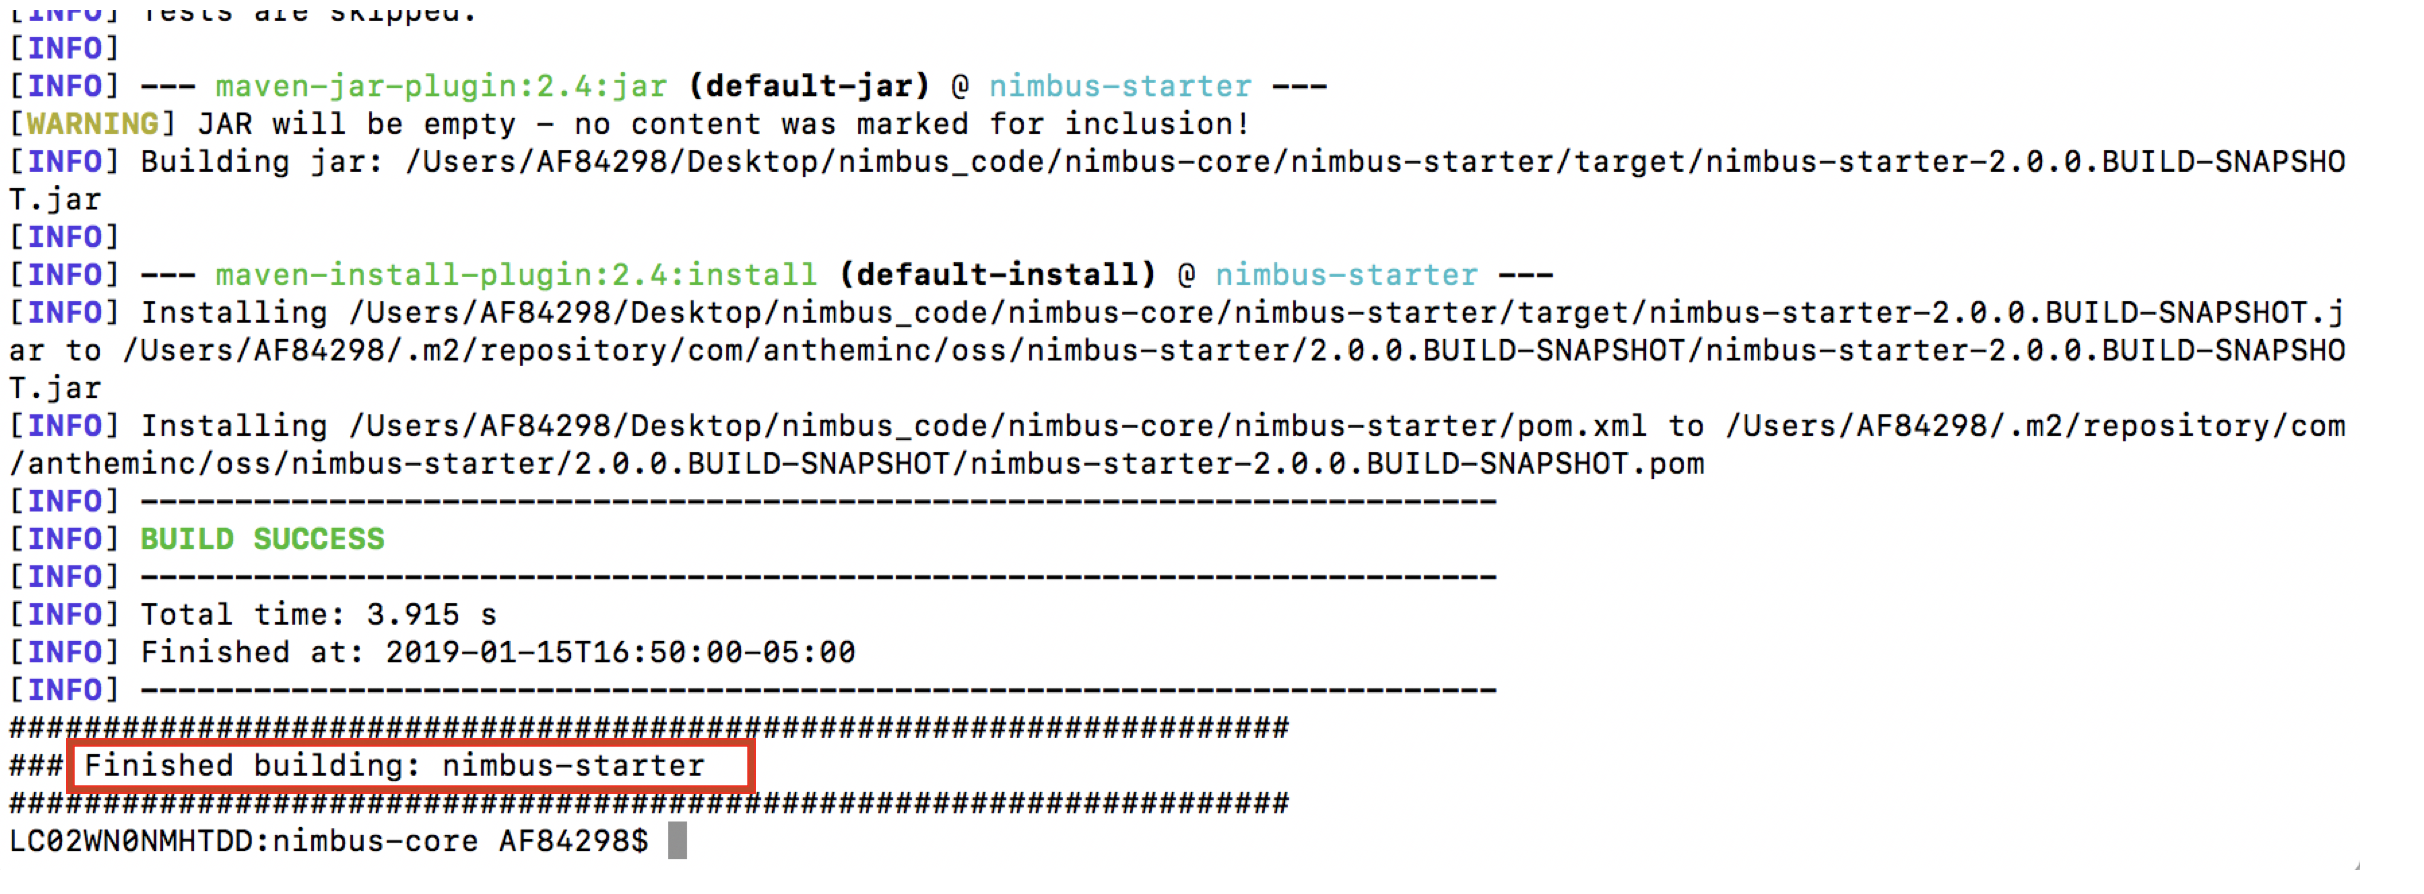
-
We are done cloning the framework code in our local folder
Cloning Pet-Clinic Code
-
Go to: https://github.com/openanthem/petclinic-training
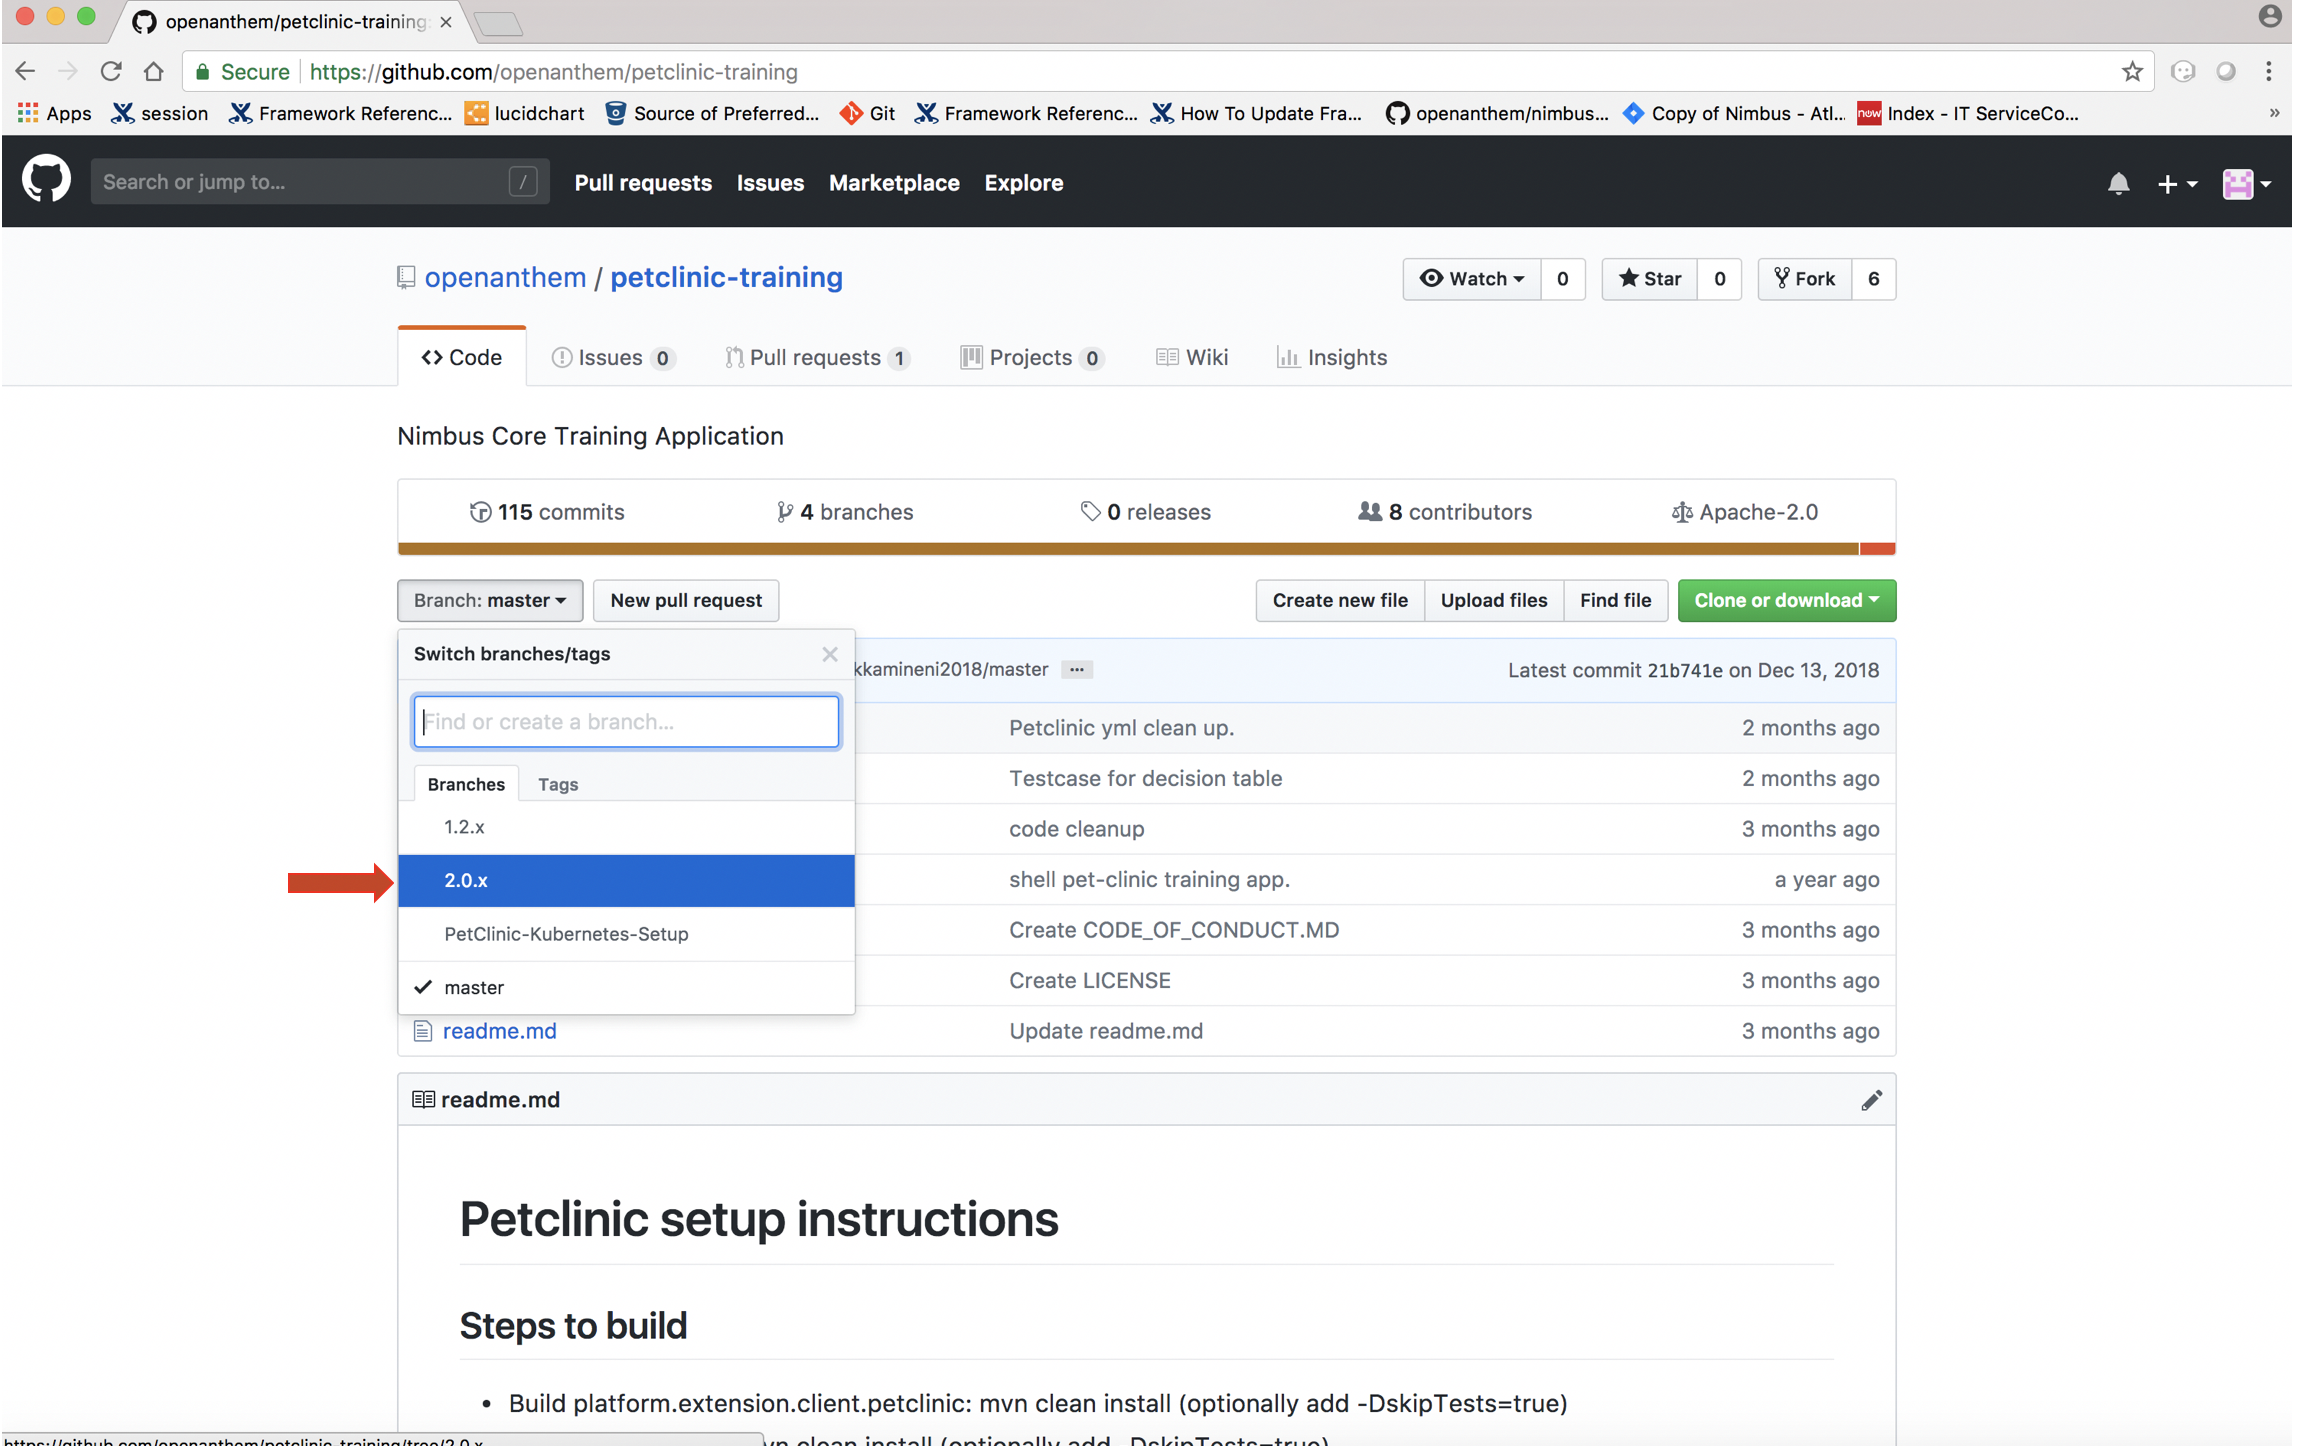
-
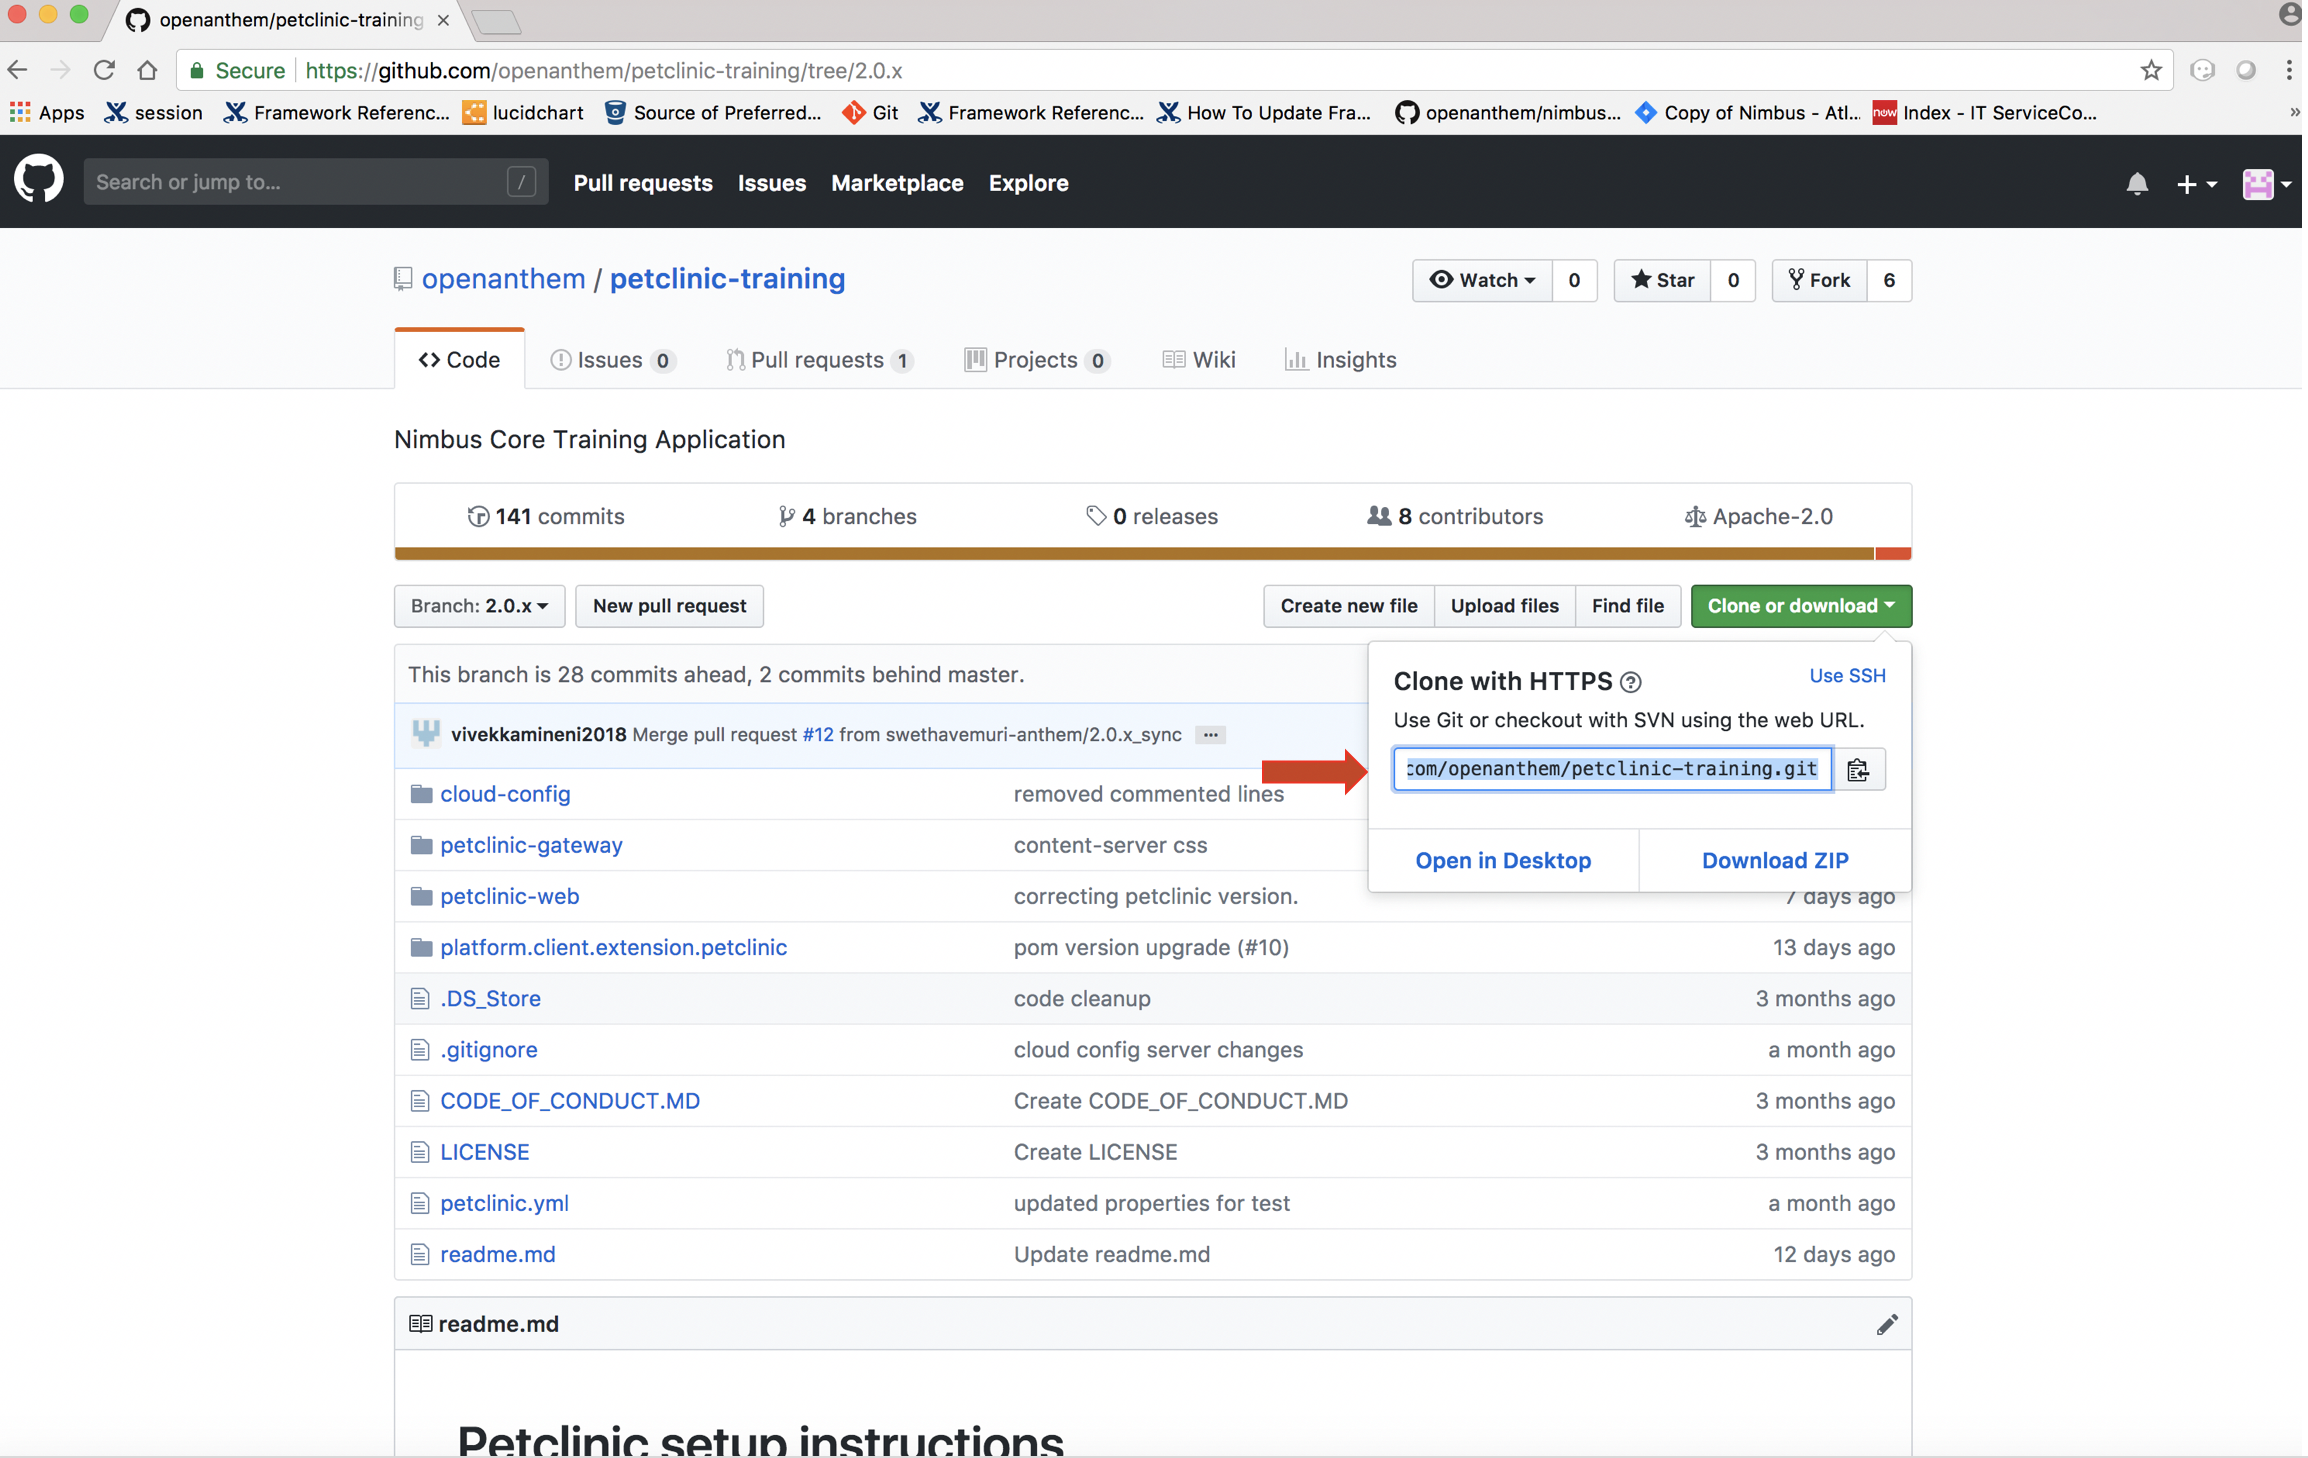
Click button
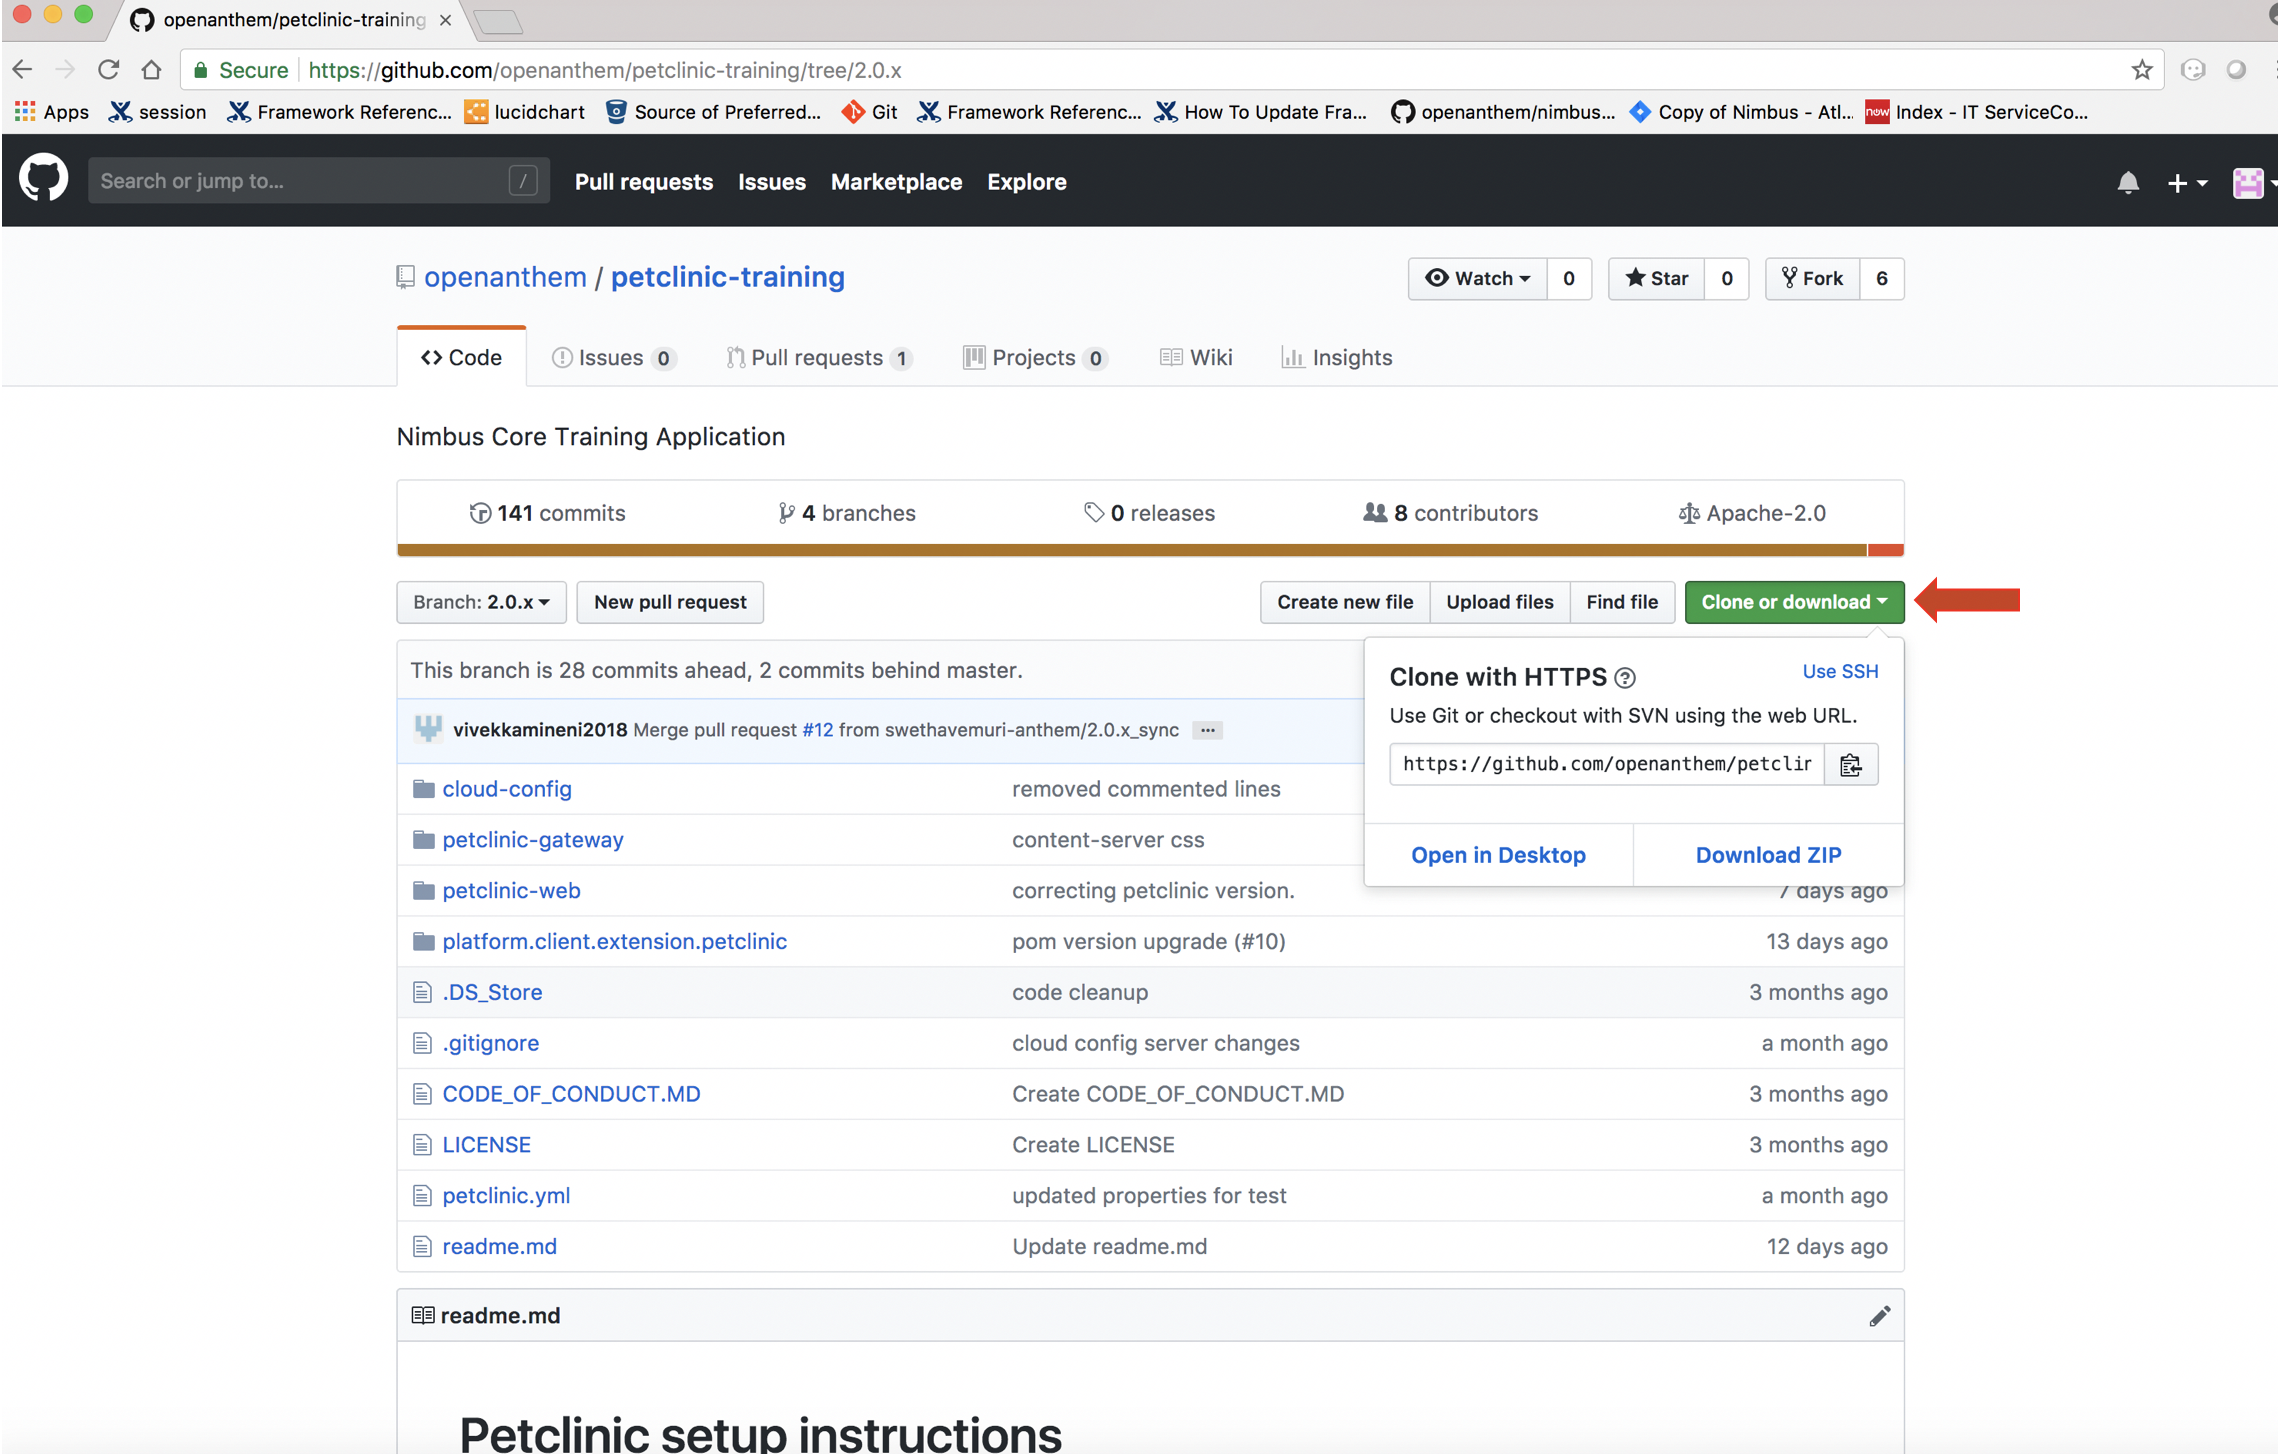
-
Copy the hyperlink https://github.com/openanthem/petclinic-training.git
-
Open and create a new folder
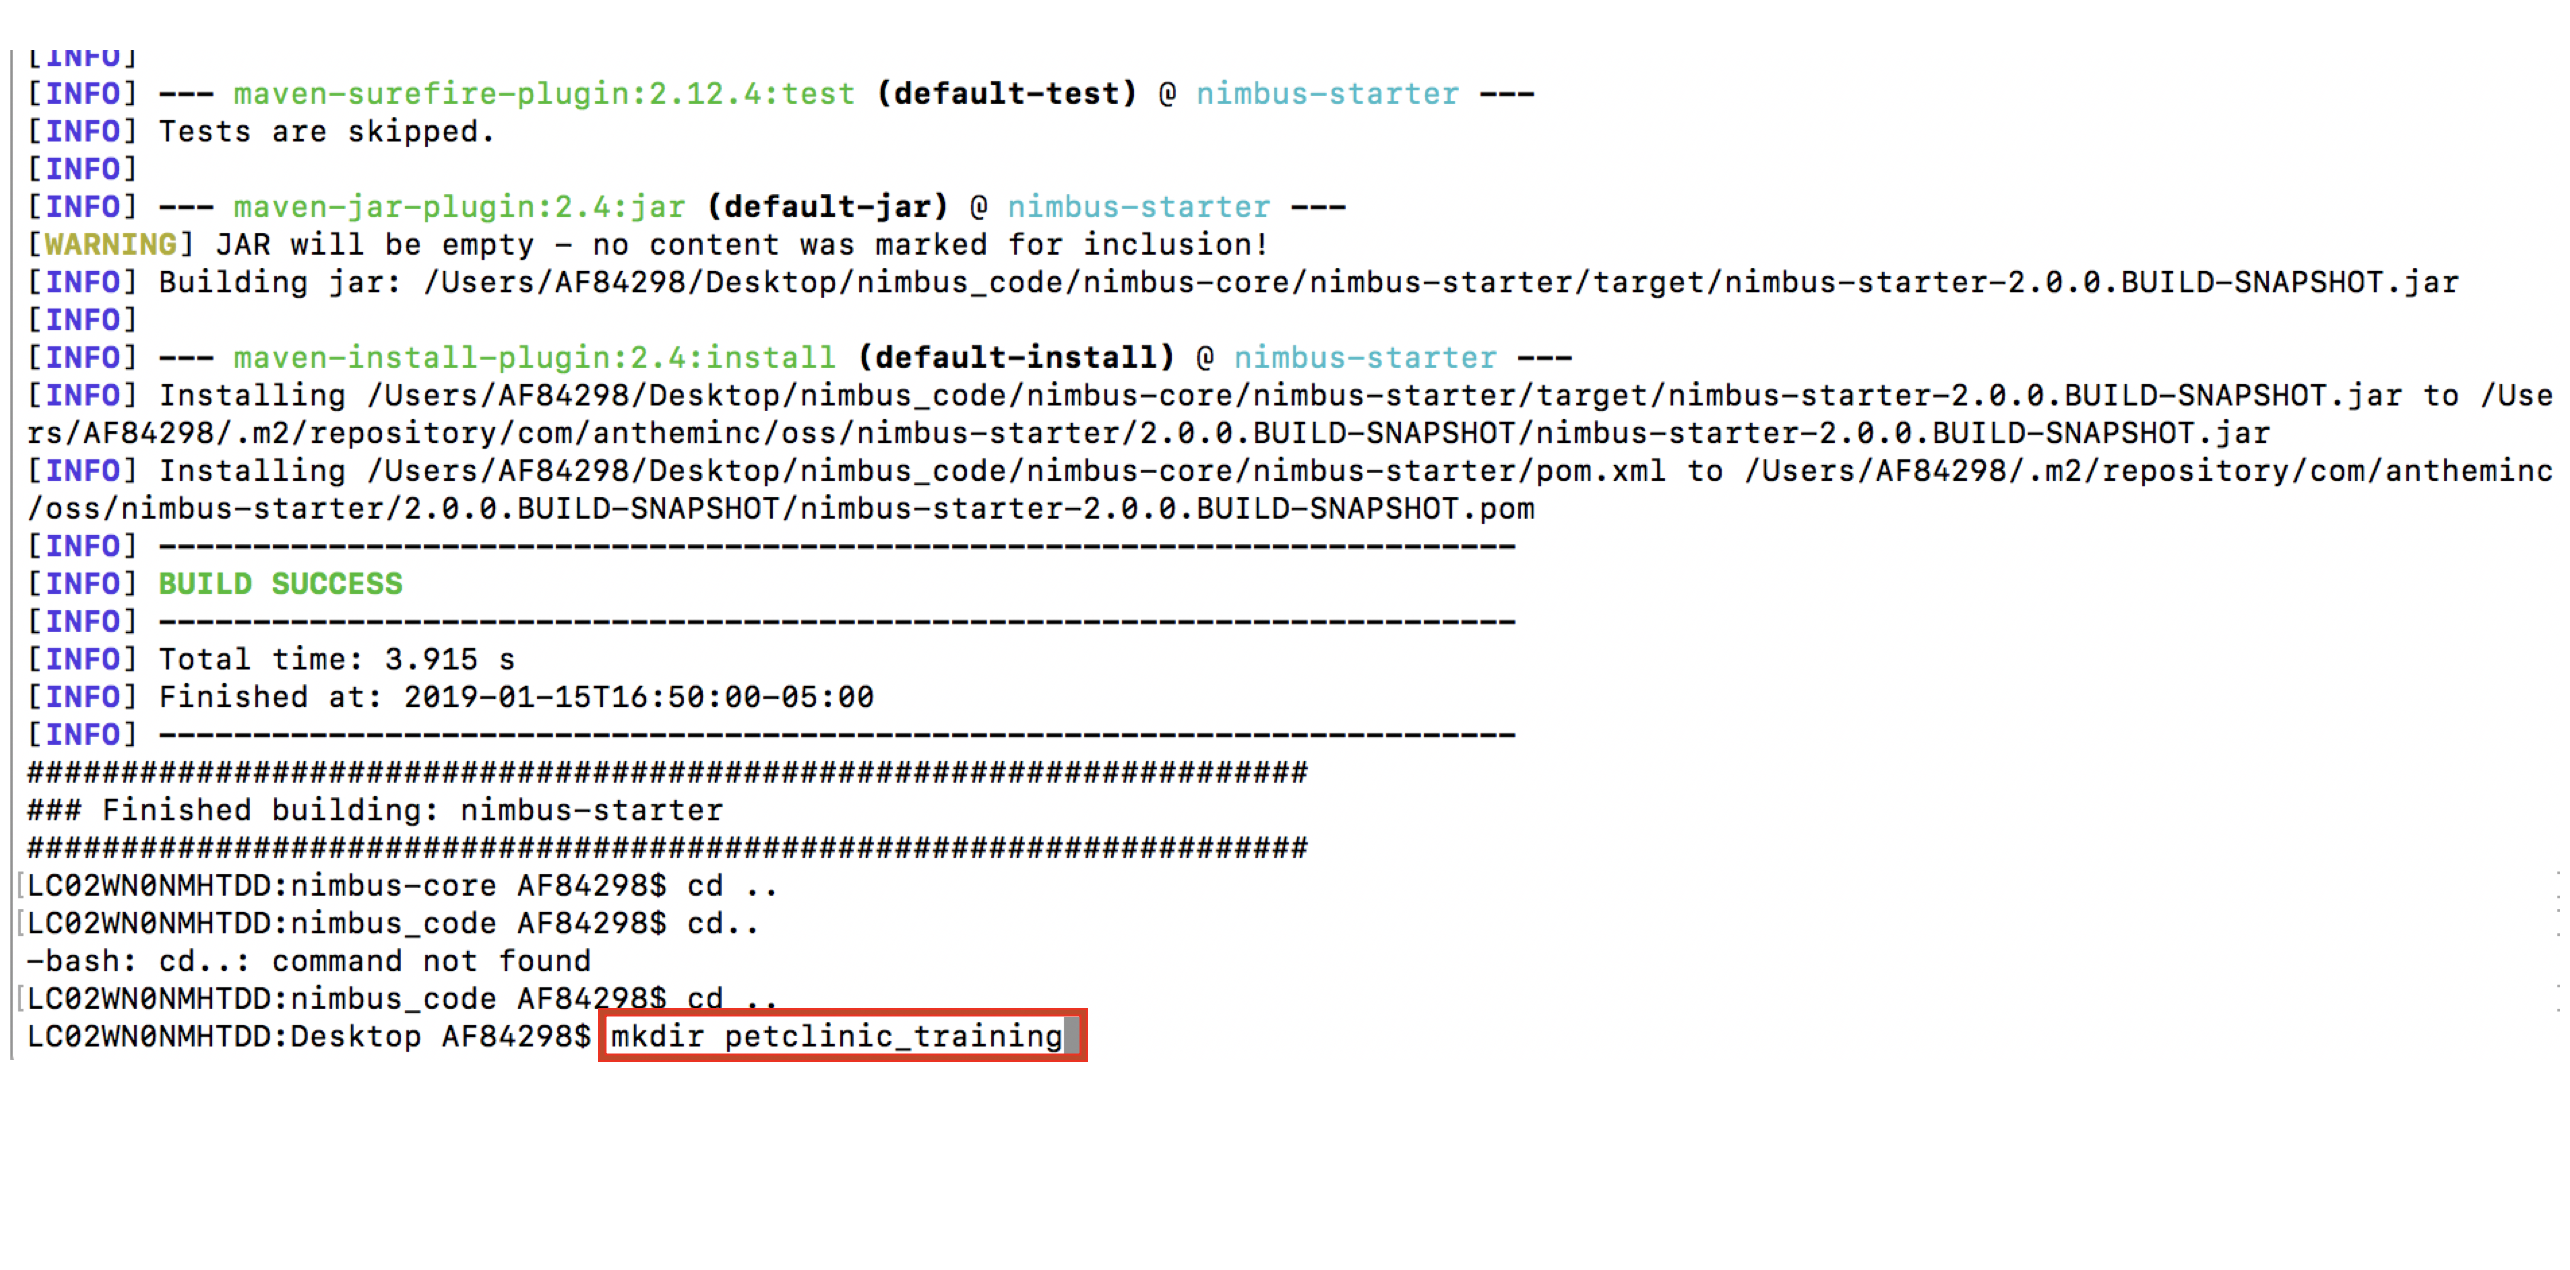
-
Navigate to the folder path
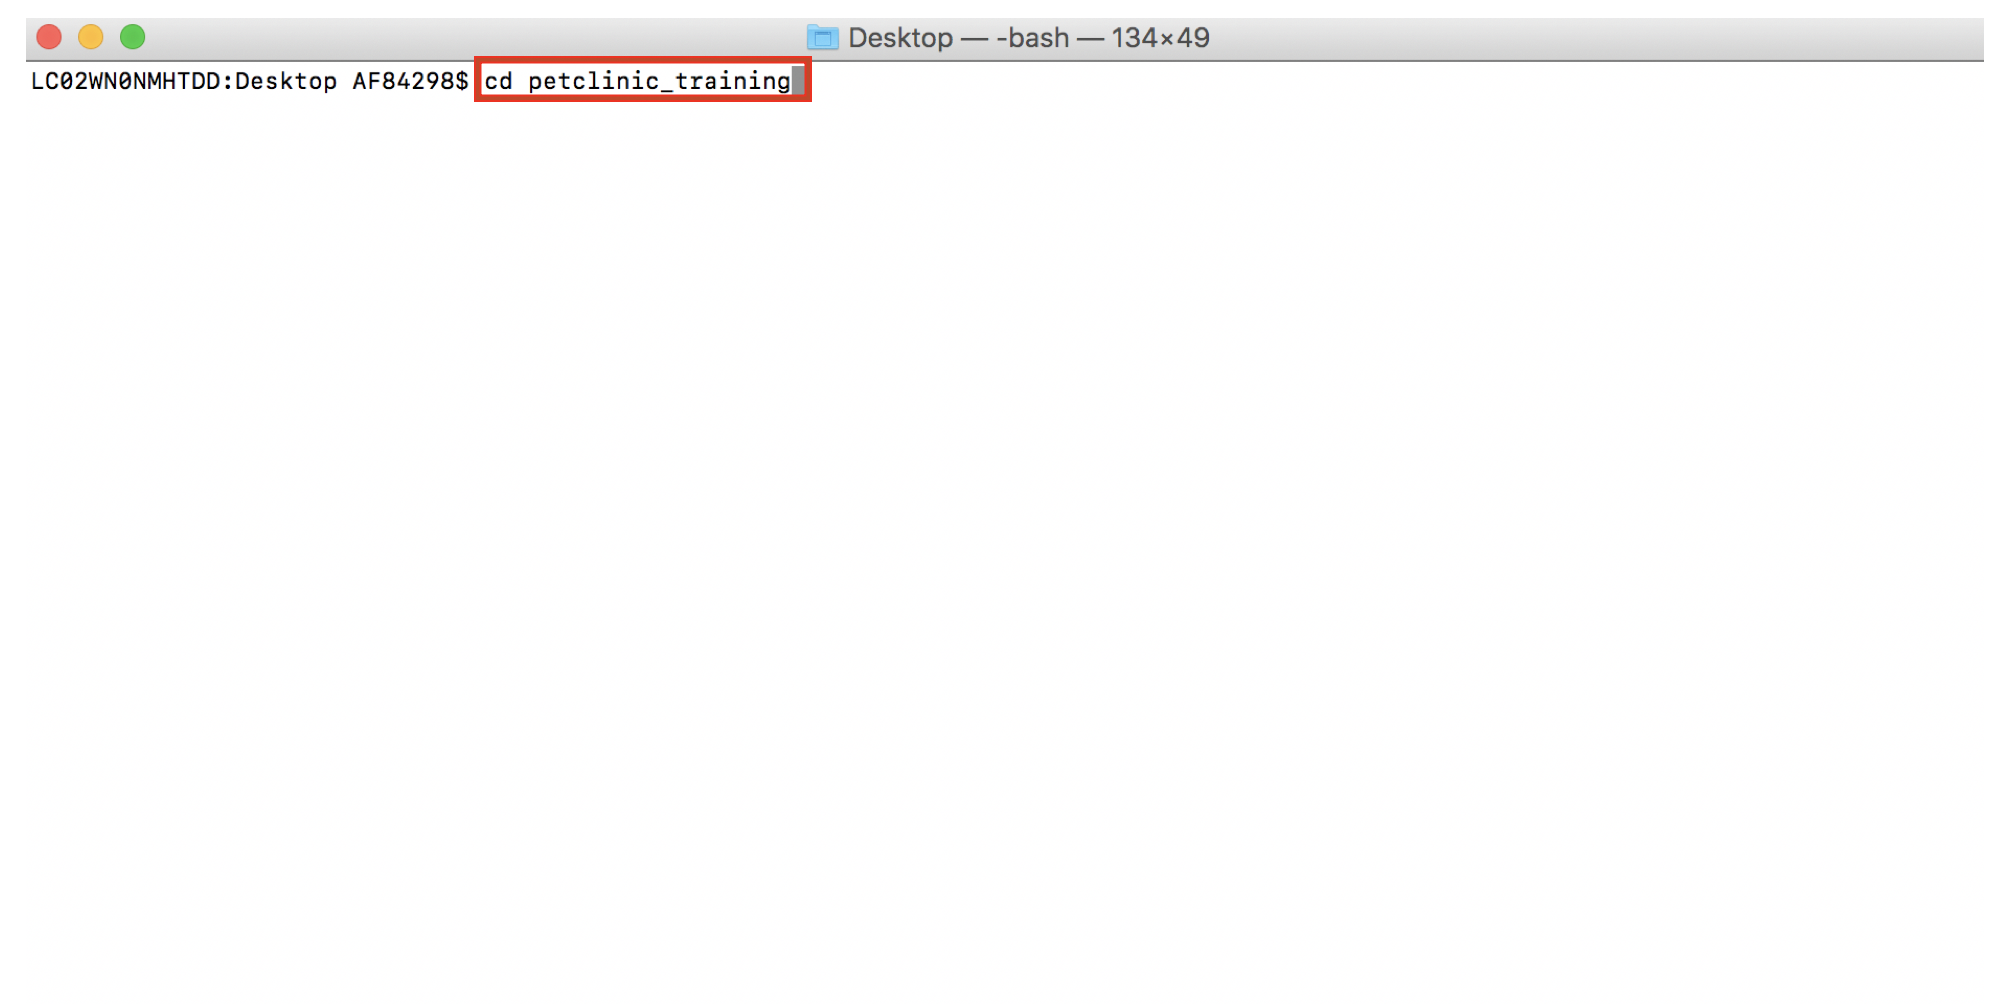
-
Run the following command
git clone -b 2.0.x https://github.com/openanthem/petclinic-training.git
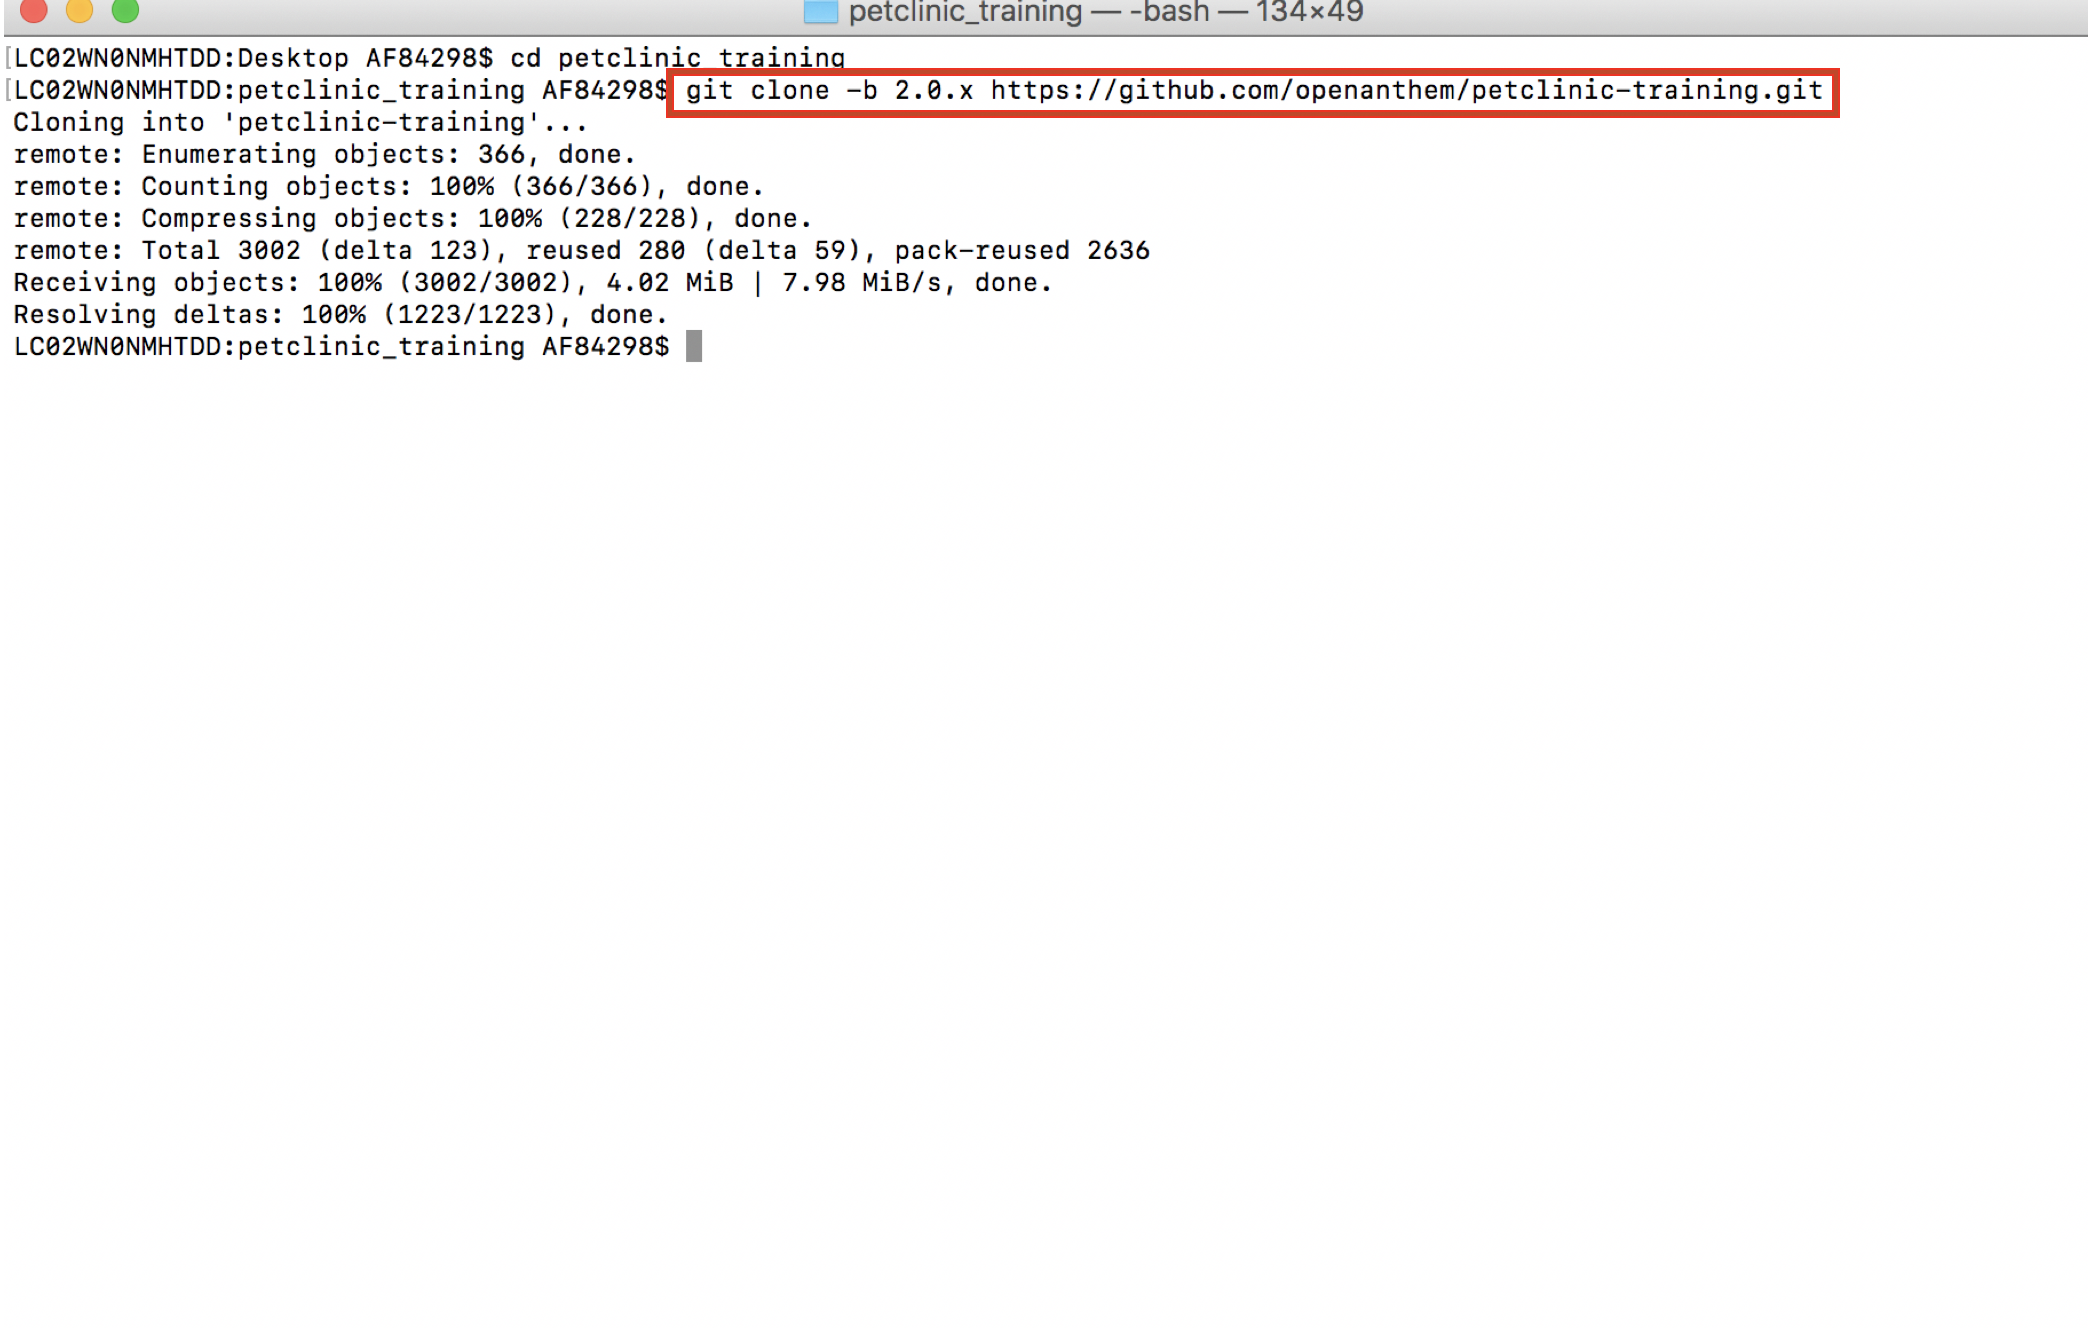
-
Terminal displays successful message
-
Import the in
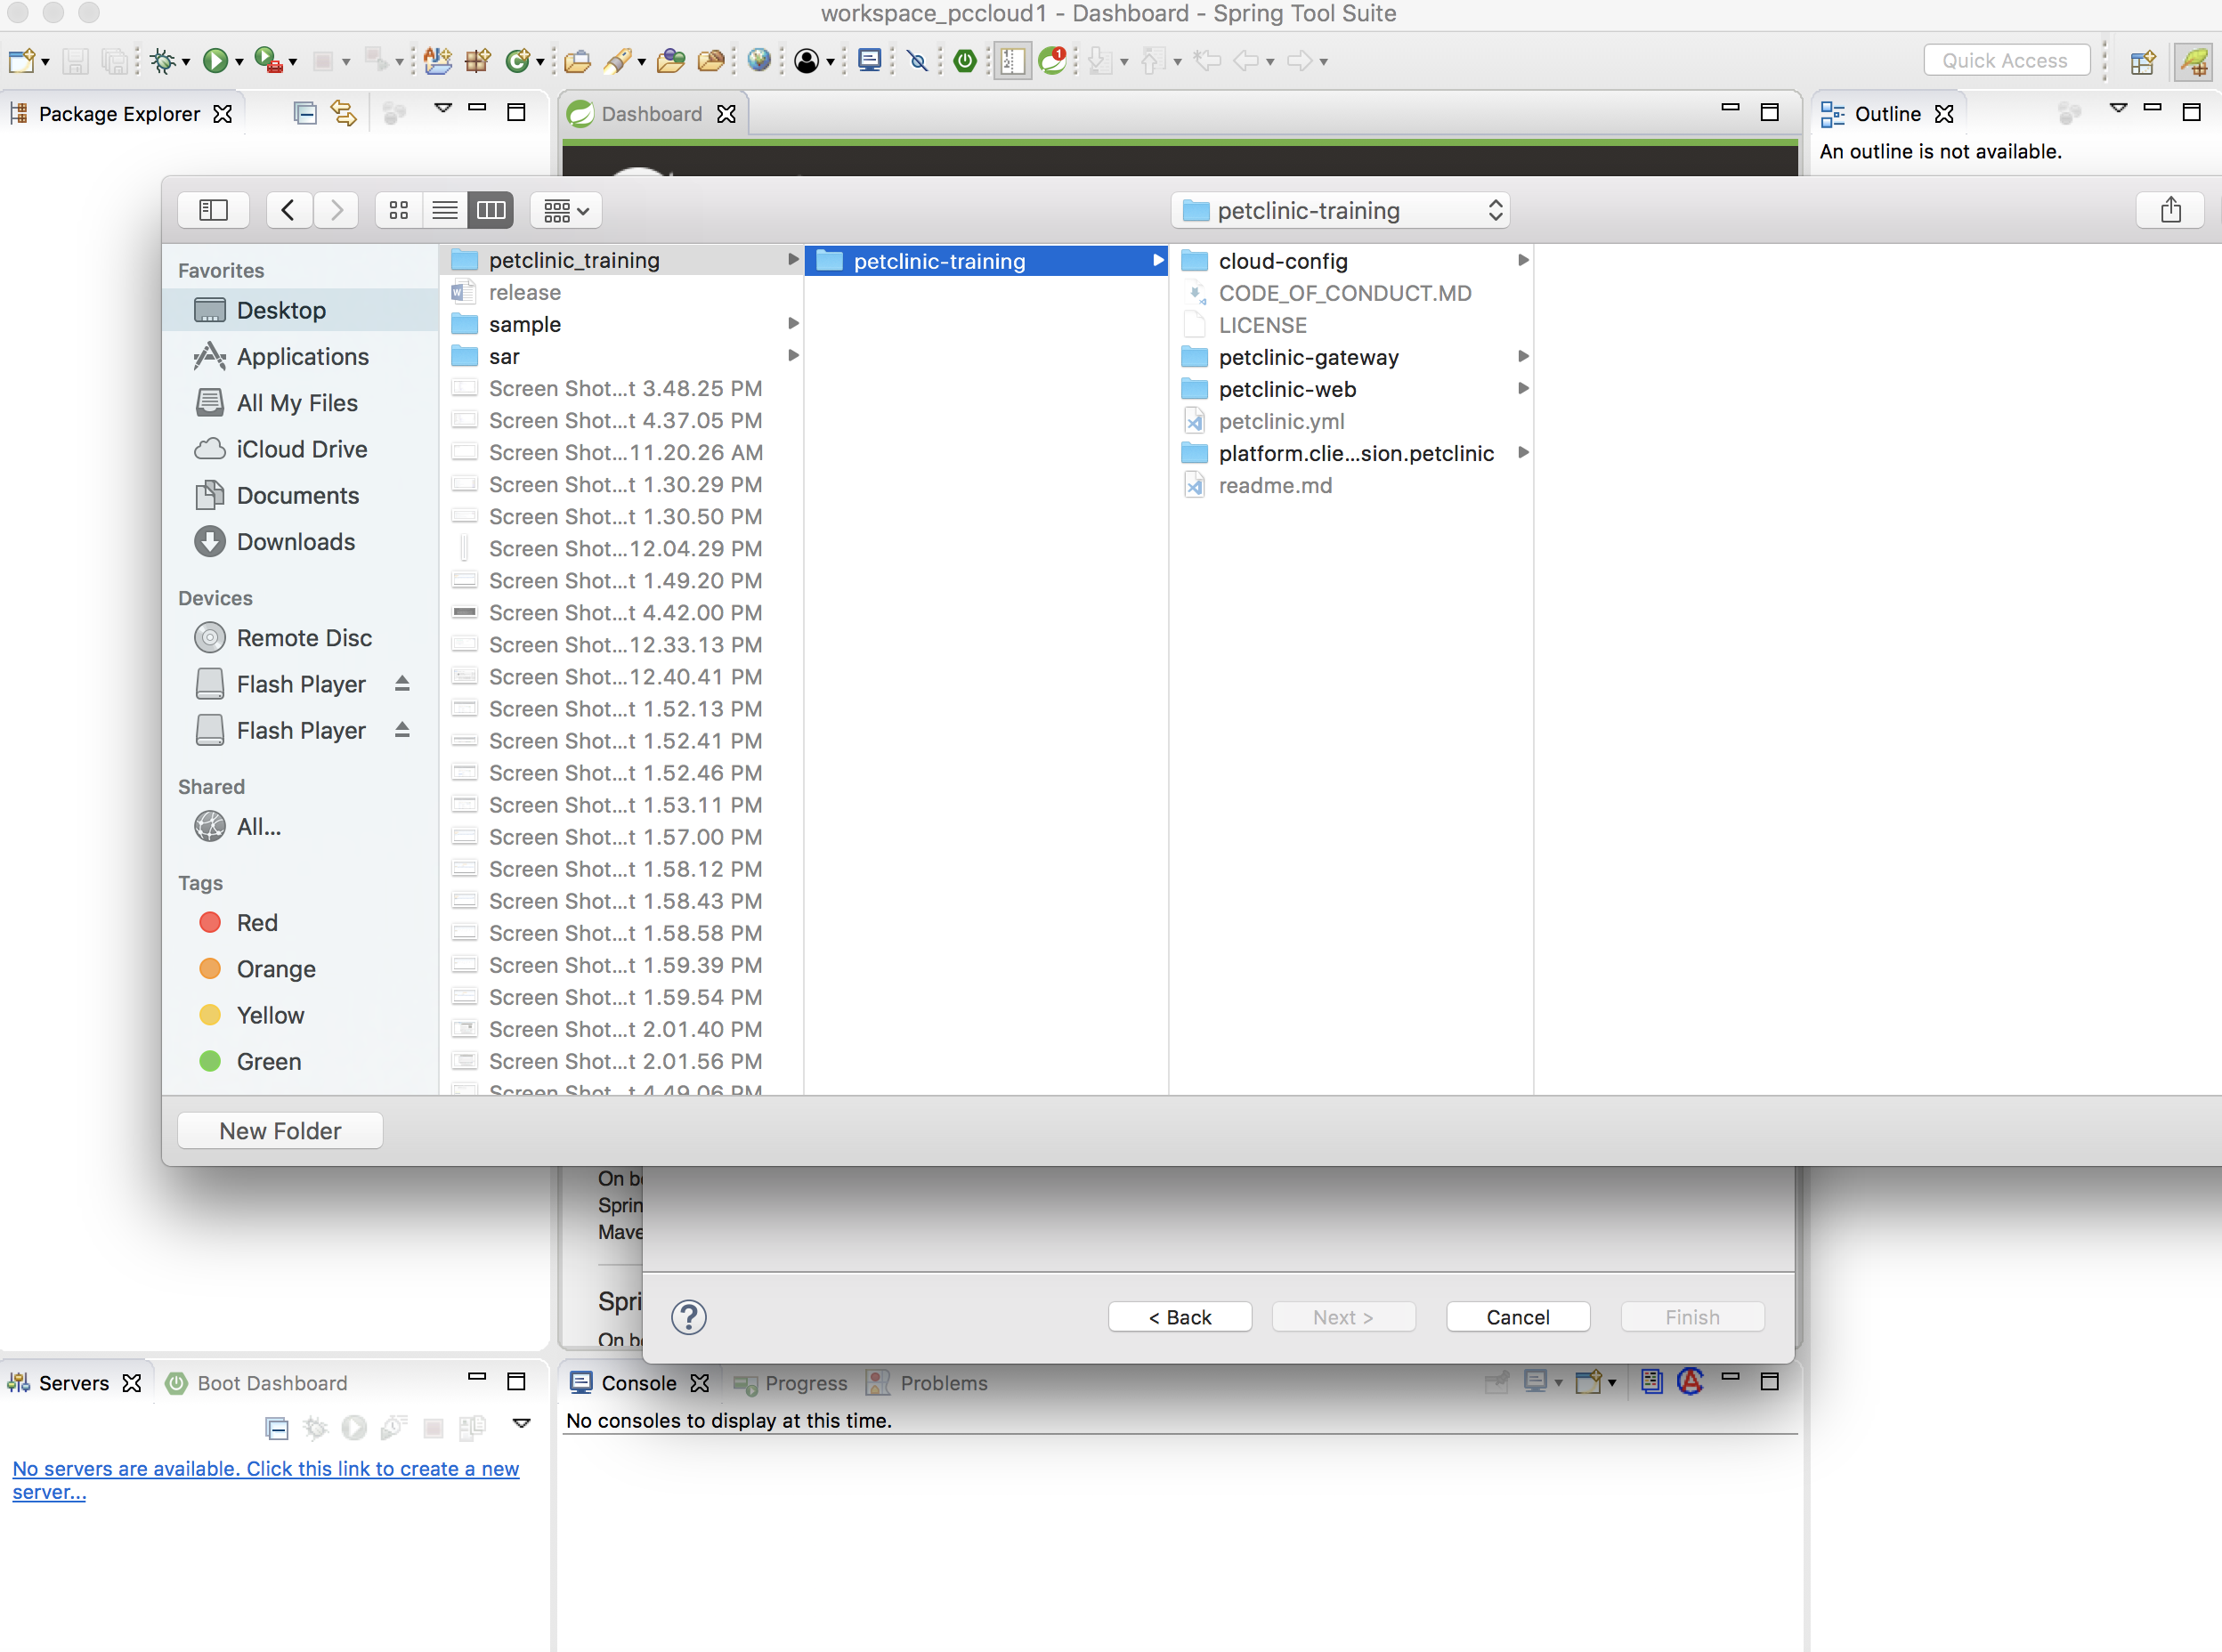
-
You can see that the following folders are imported
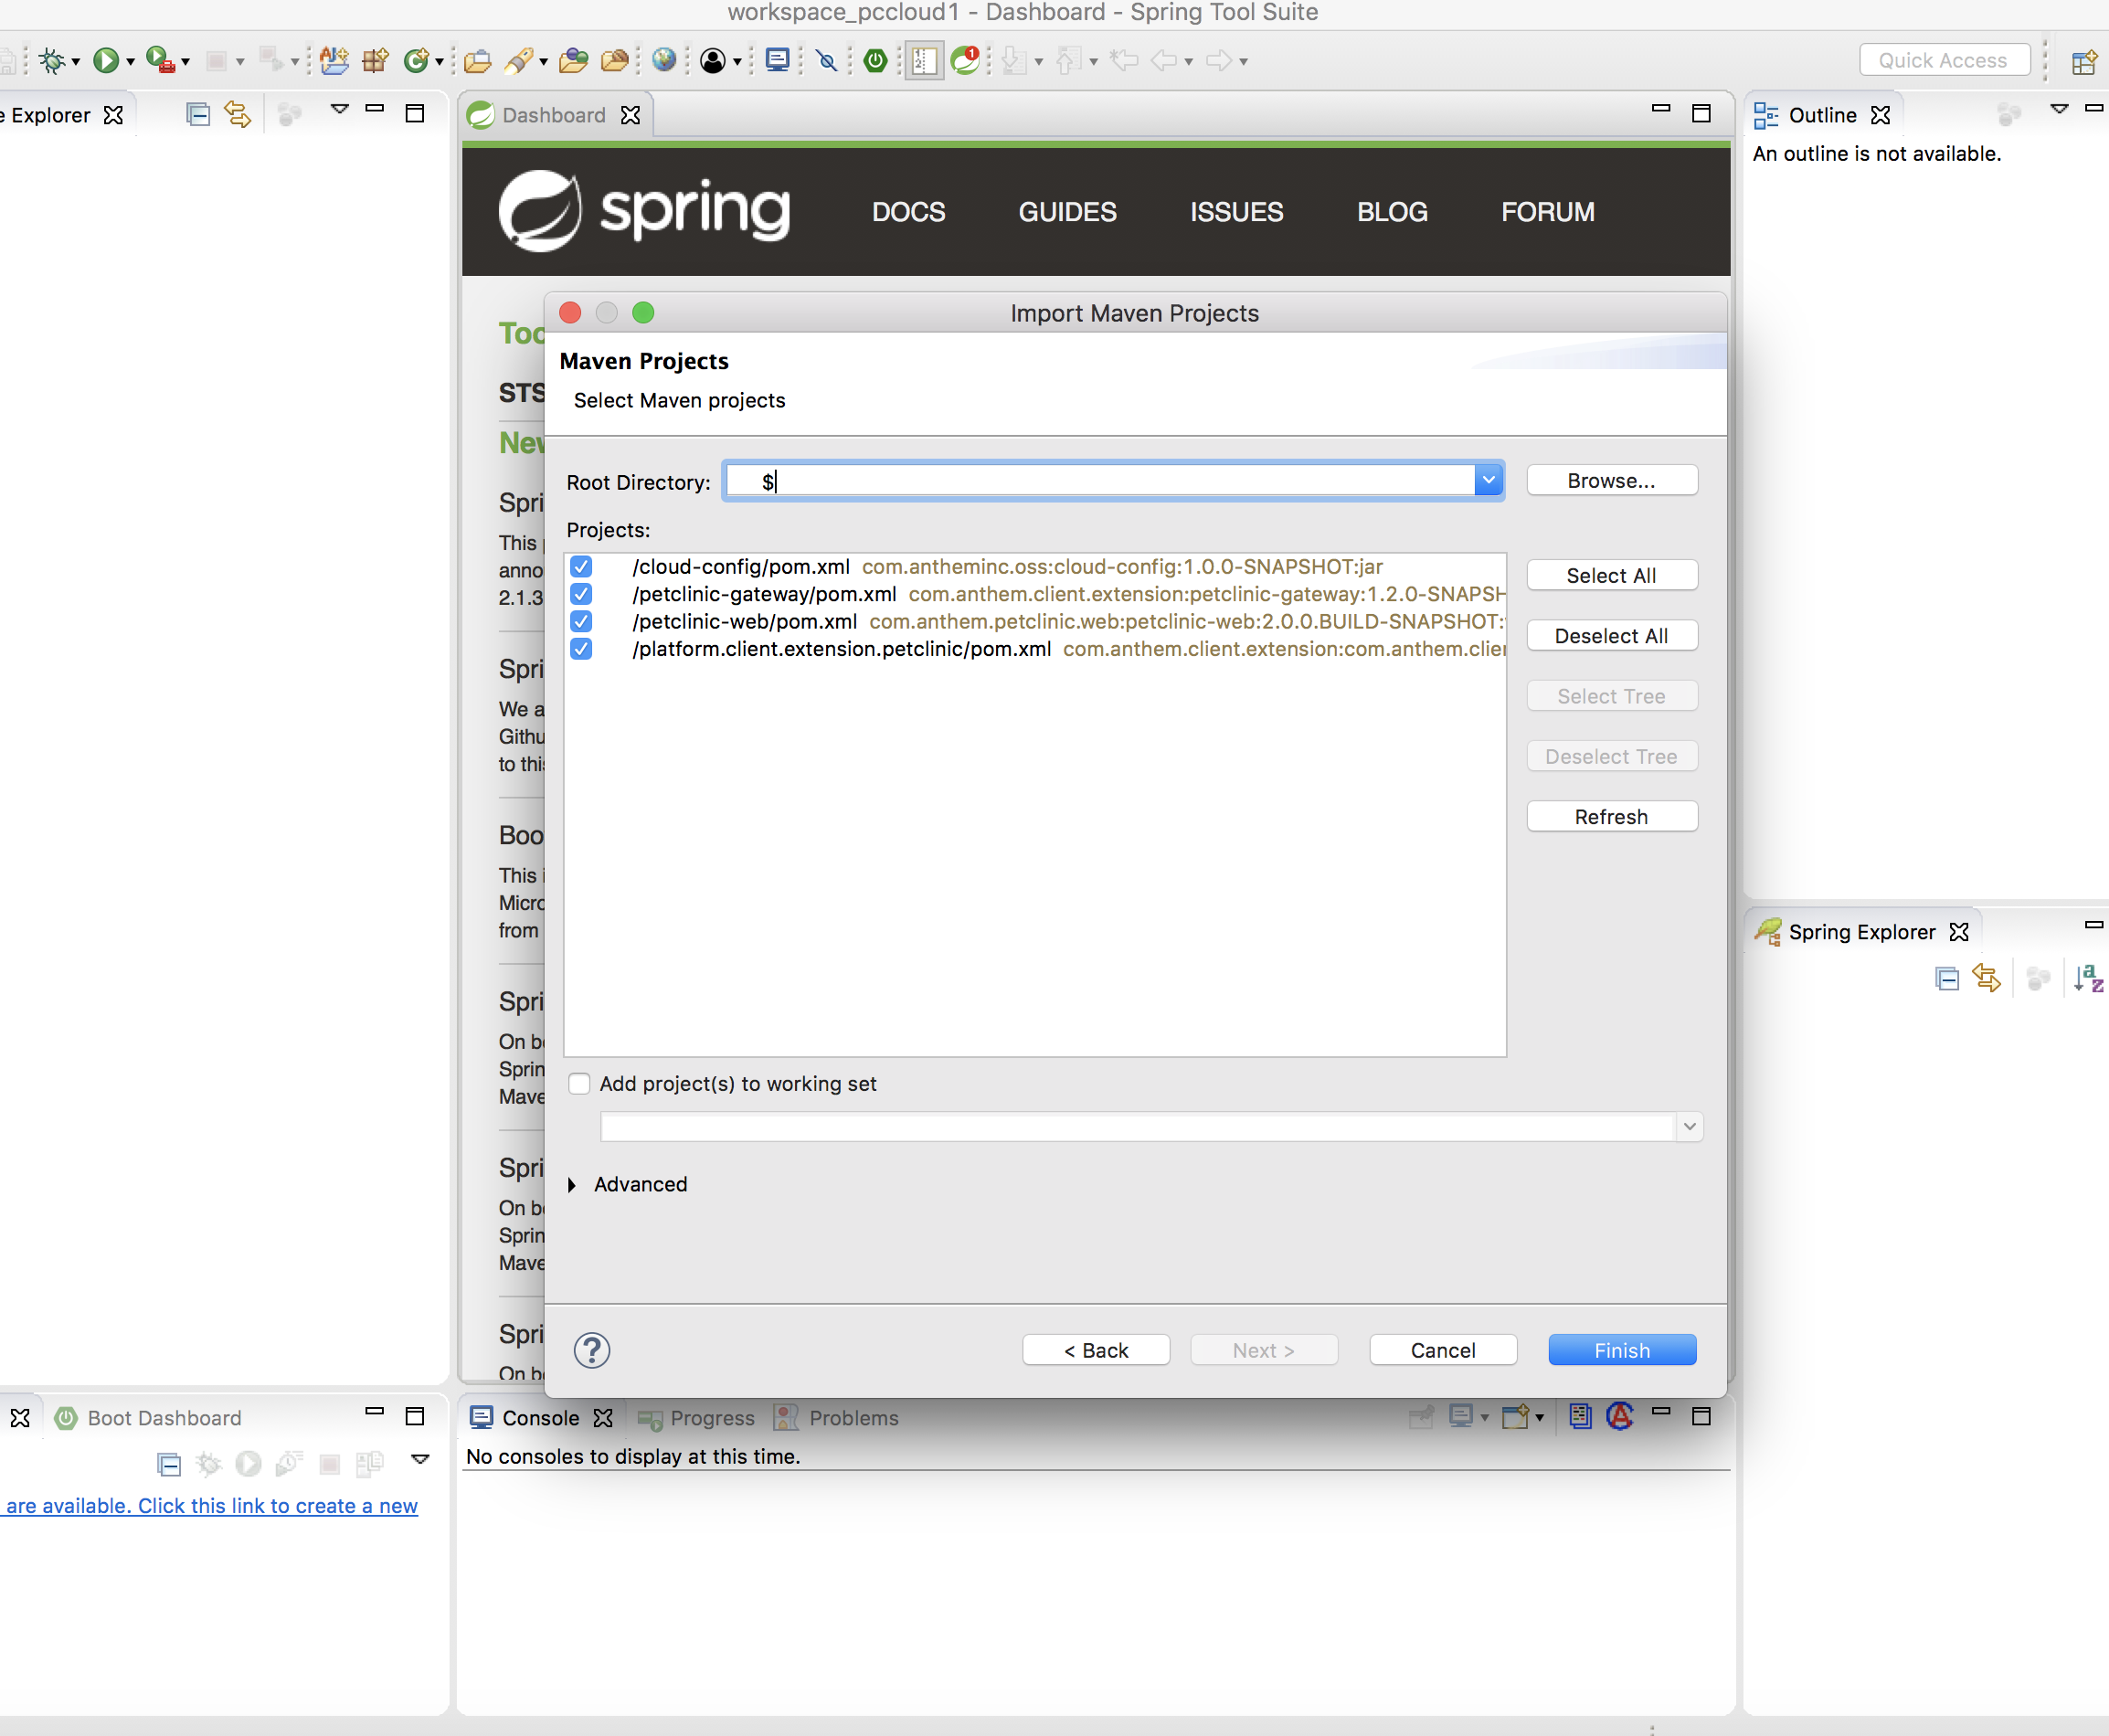
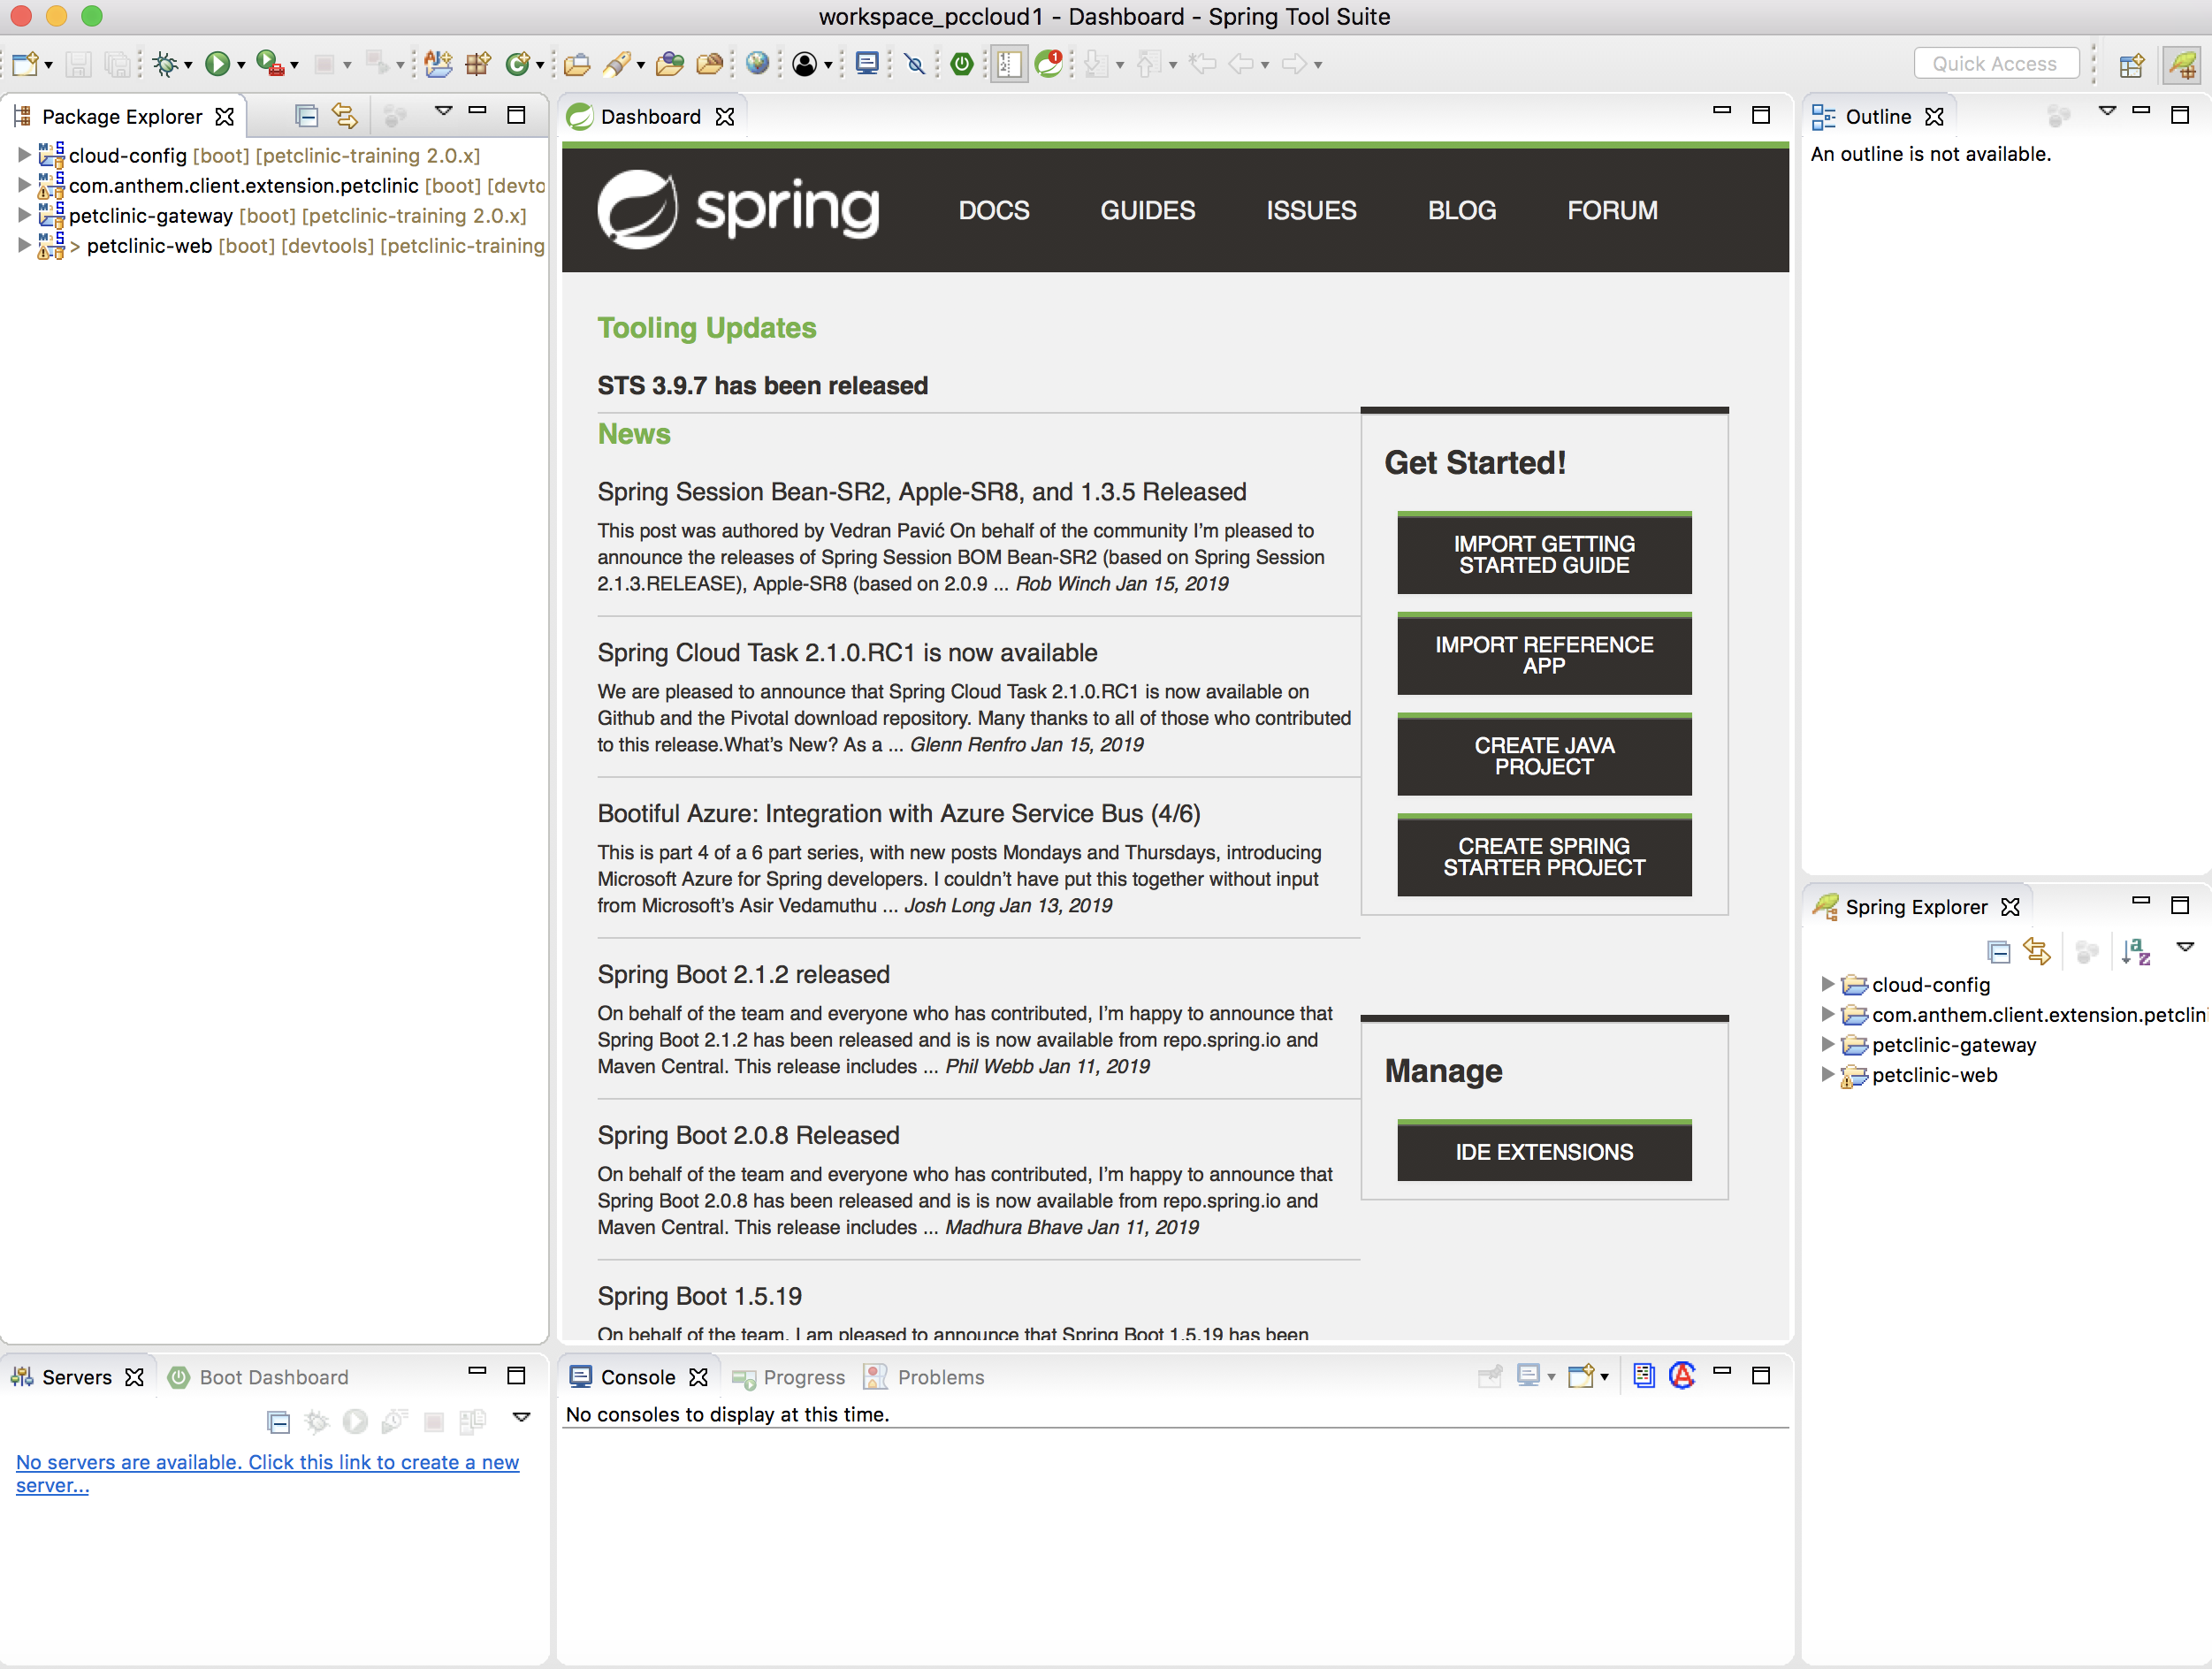
-
Build the projects
-
Make sure your is running. Go to Terminal and run the command
brew services list
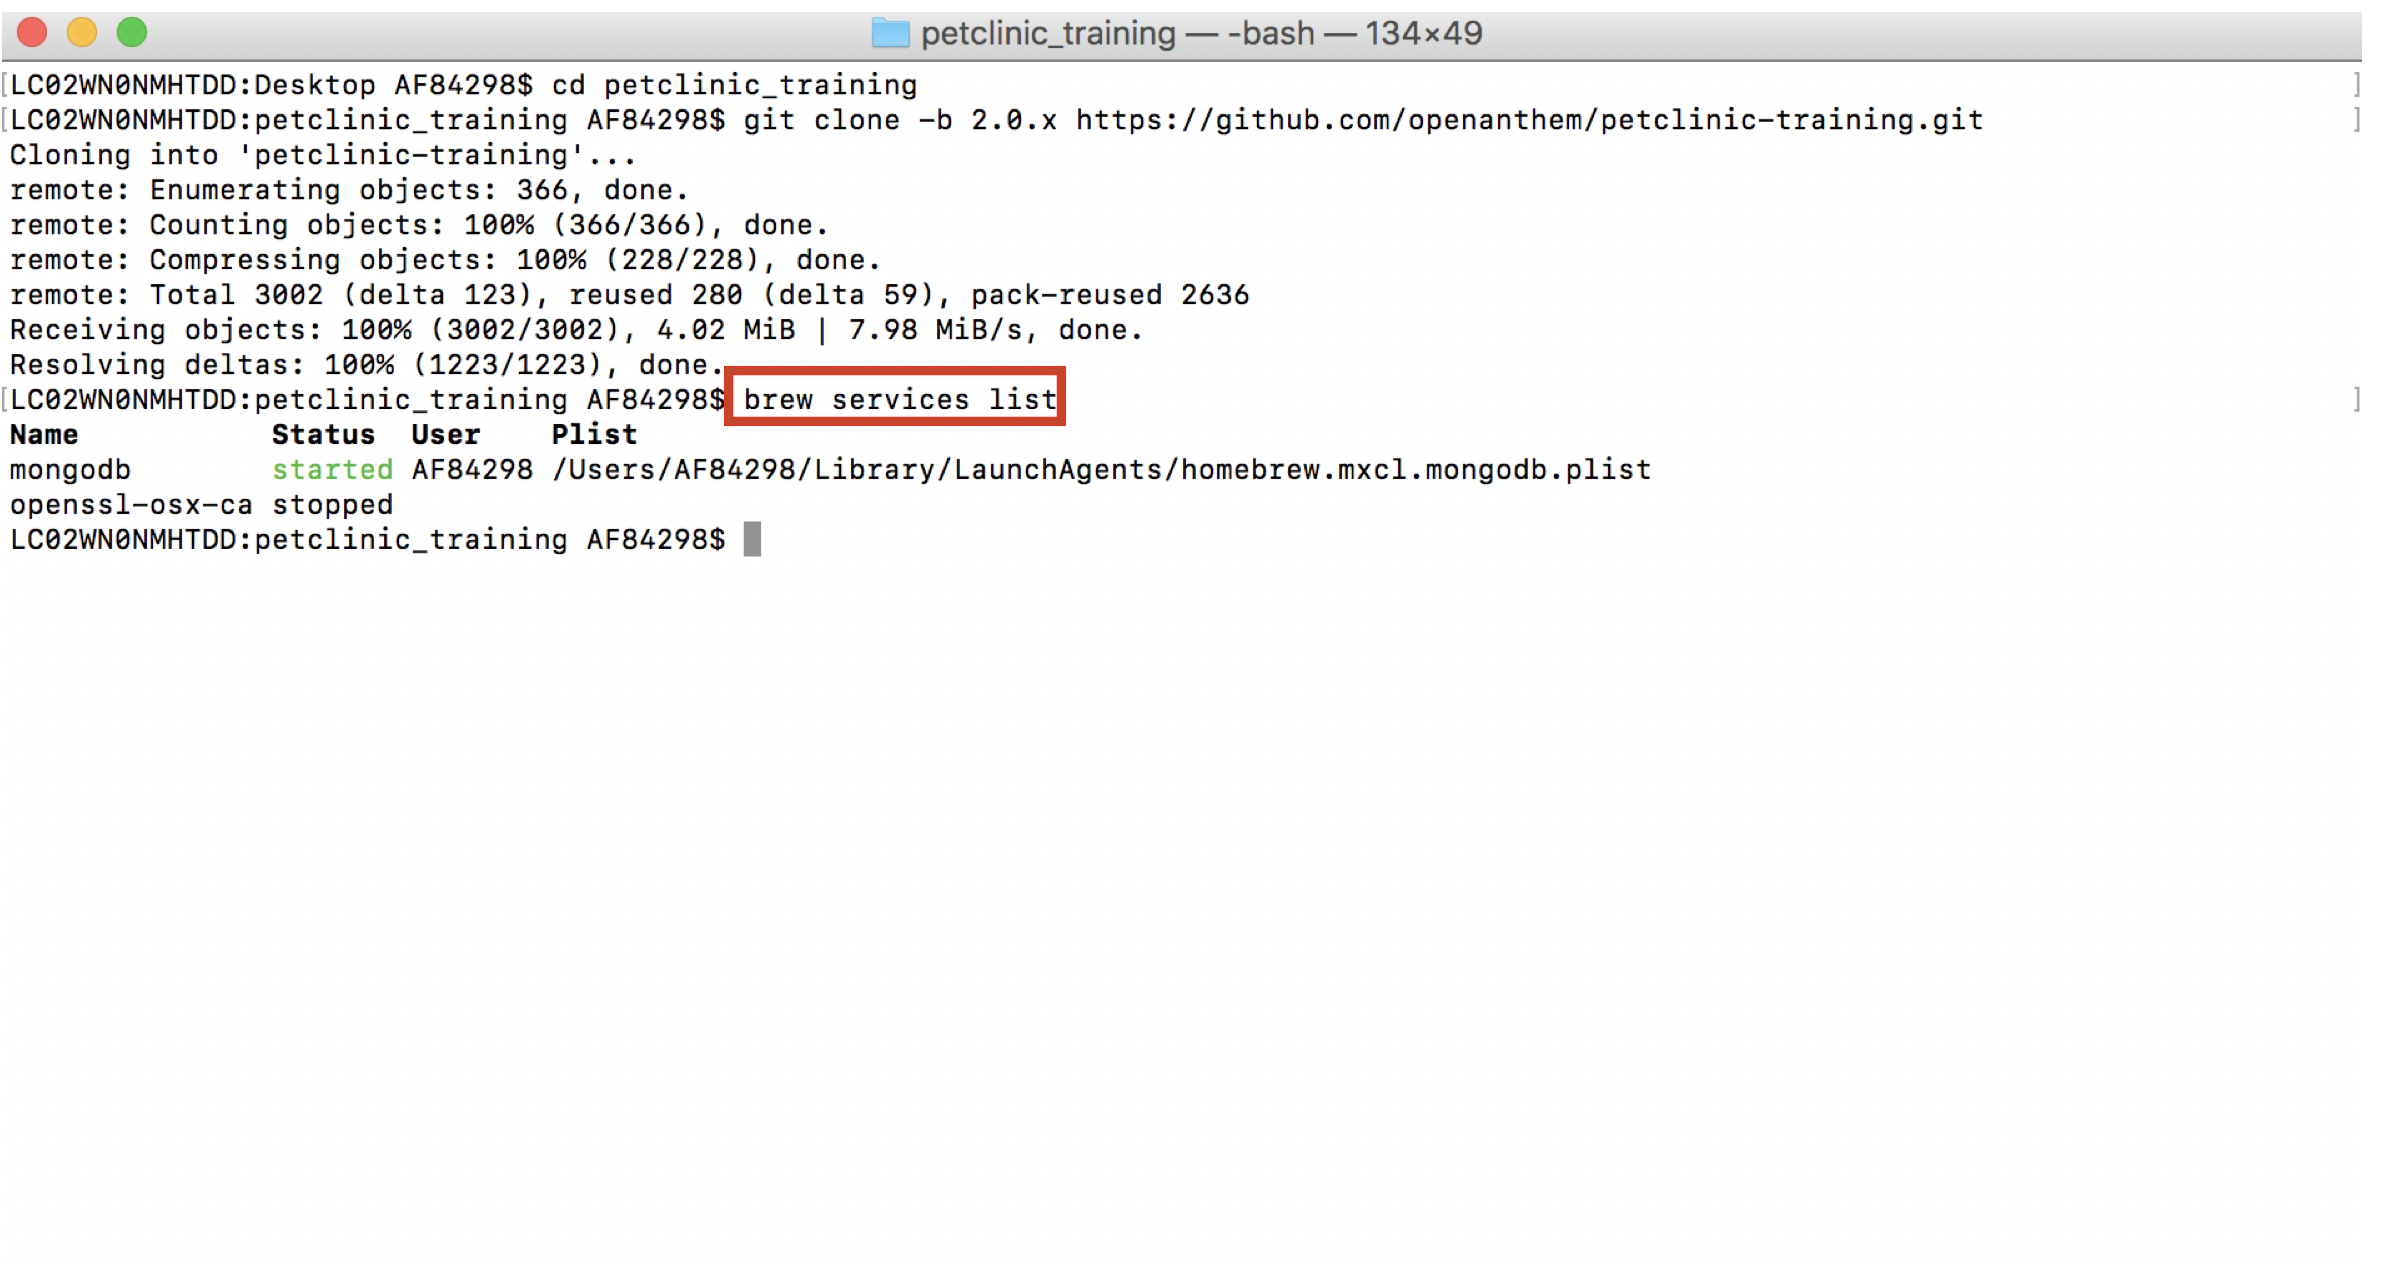
-
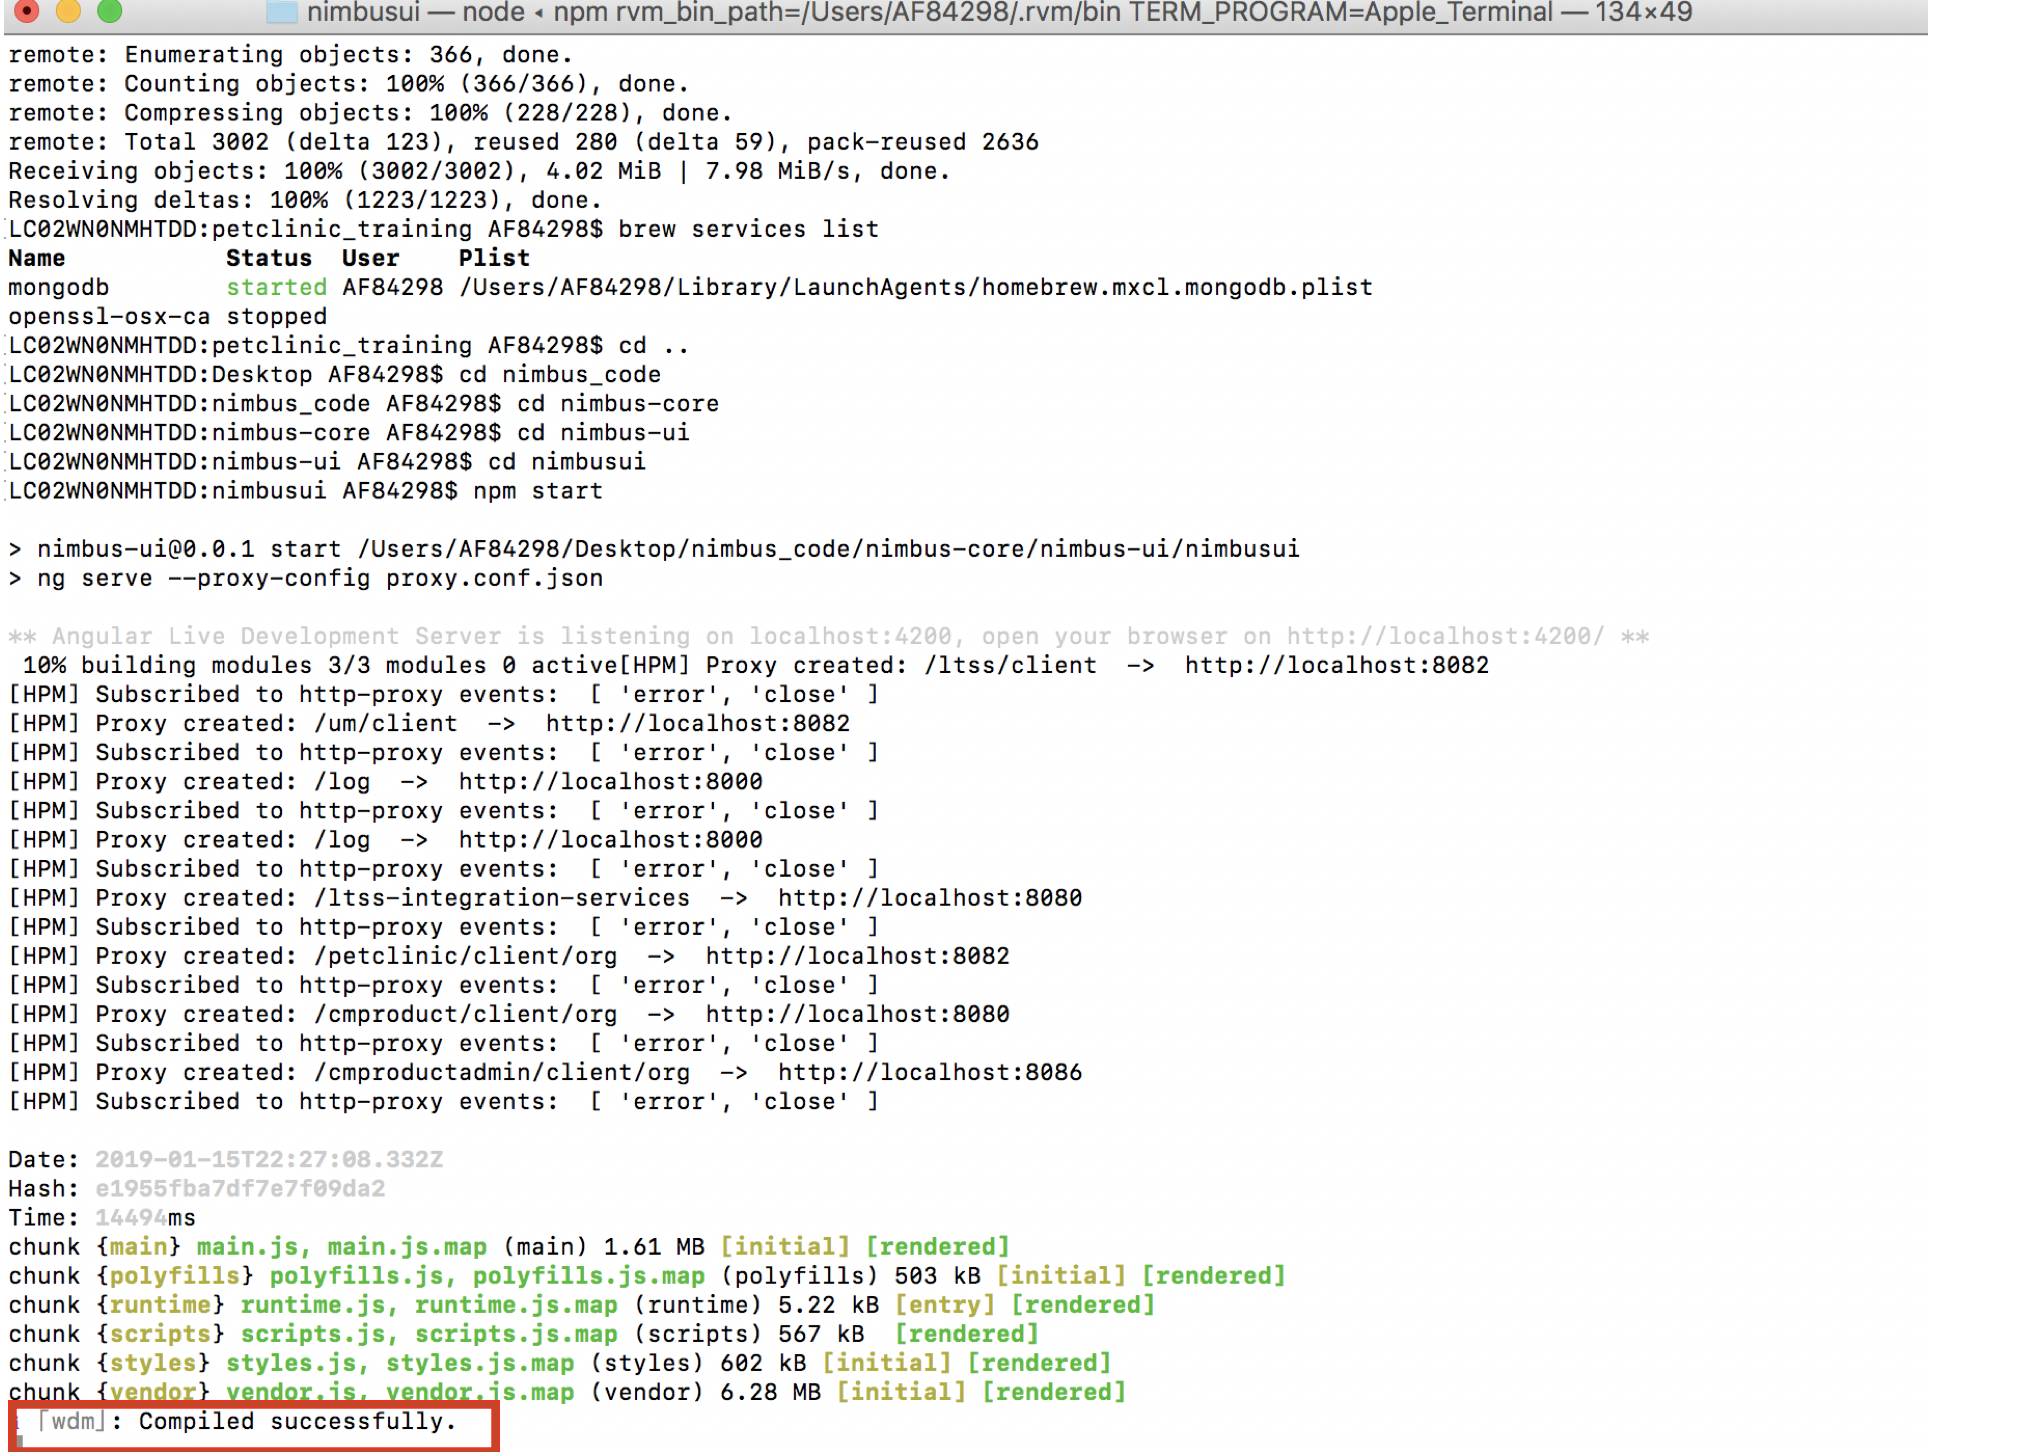
Run .Go to Terminal. Navigate to nimbus_code/nimbus-core/nimbus-ui/nimbusui and run the command
npm start
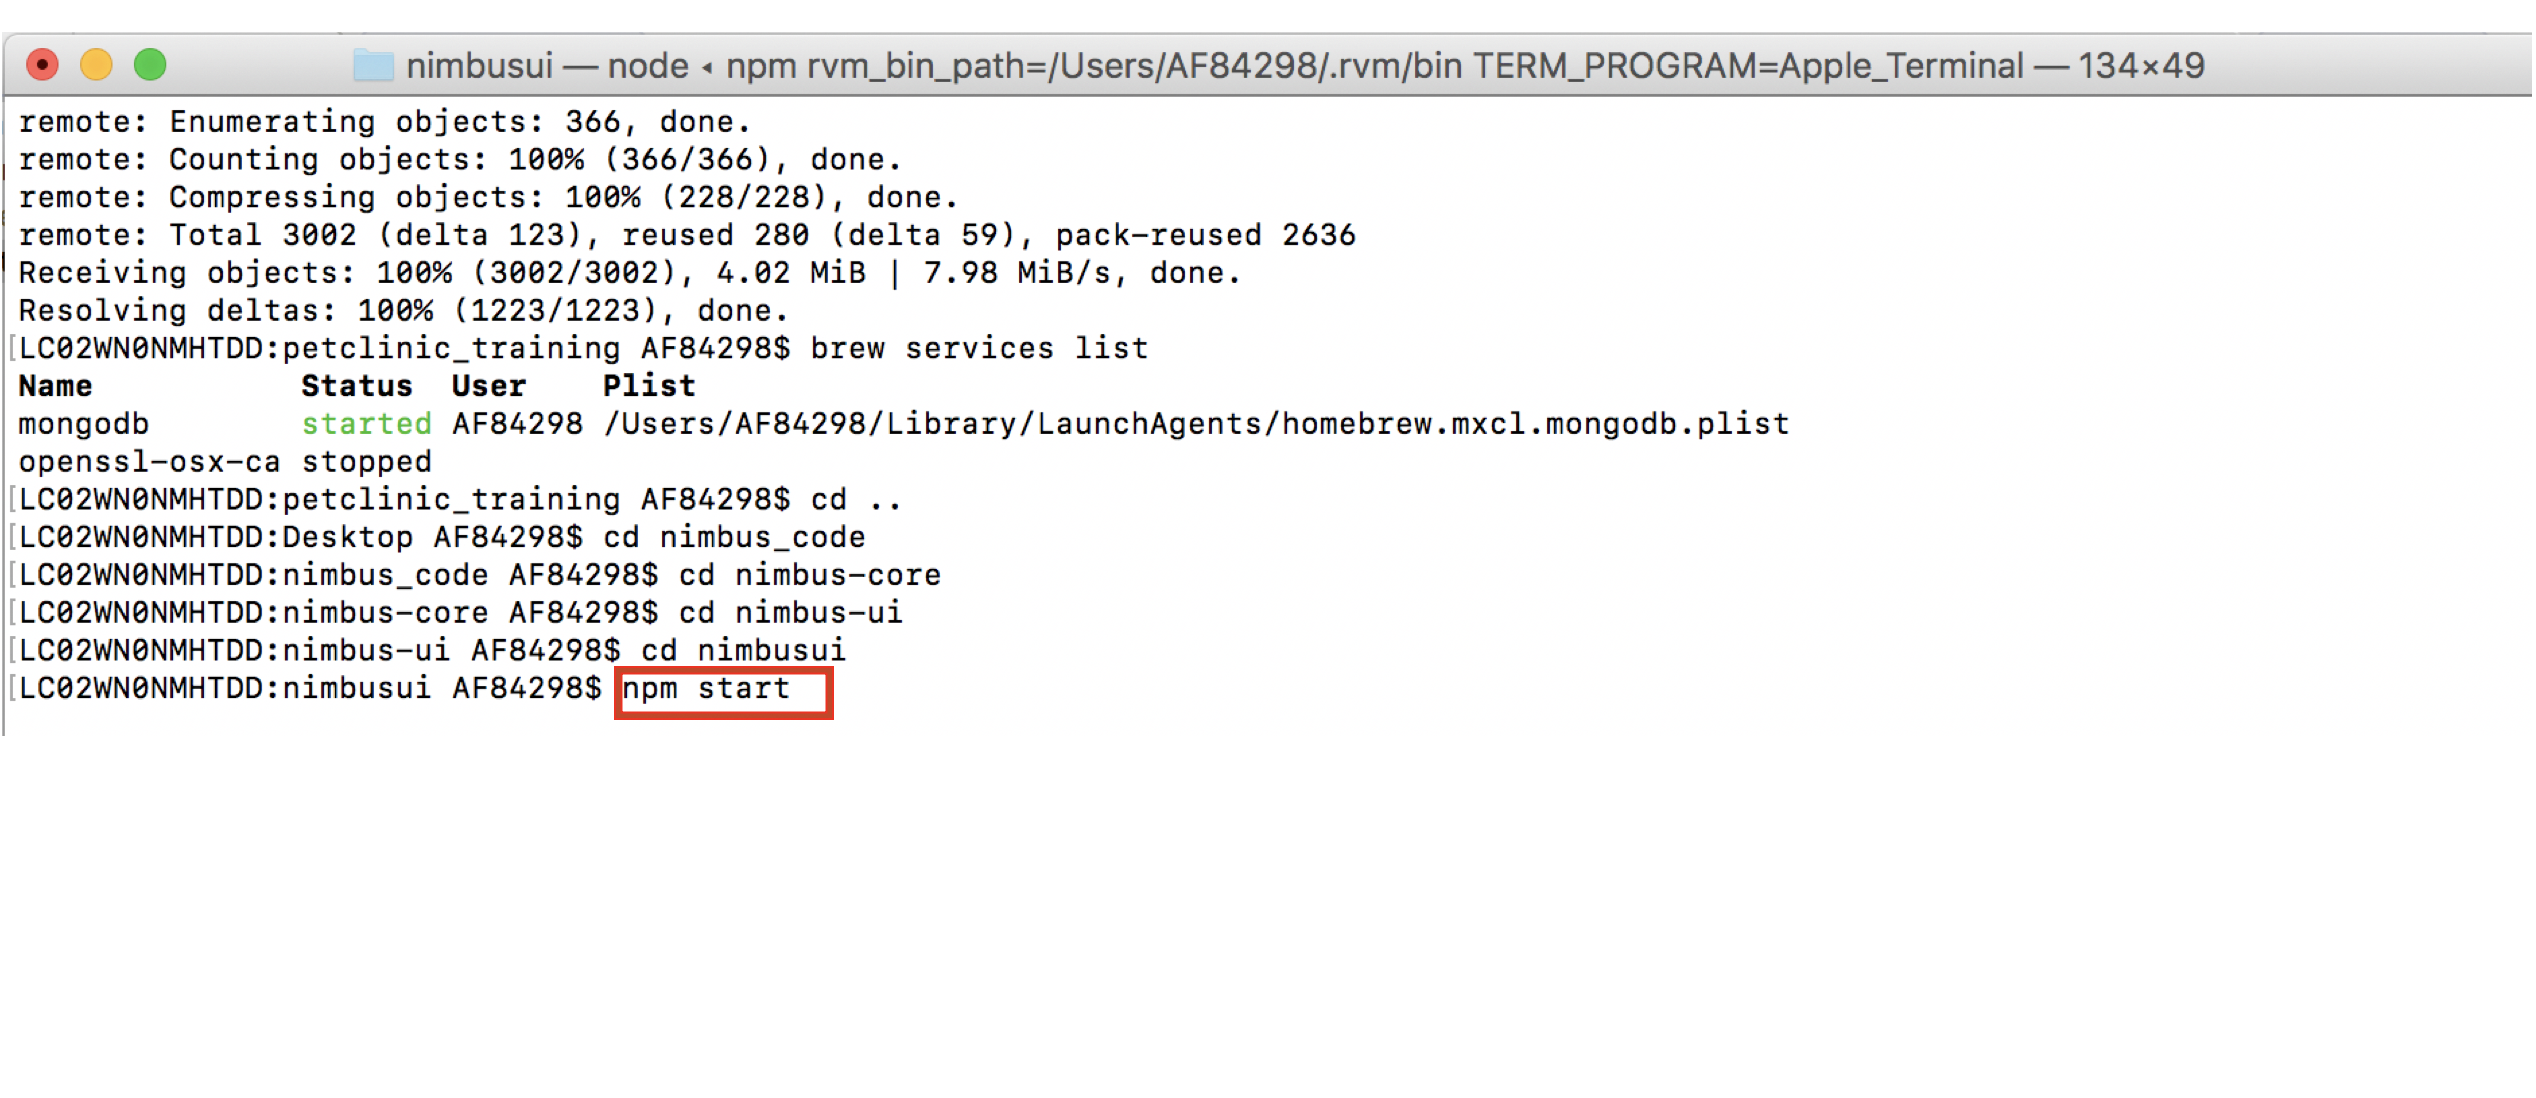
-
You can see the compiled successfully message.
-
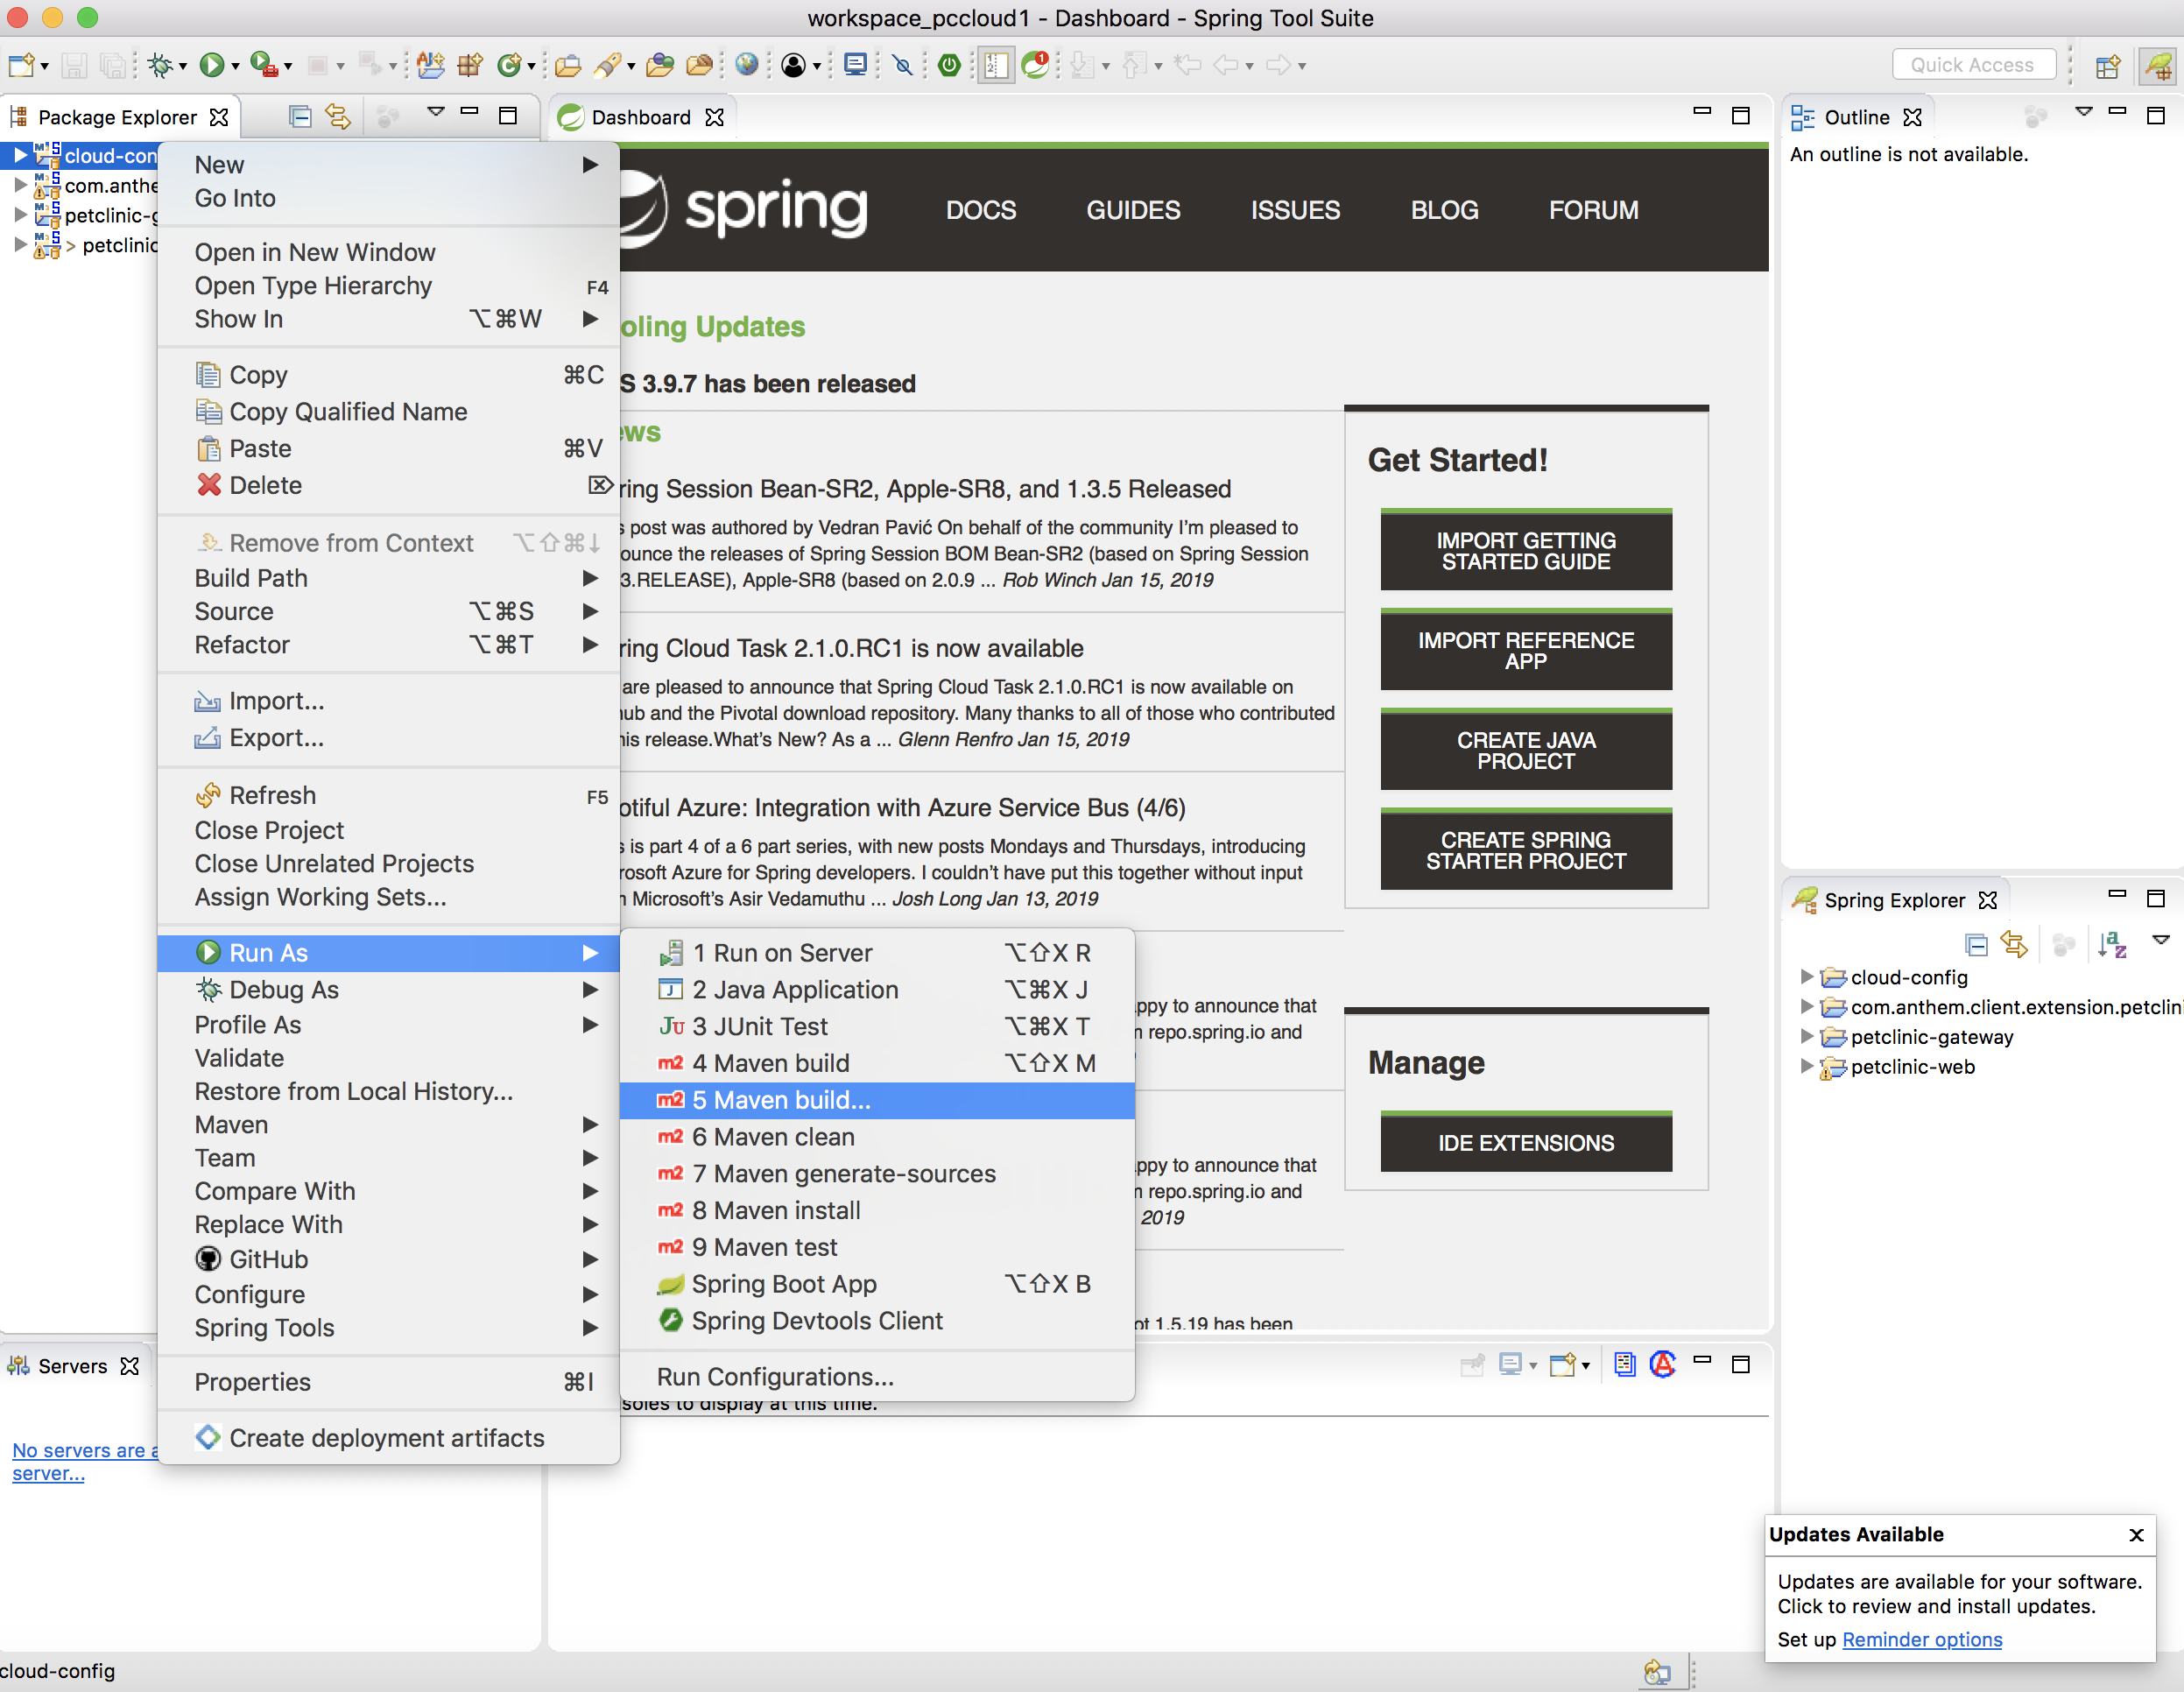
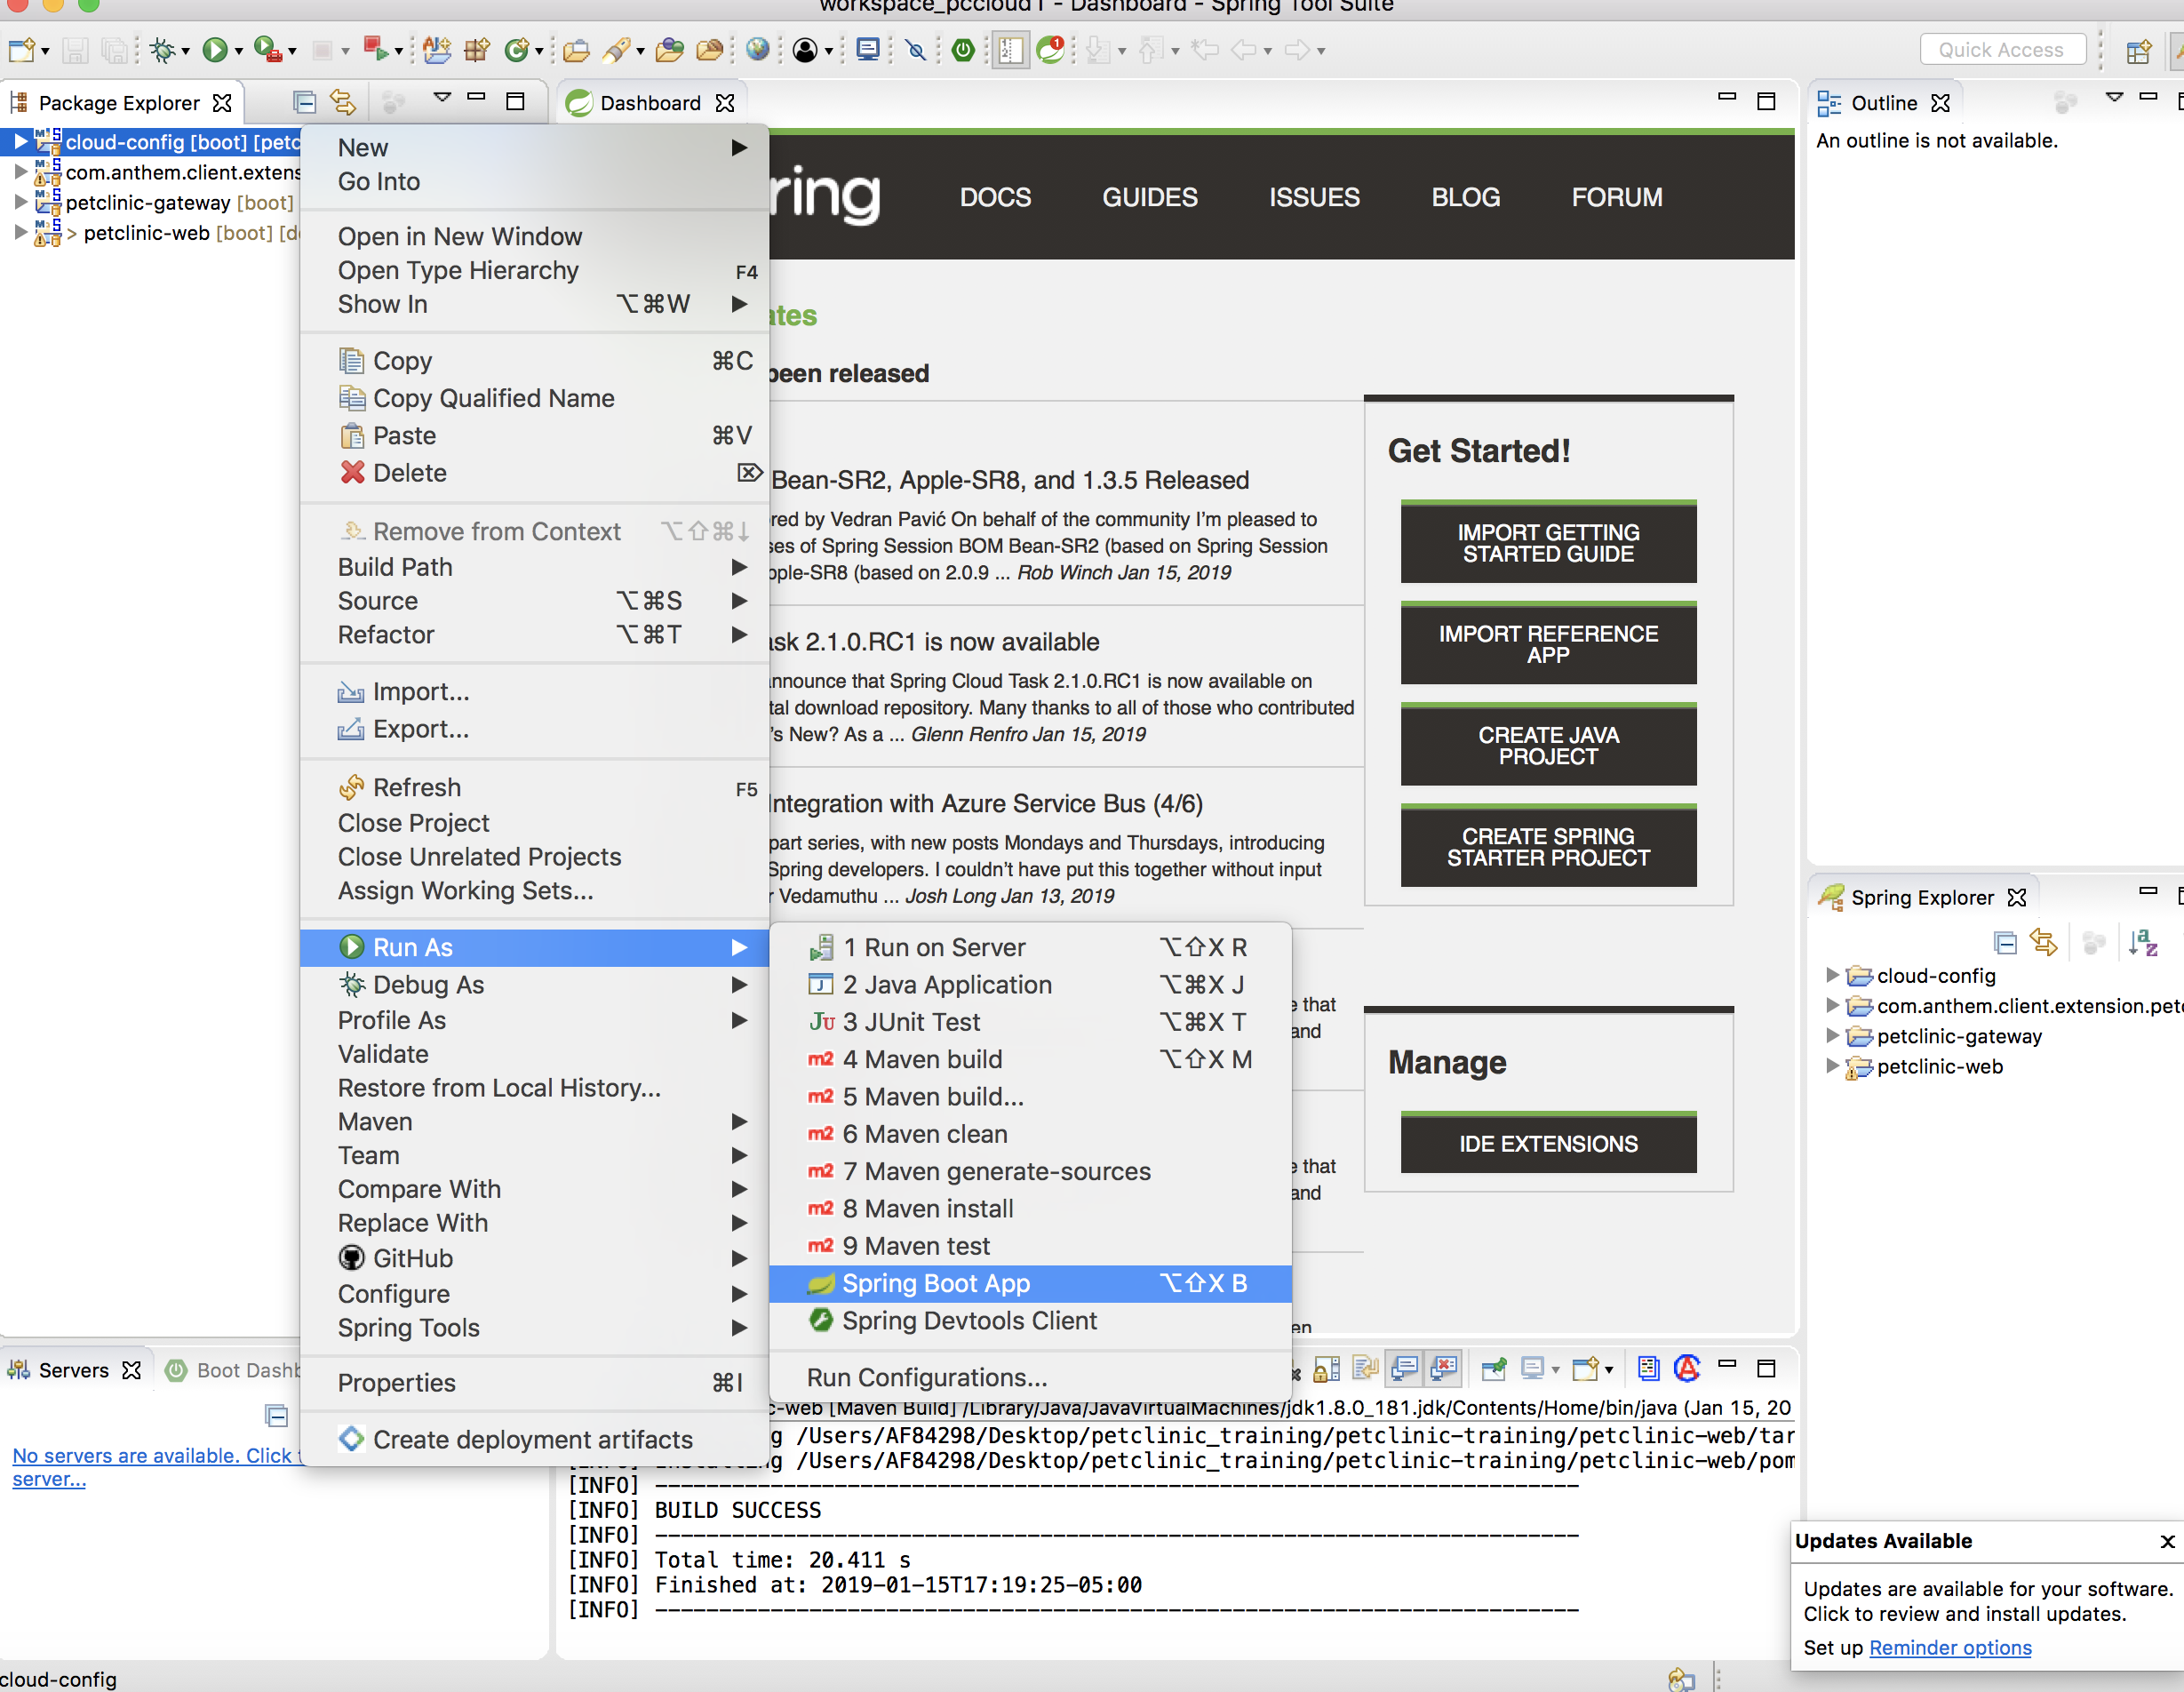
Now, open STS
-
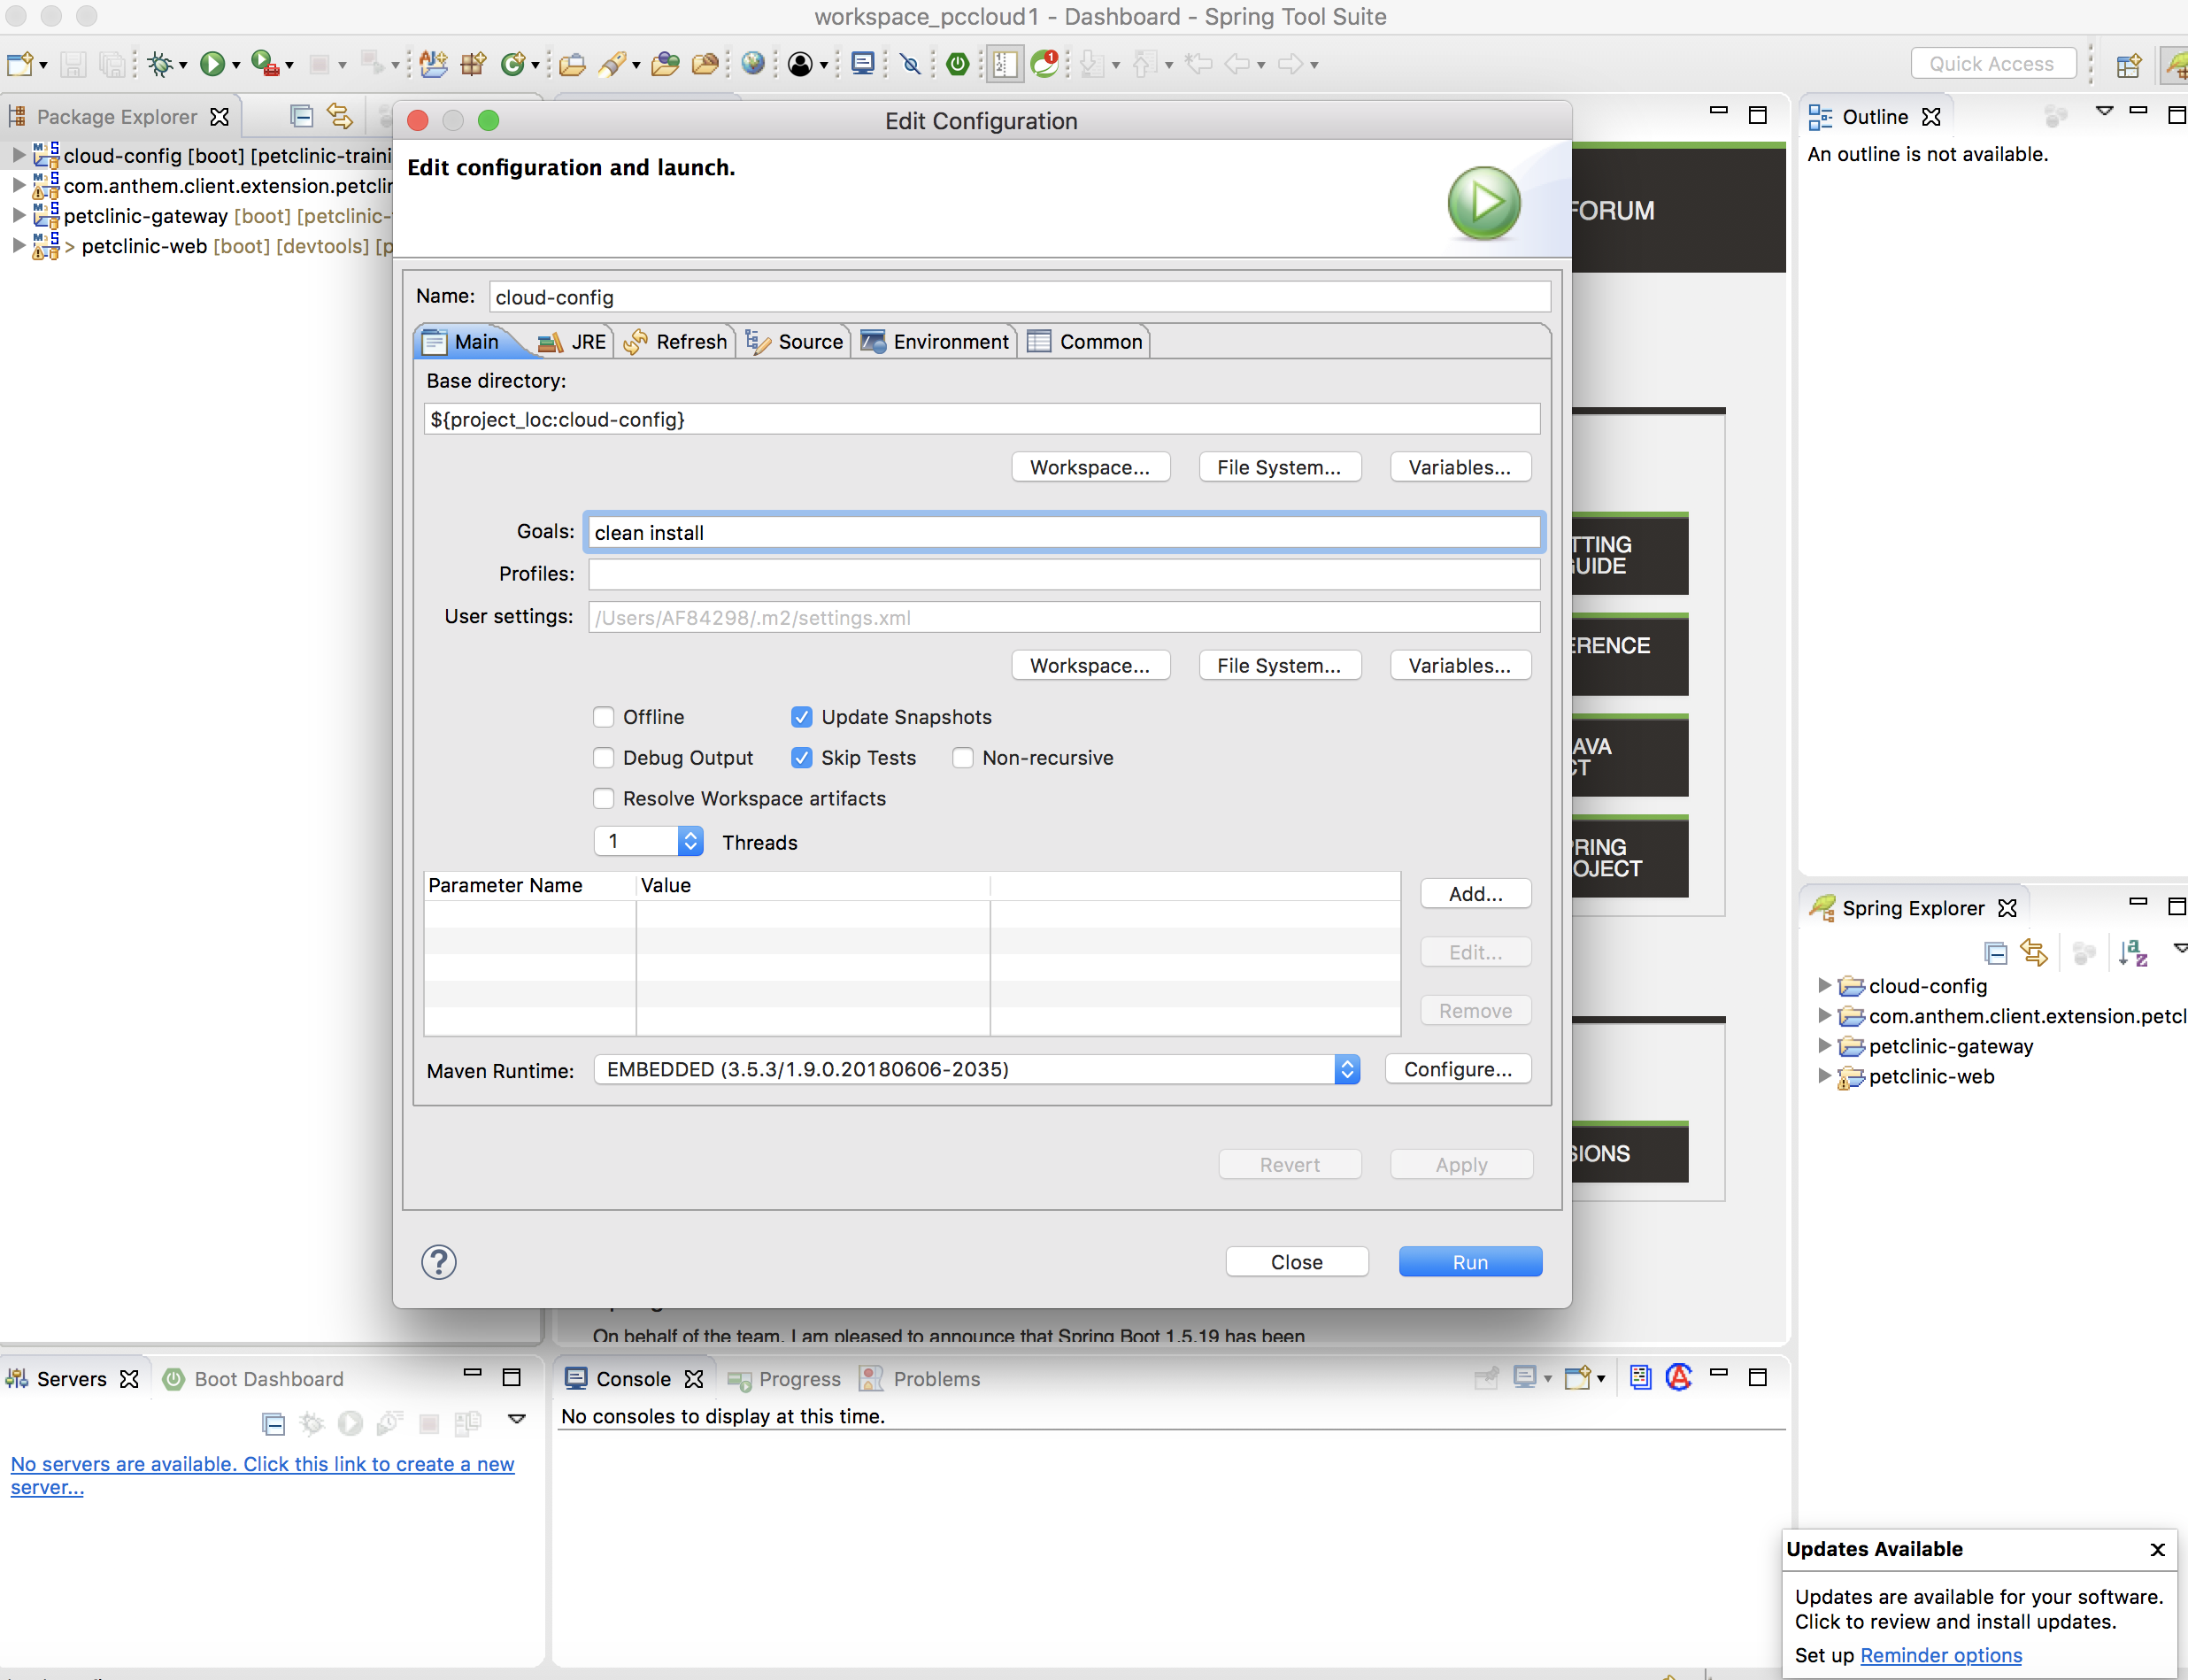
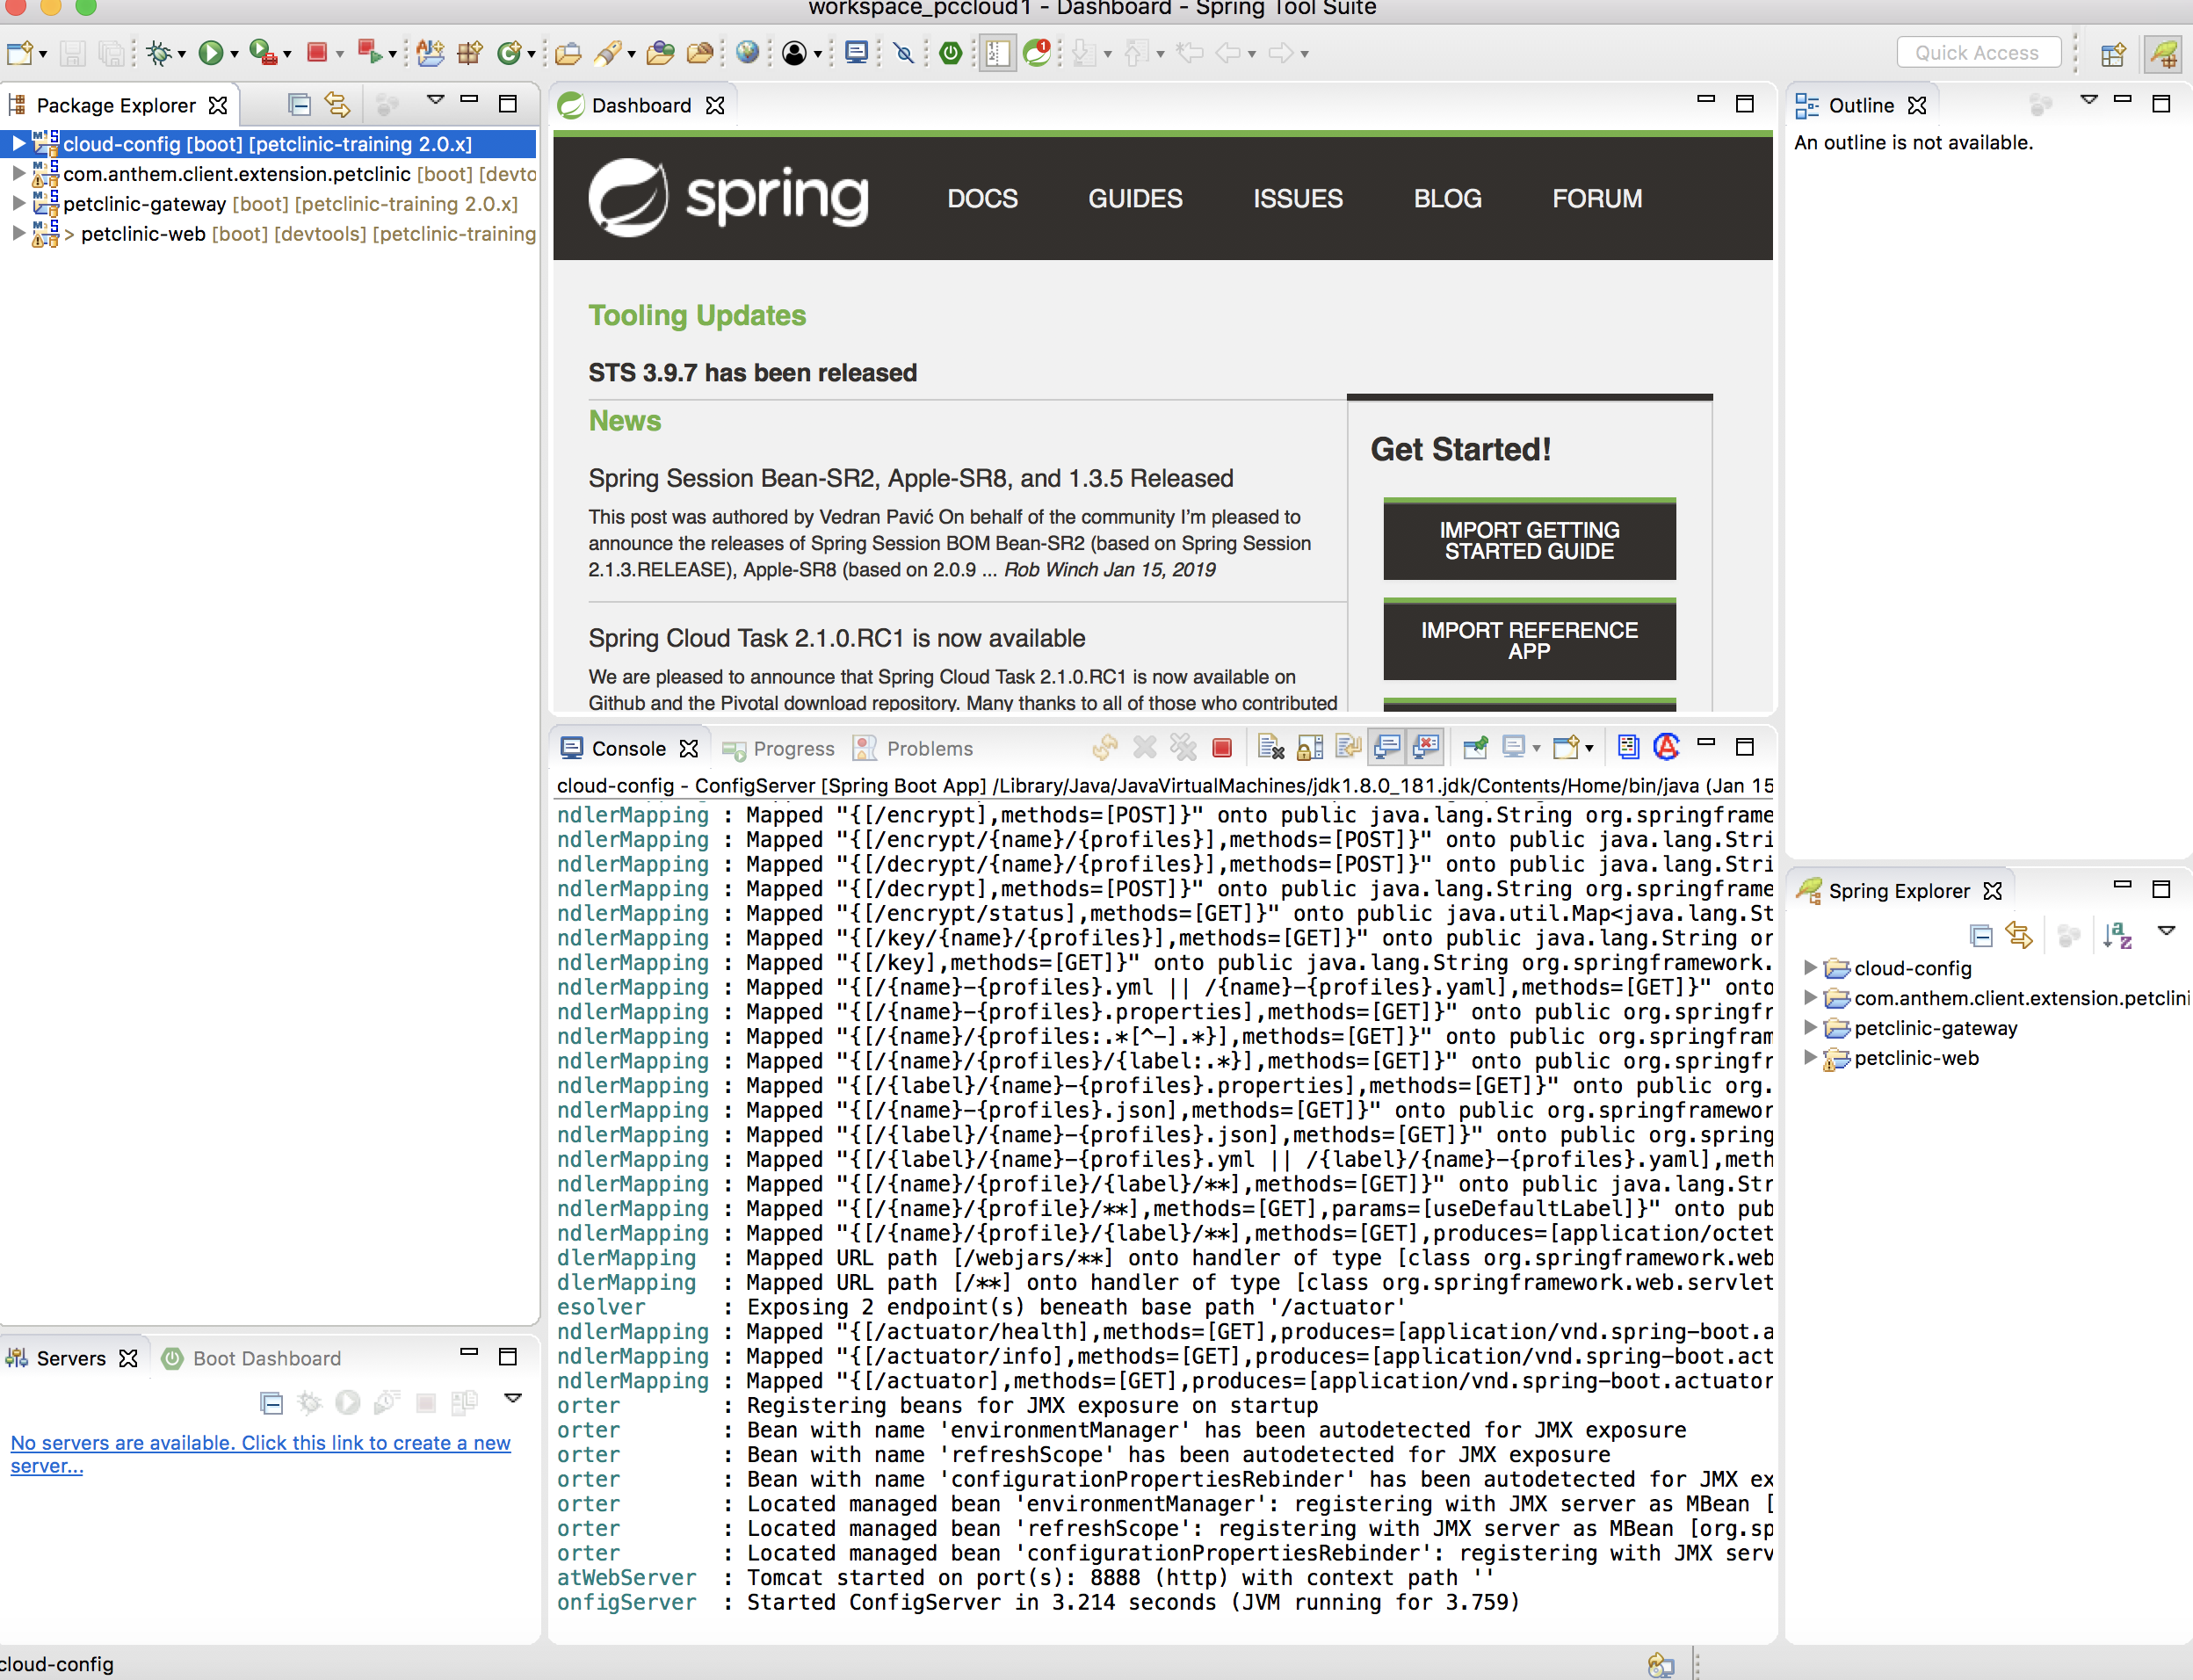
Run cloud-config as a spring boot application
-
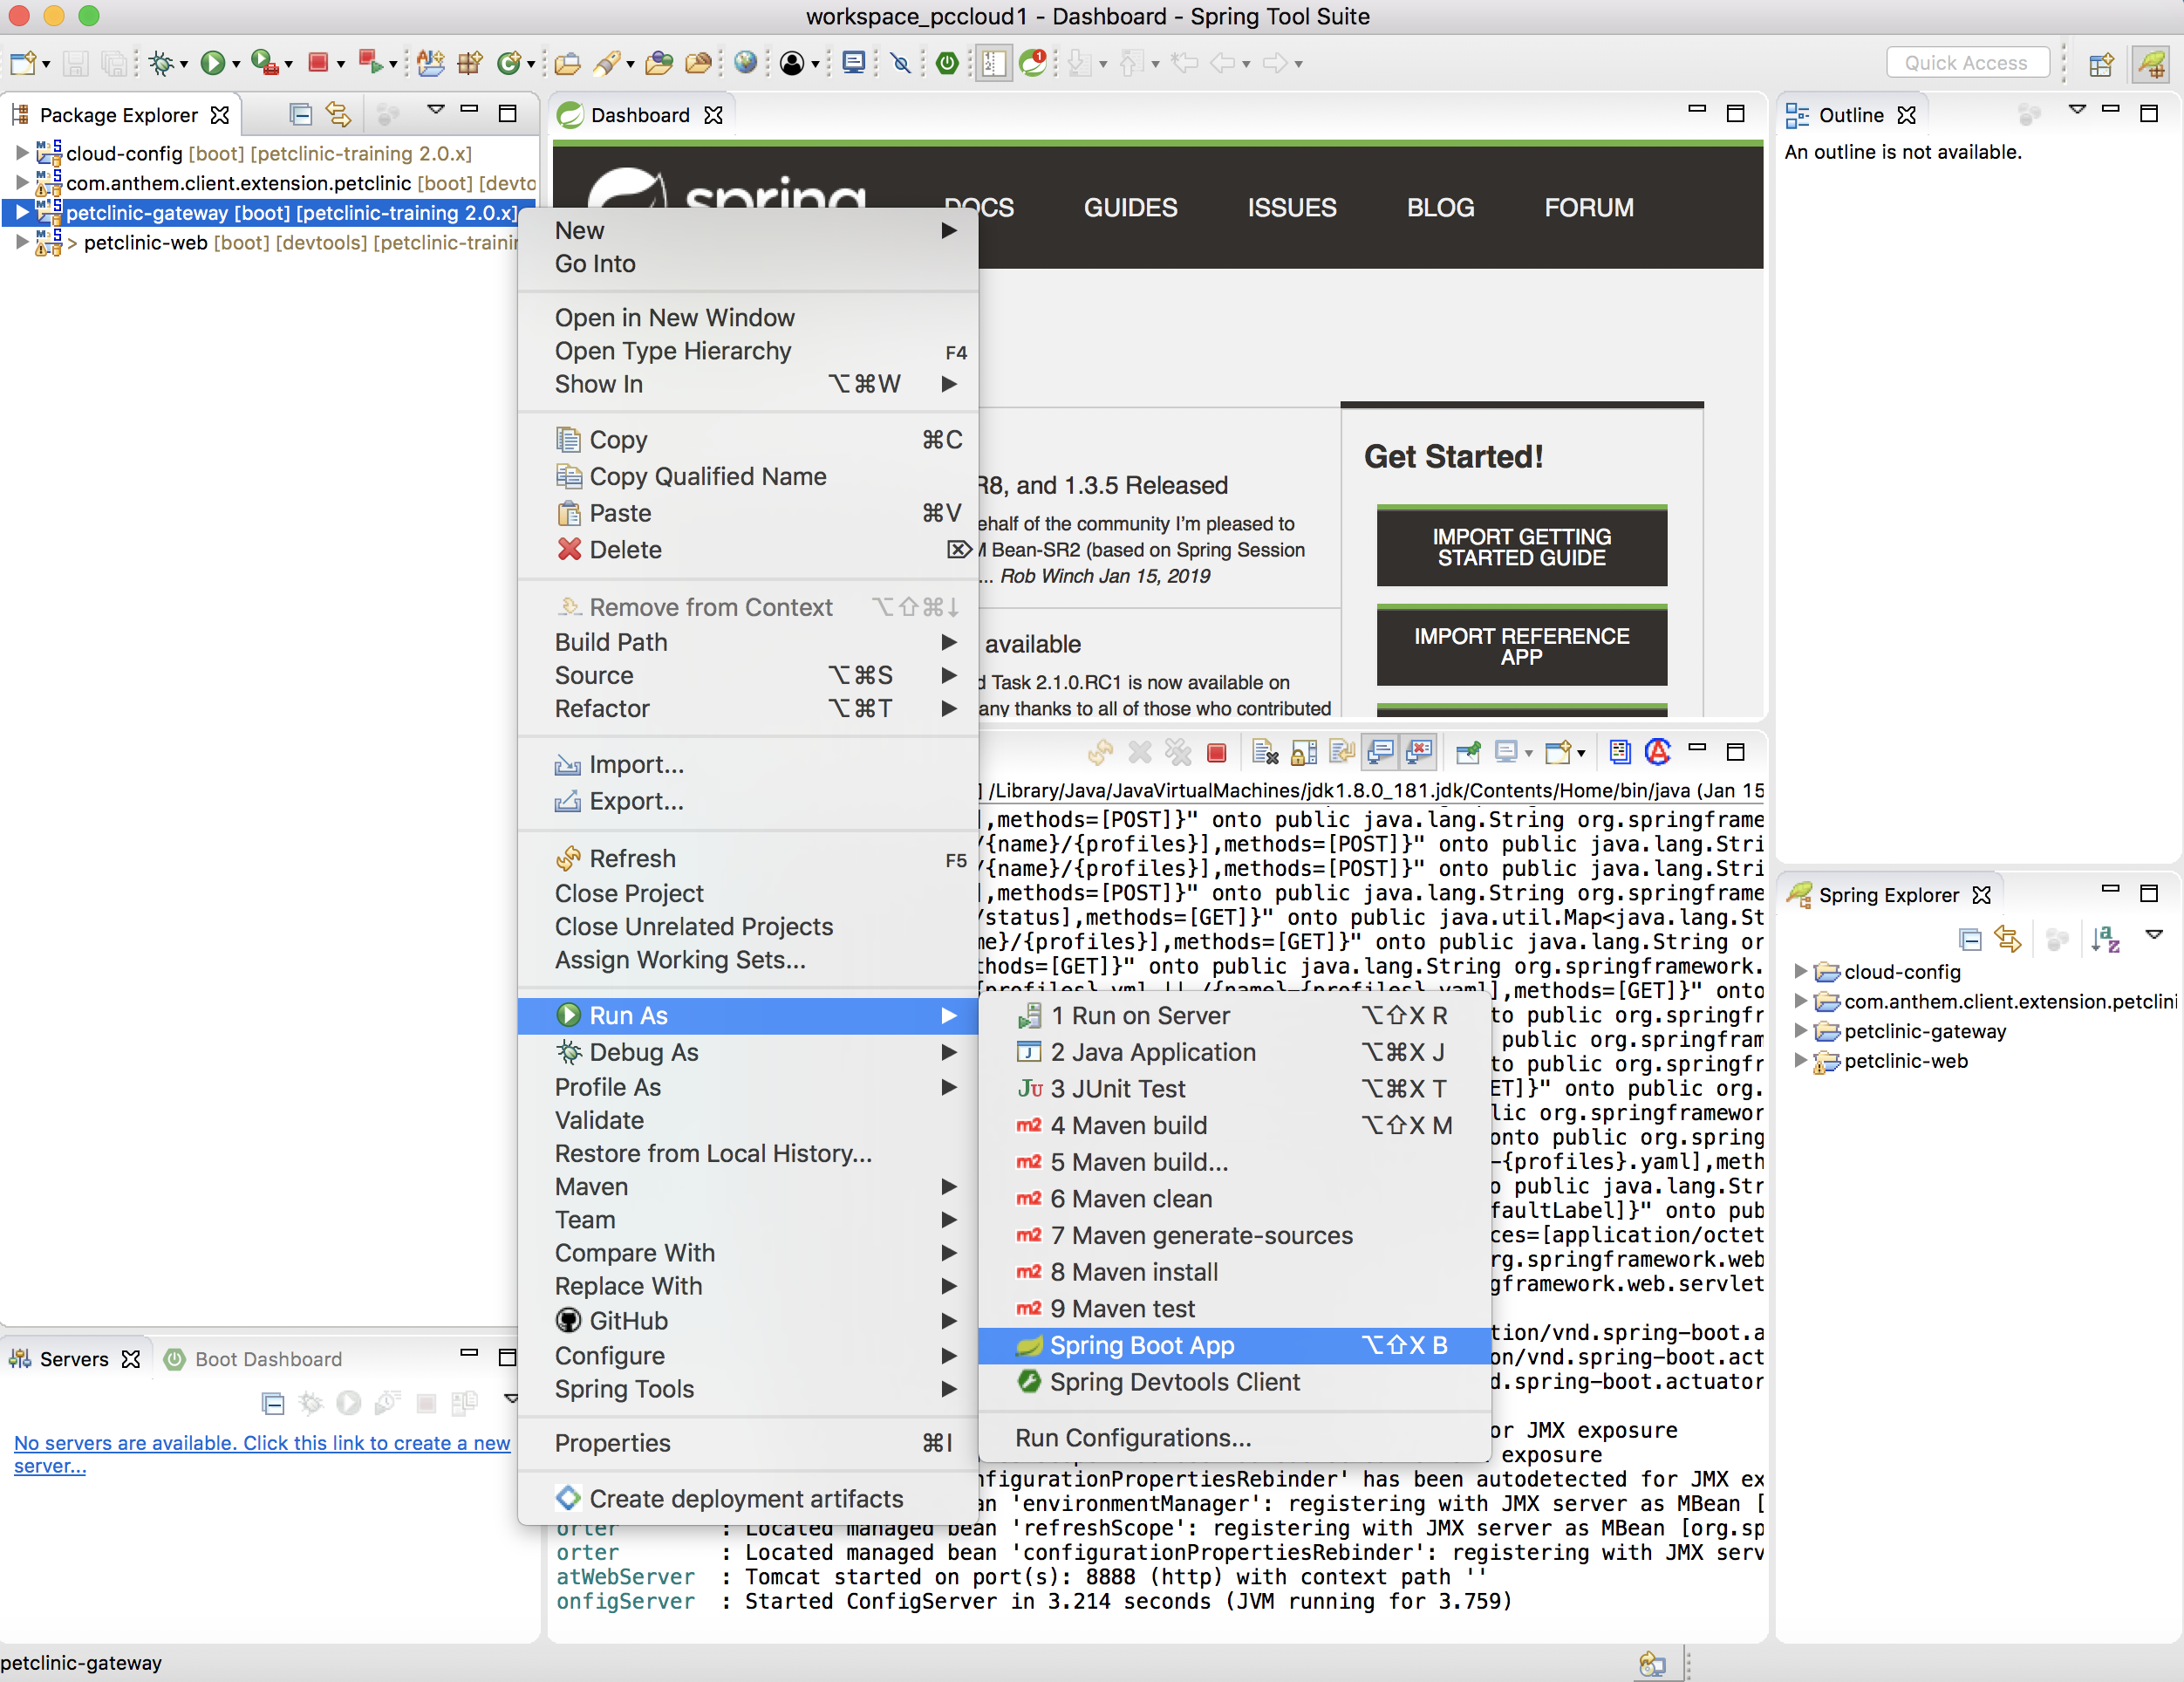
Run petclinic-gateway as a spring boot application
-
Run petclinic-web as a spring boot application
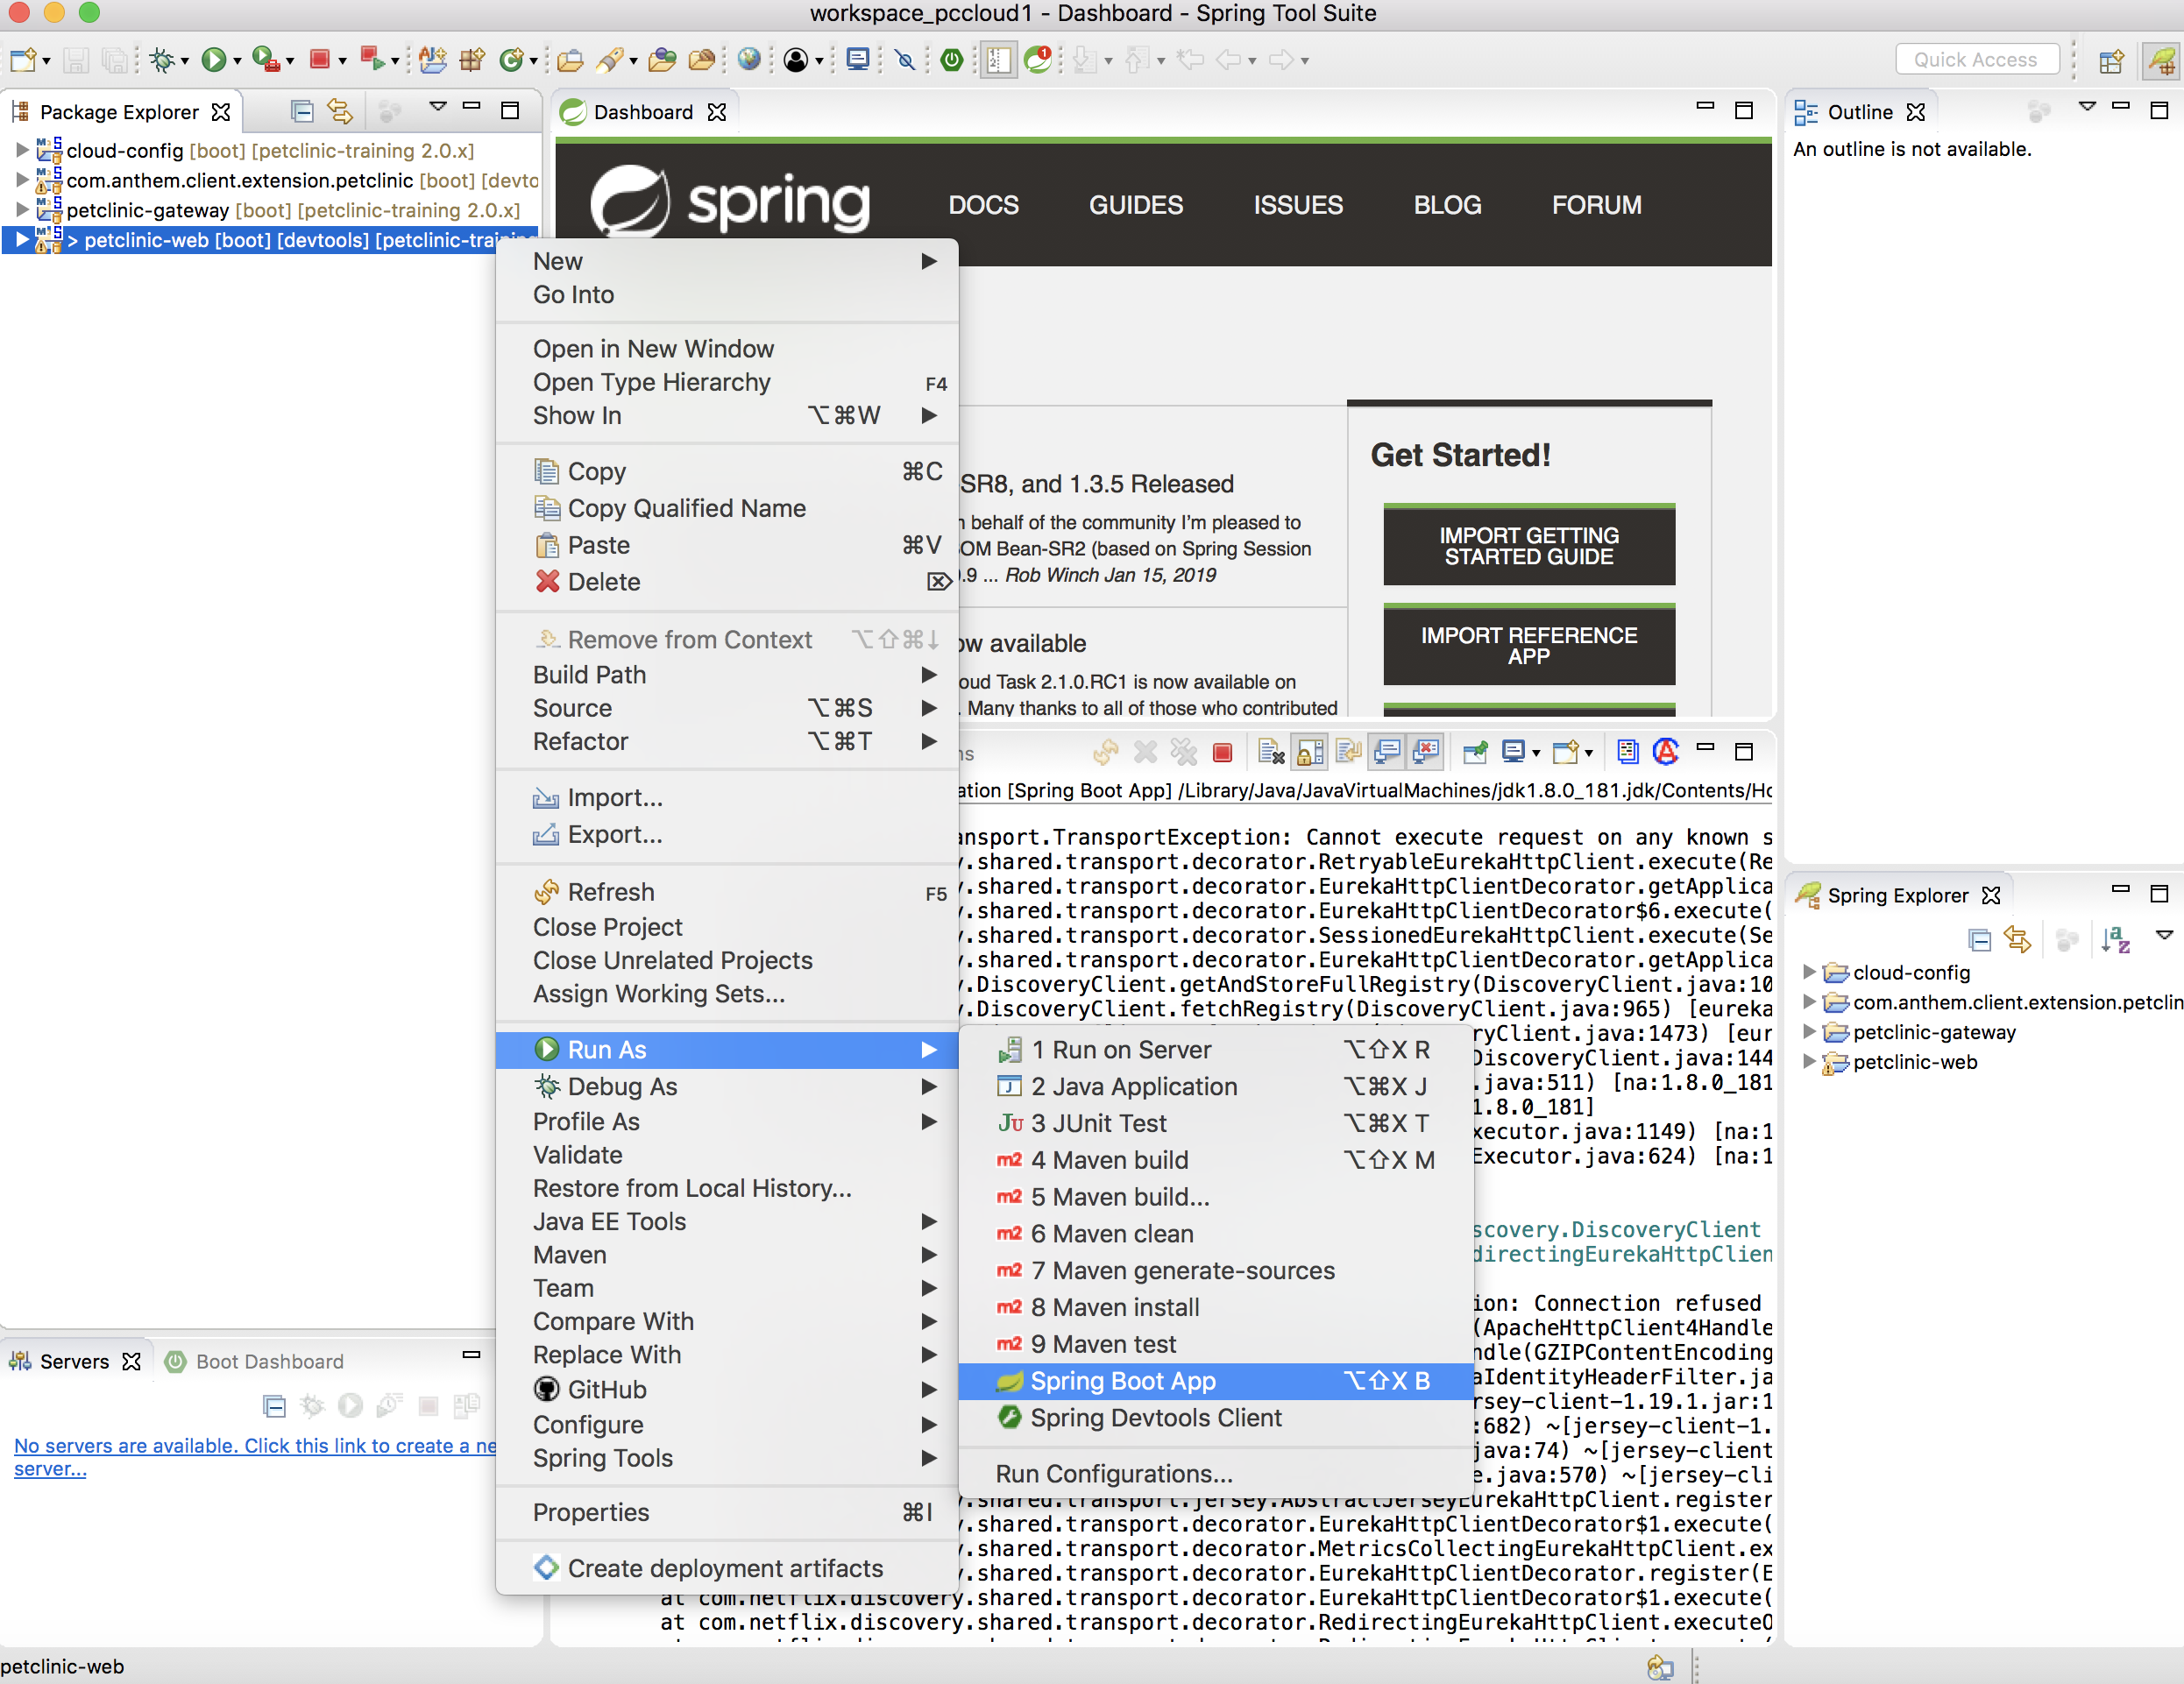
-
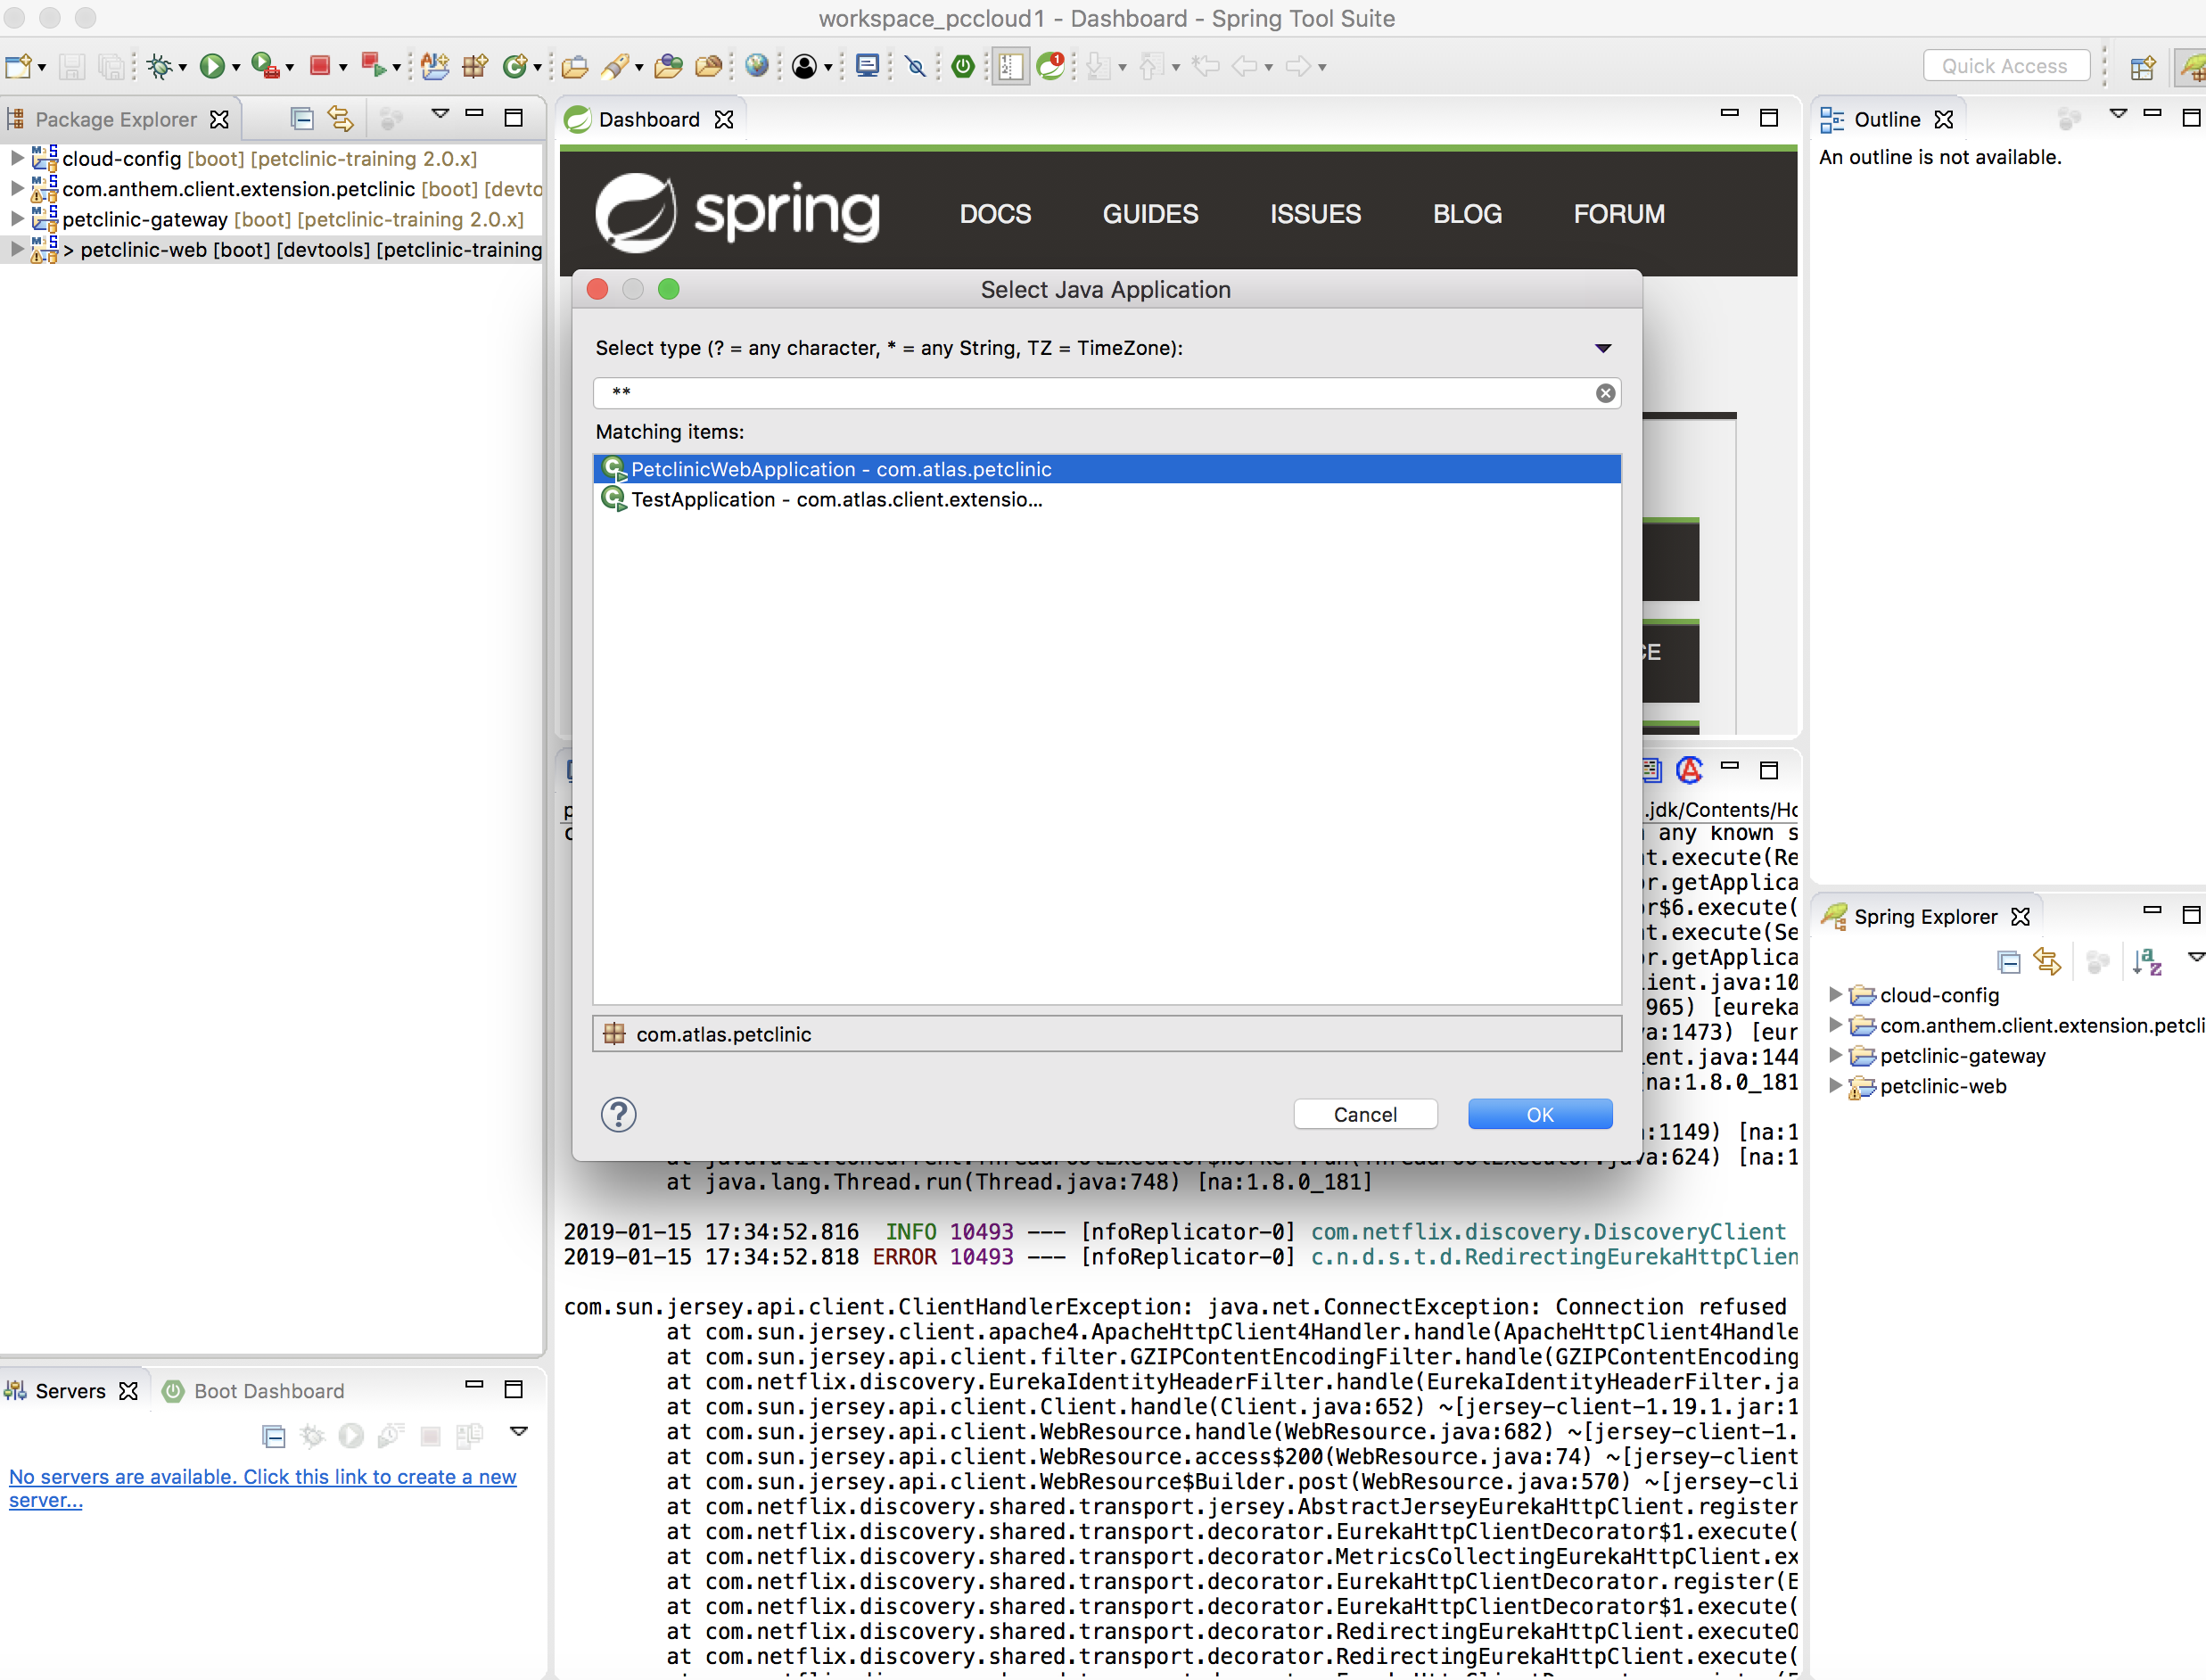
-
Select the application as
-
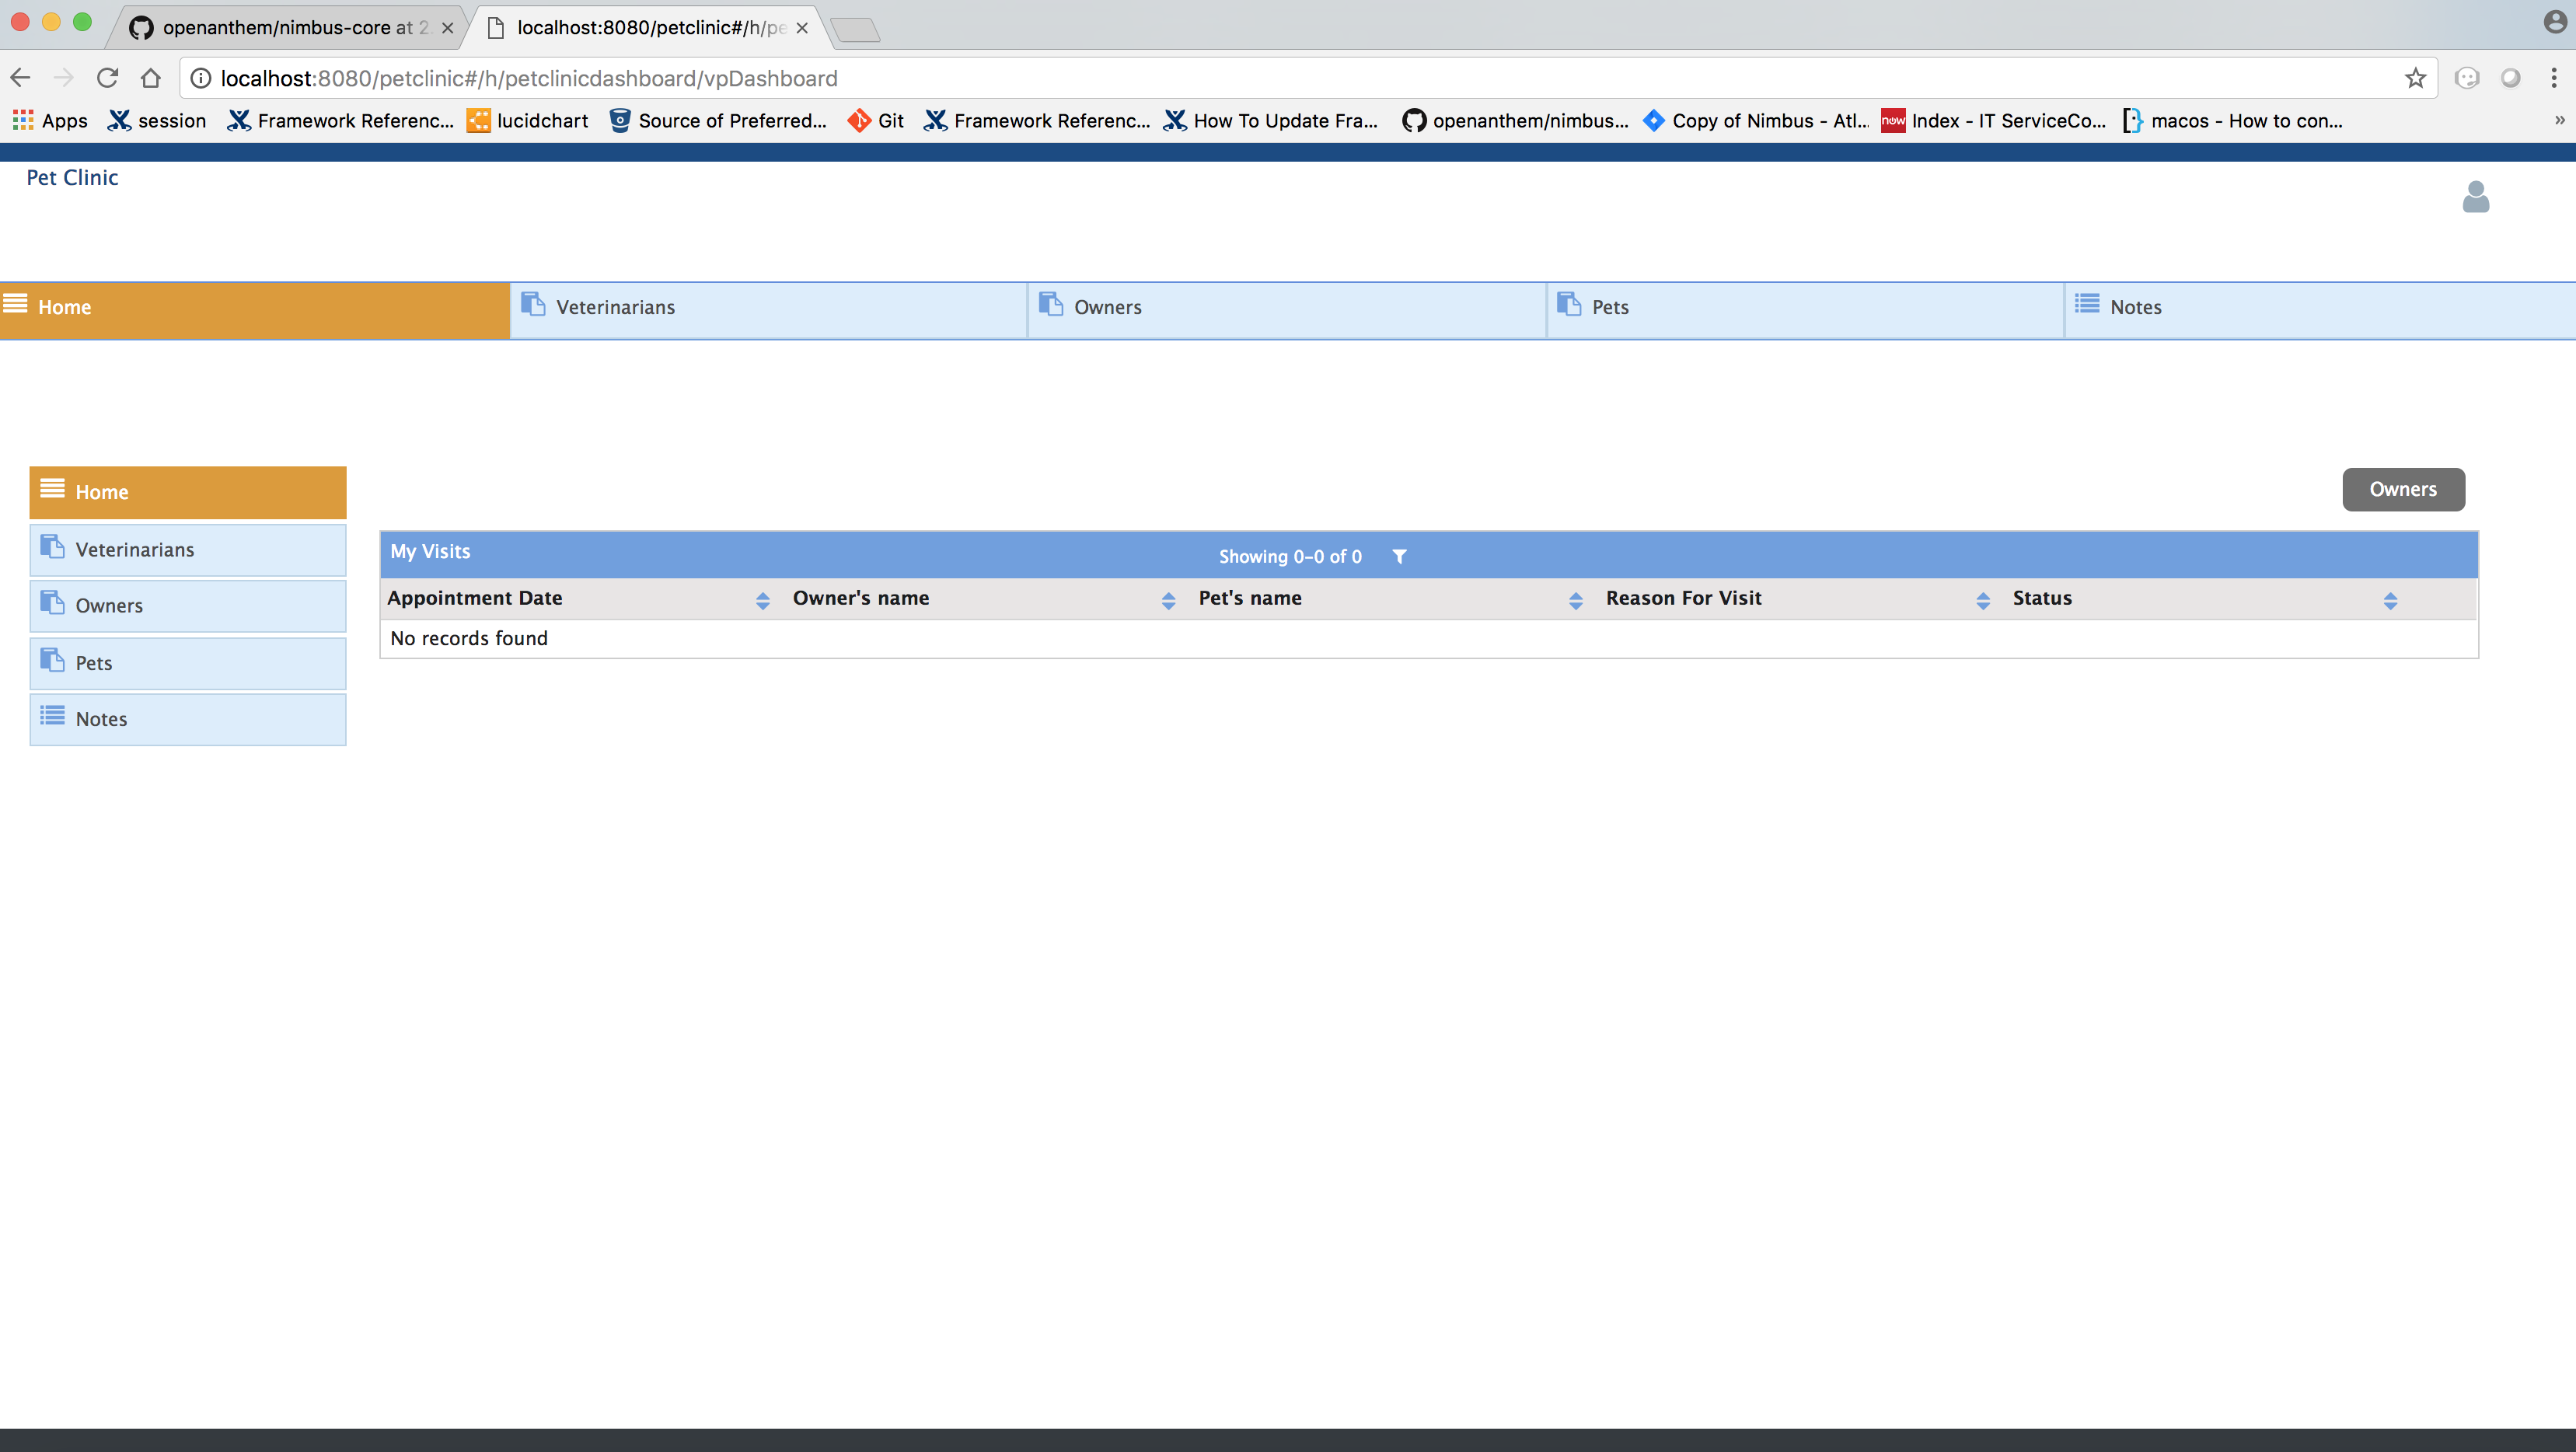
Launch the app by visting http://localhost:8080/petclinic#/h/petclinicdashboard/vpDashboard
Playing around with Pet-Clinic App:
Adding a new Owner:
-
Launch the app by visiting http://localhost:8080/petclinic#/h/petclinicdashboard/vpDashboard
-
Click Owners
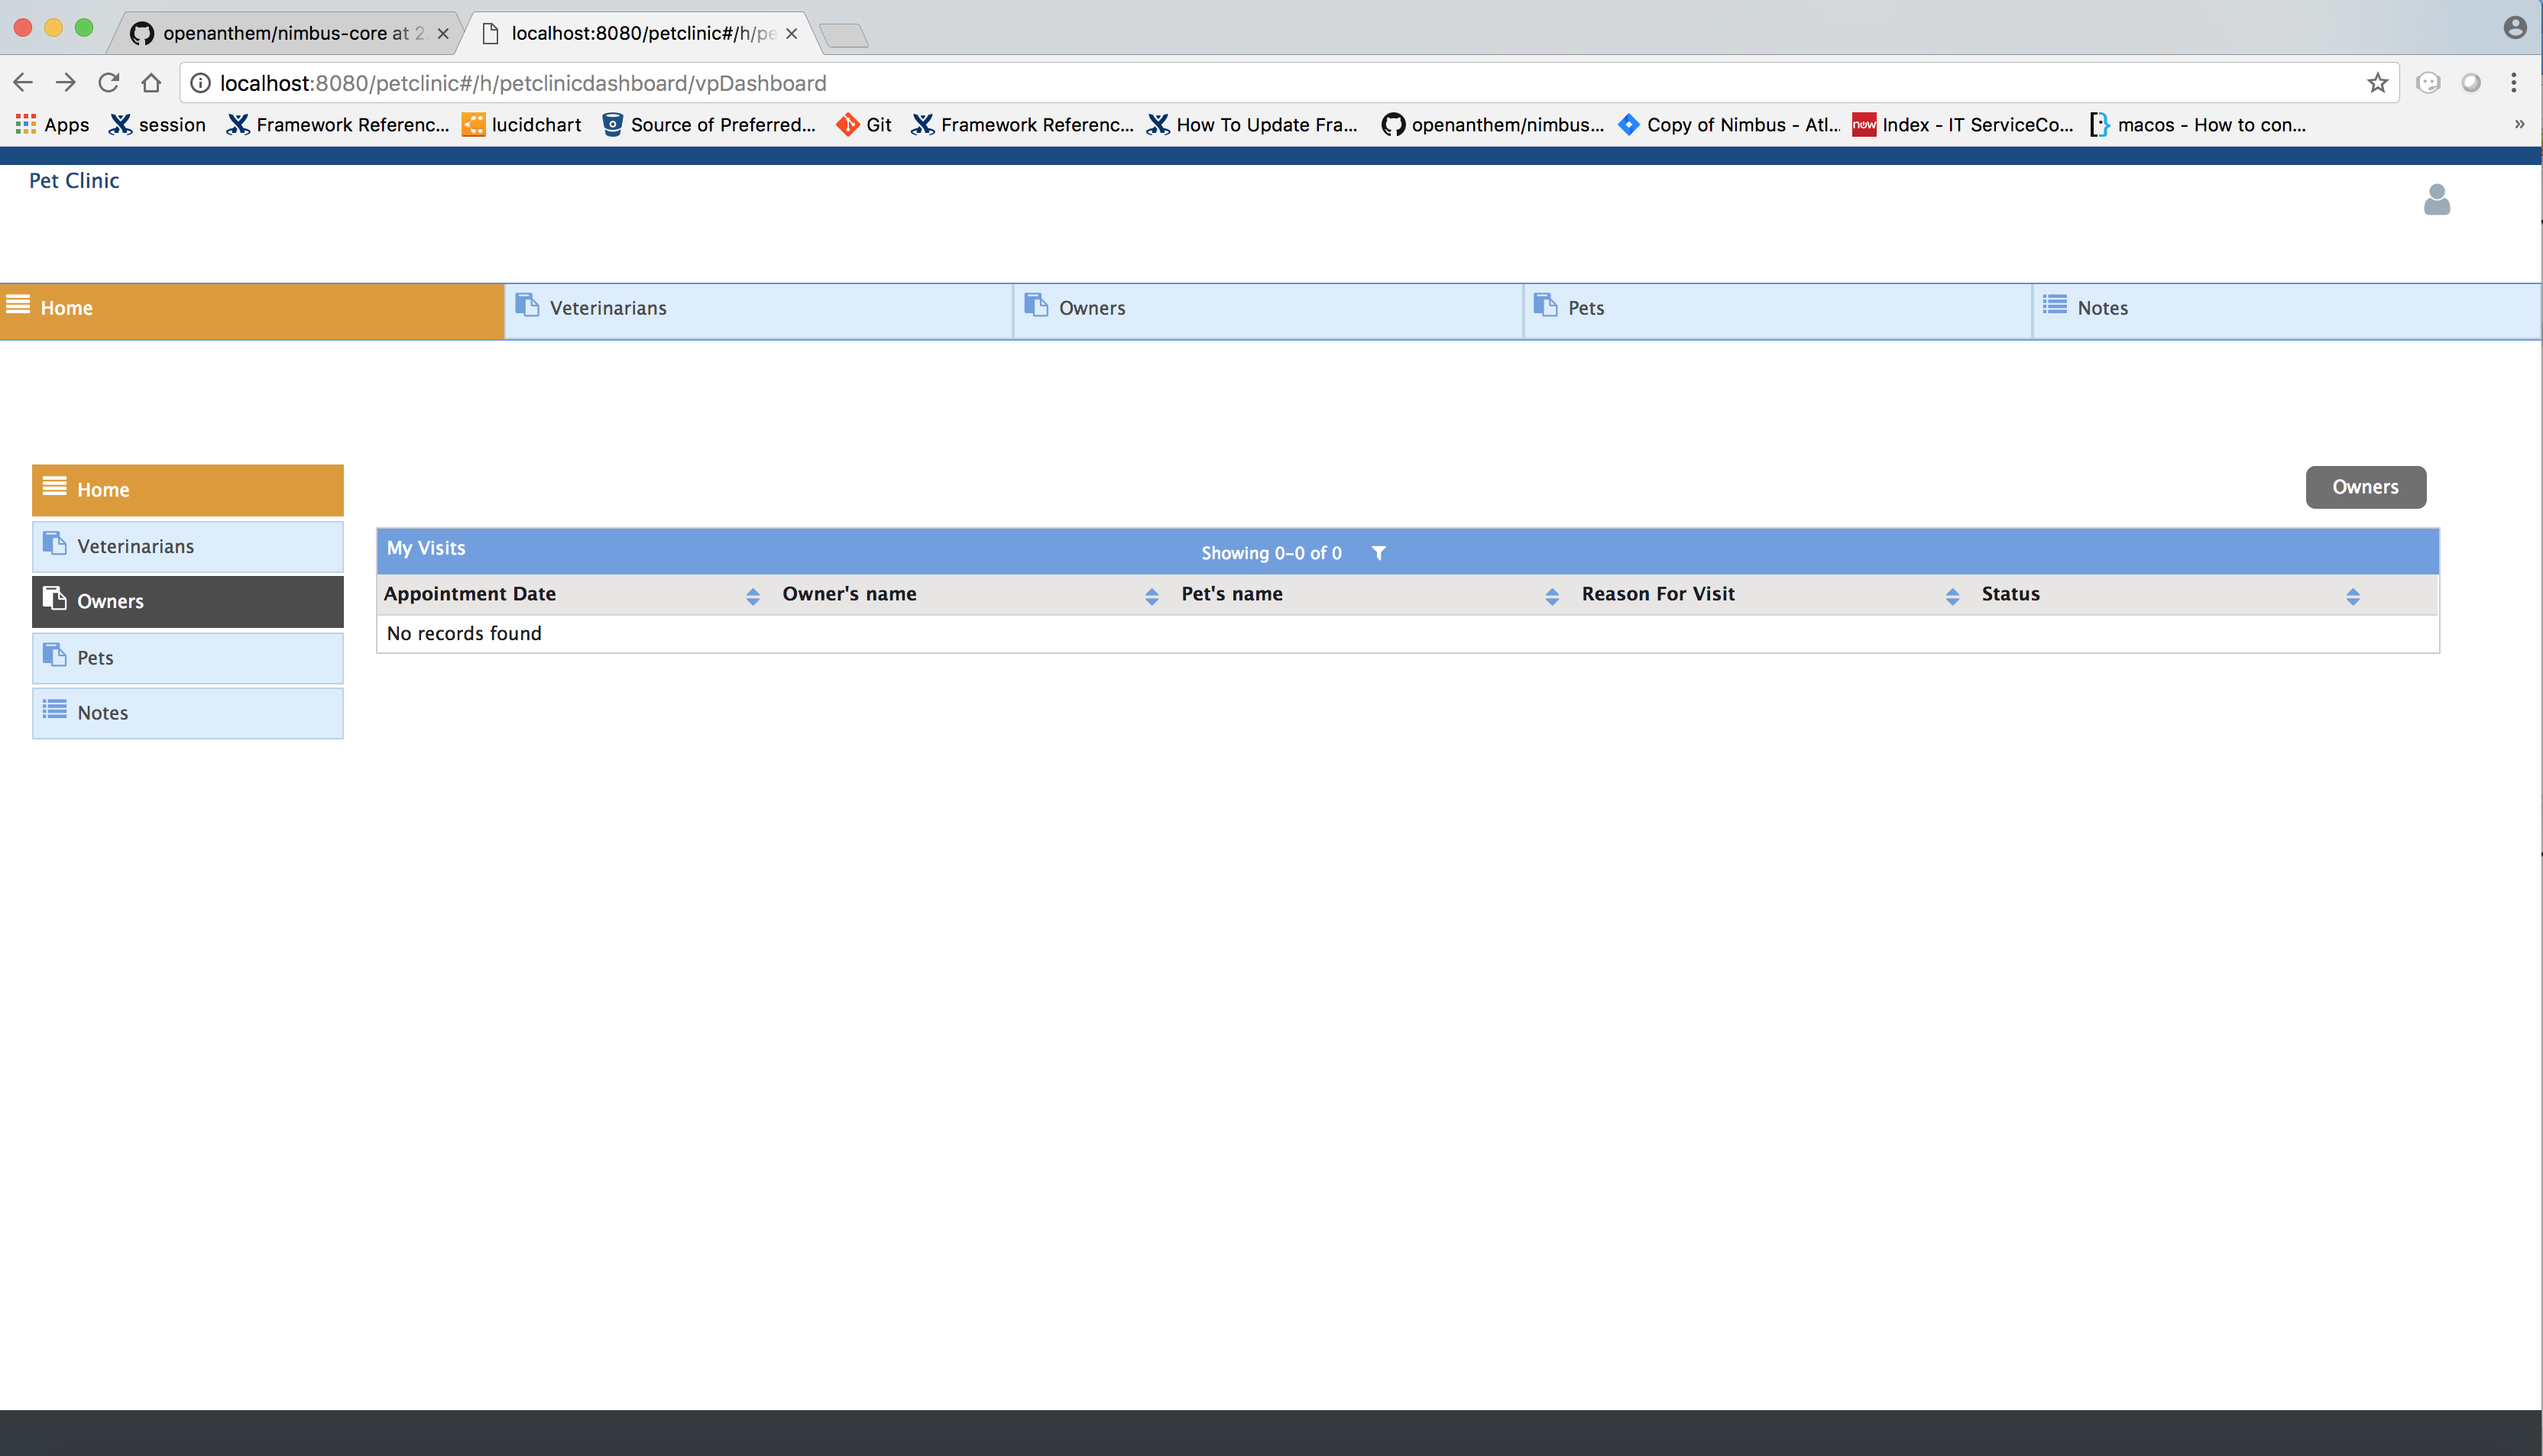
-
You will be redirected to Owners page. Ente first name and last name and Click Add Owner
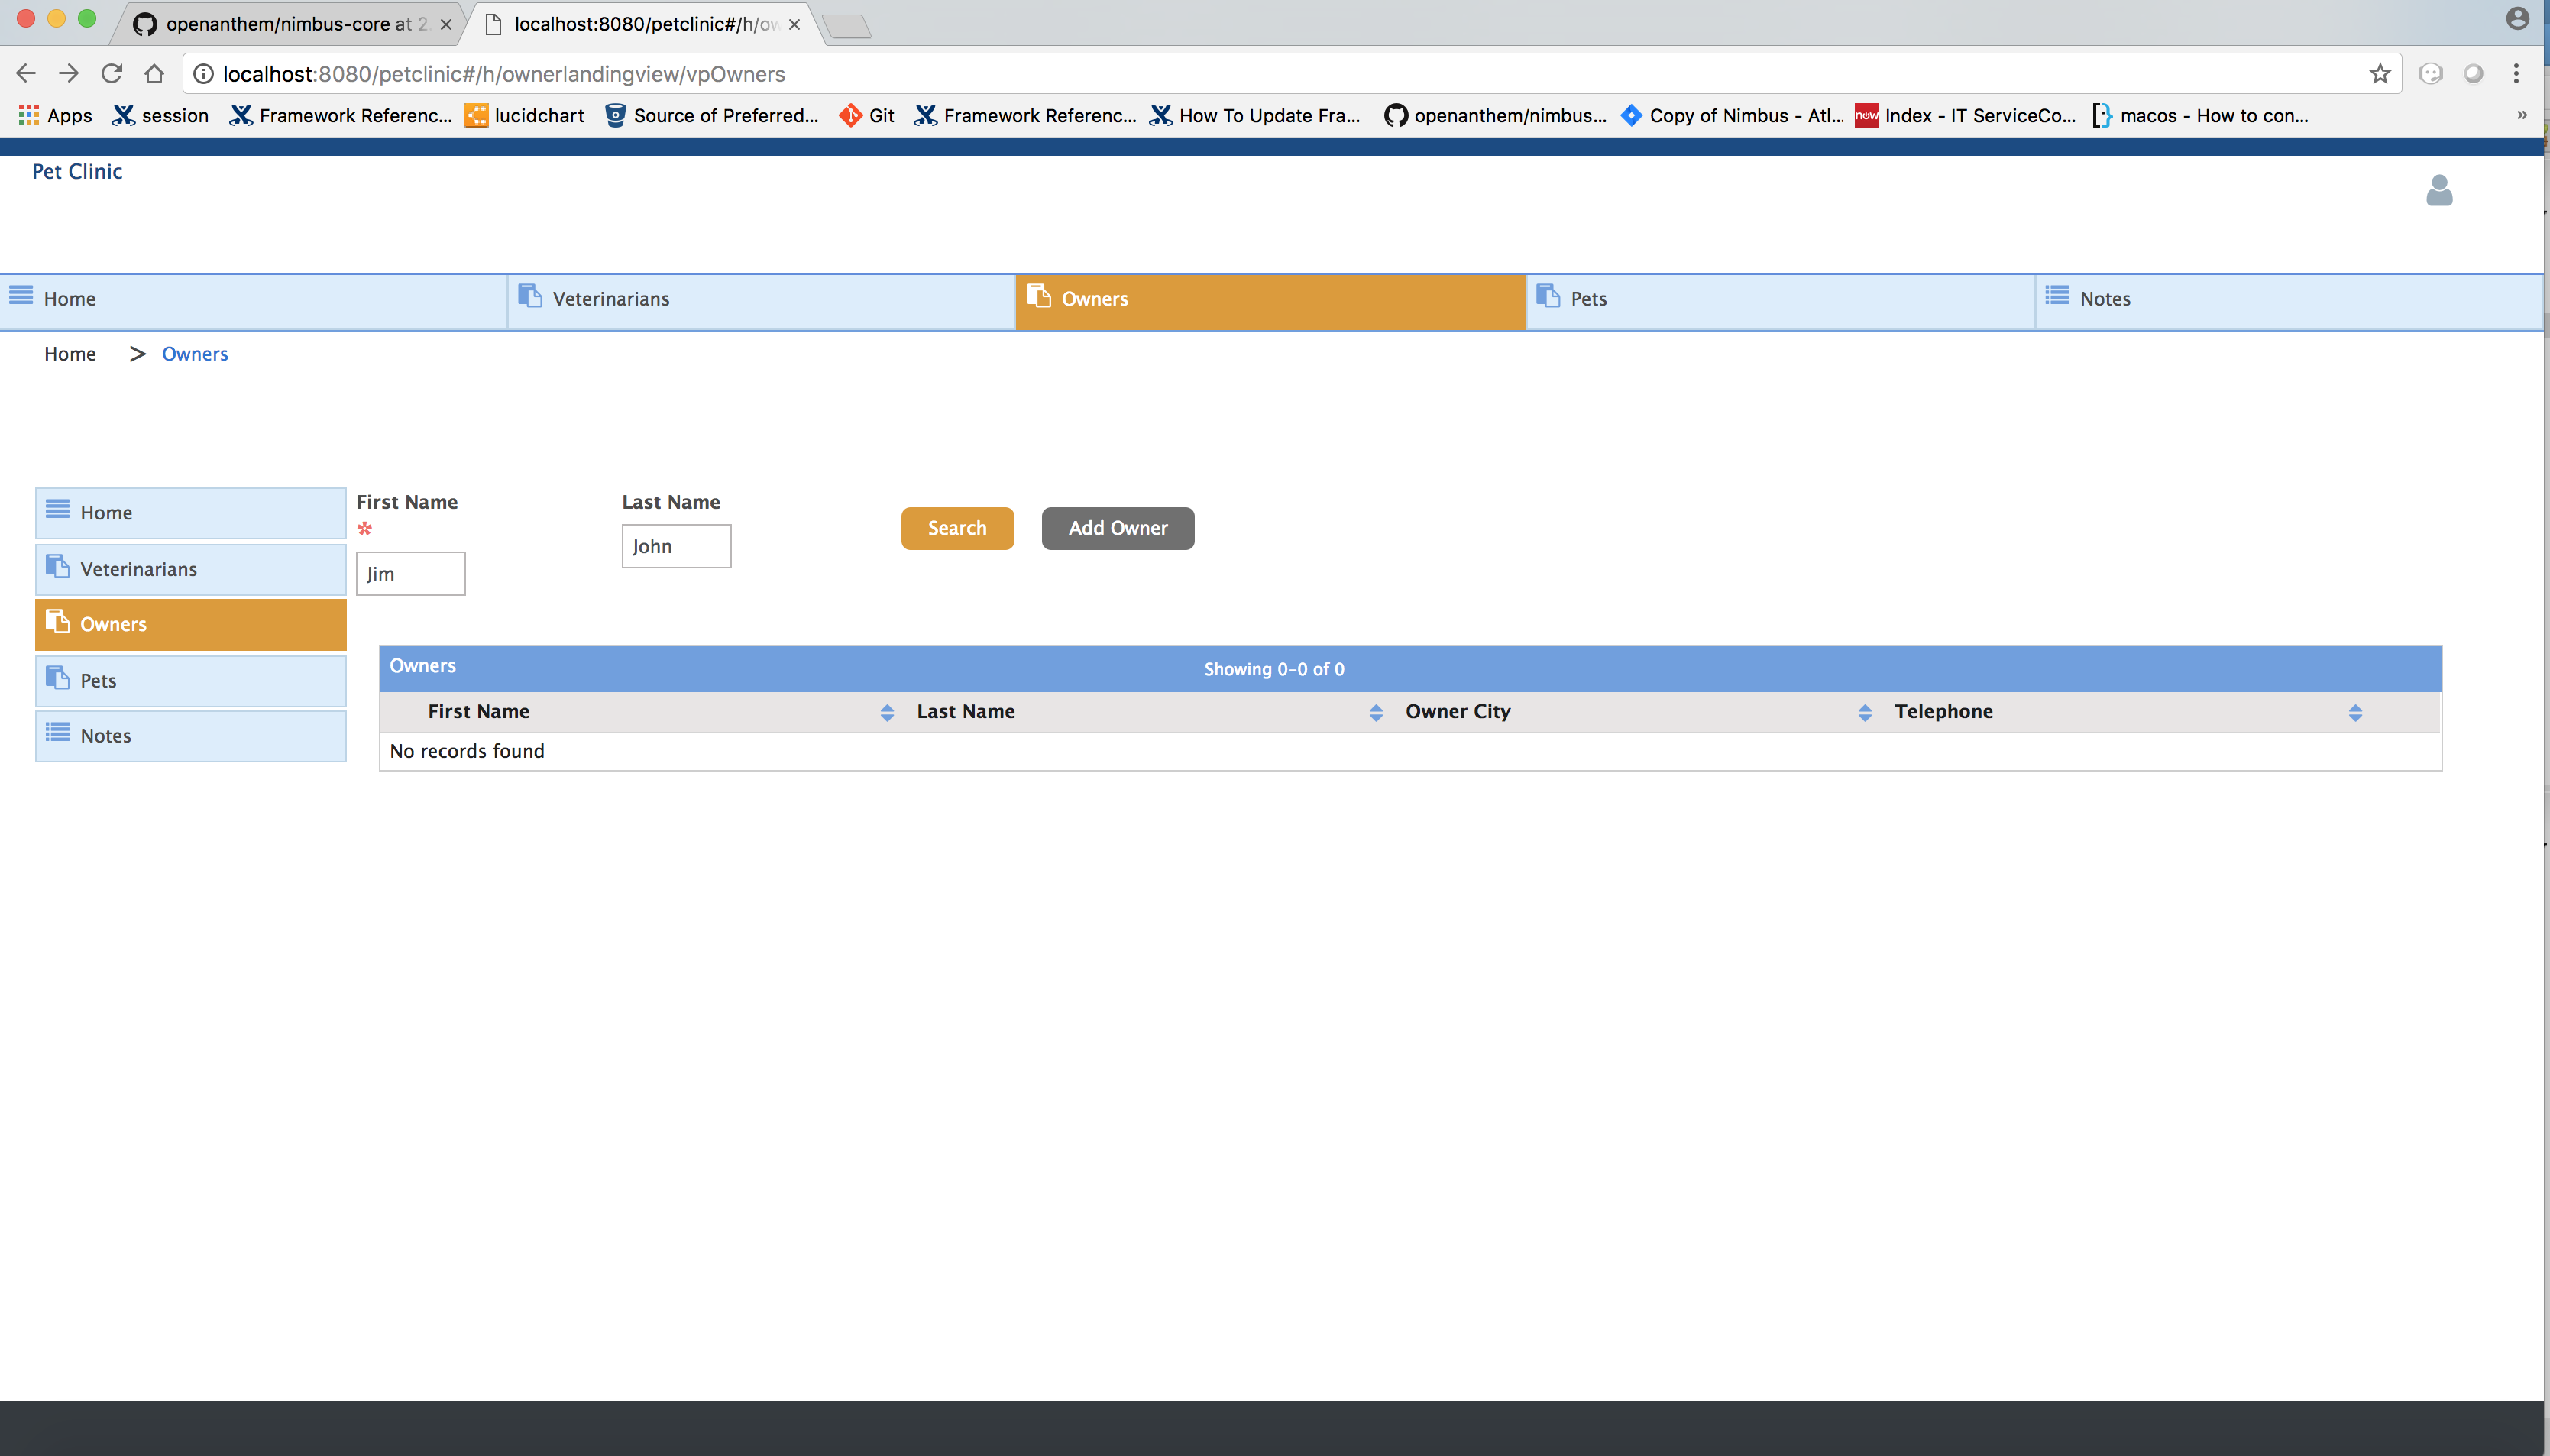
-
You will be redirected to Add Owners page
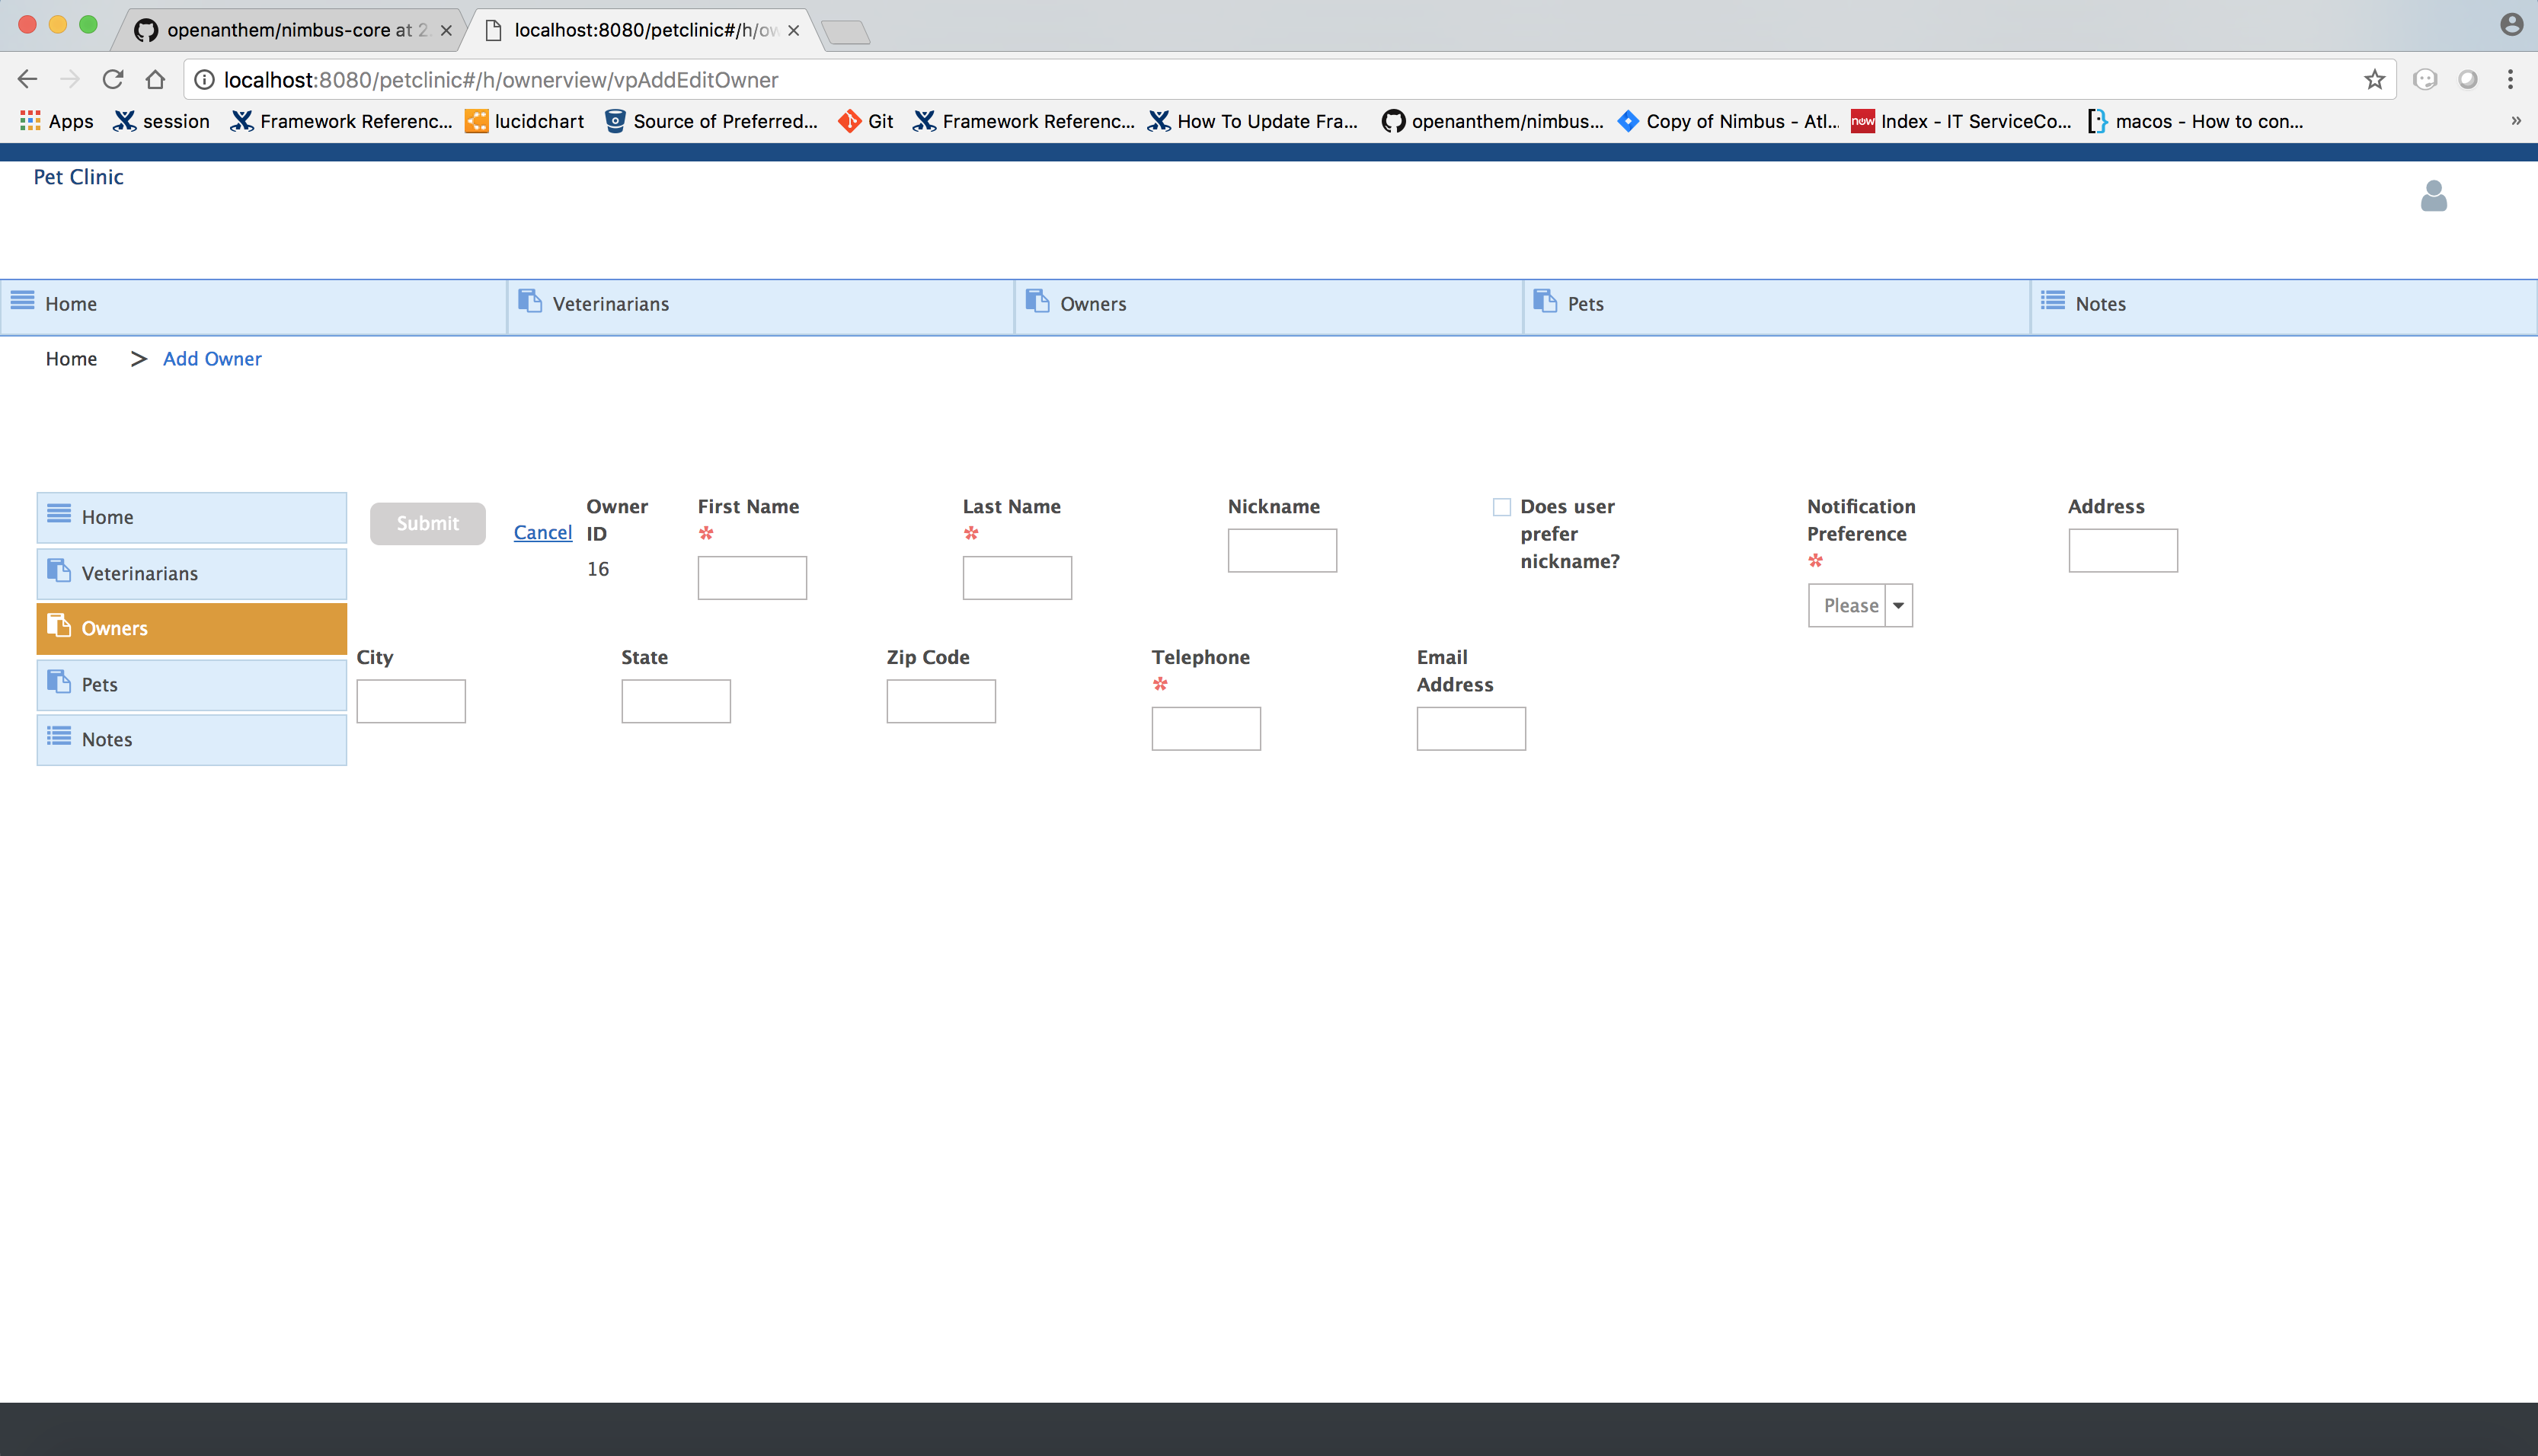
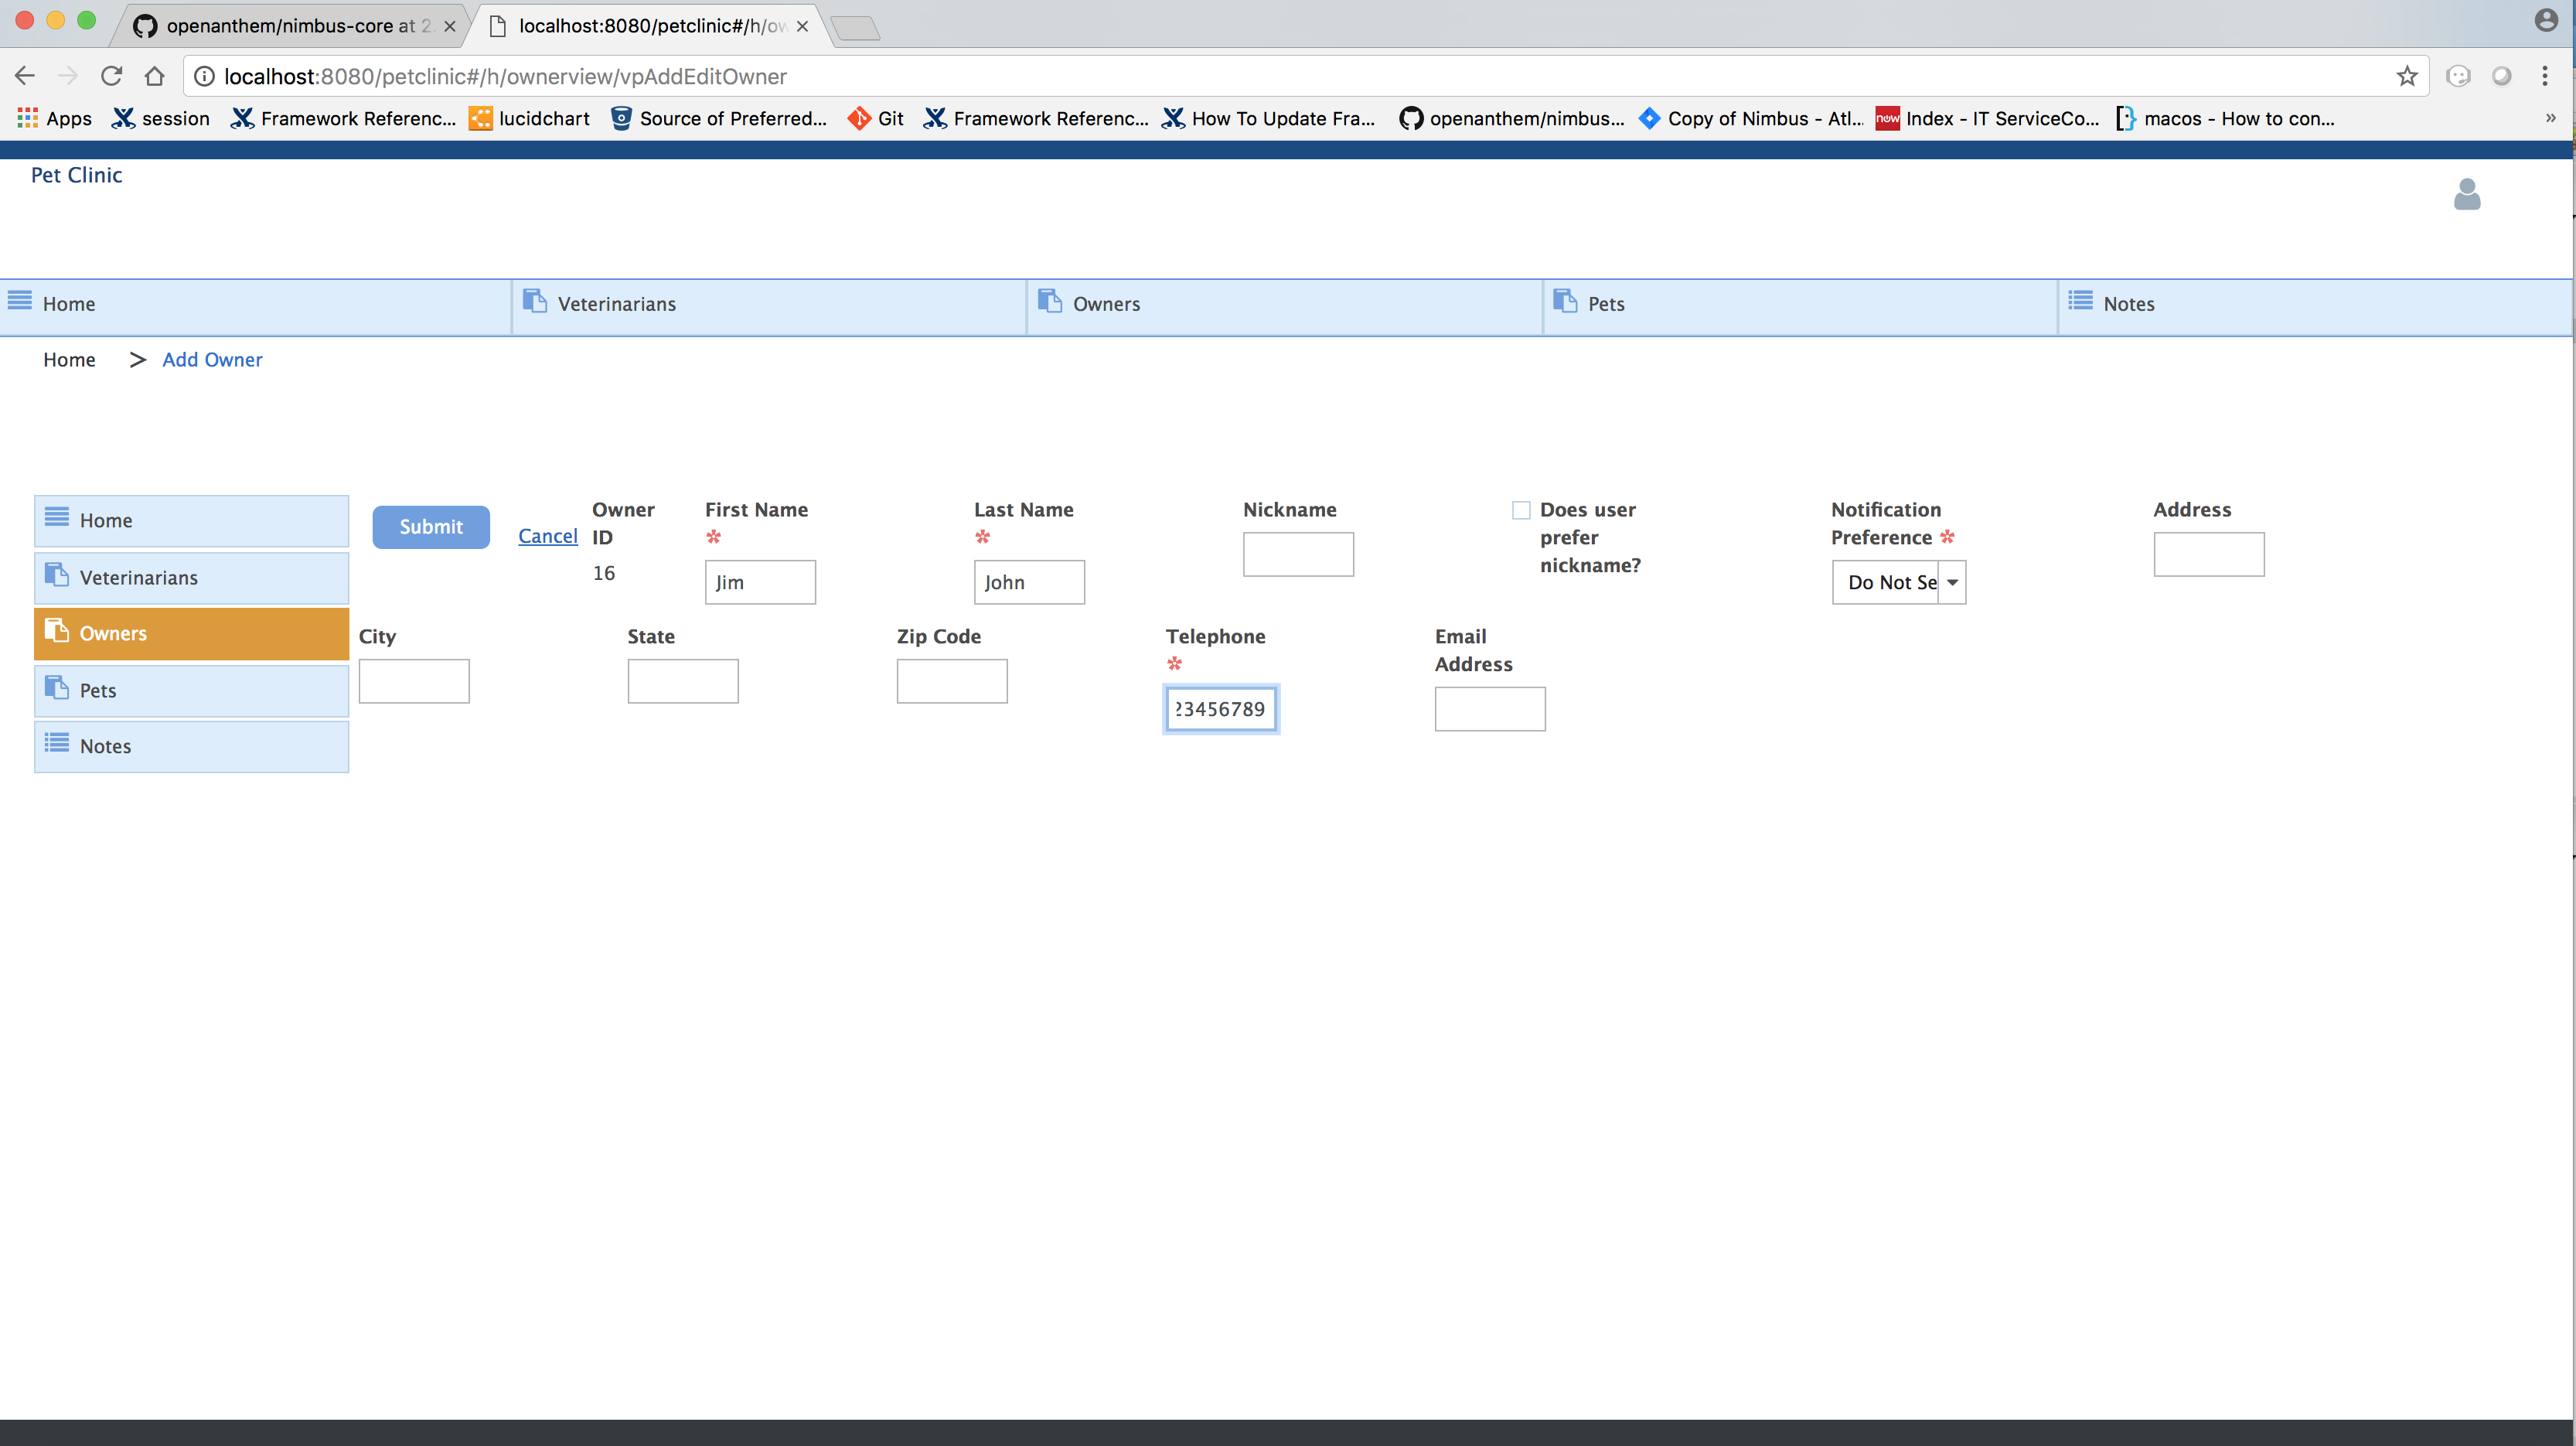
-
Enter the details and Click Submit
-
You can view the details in Owners page
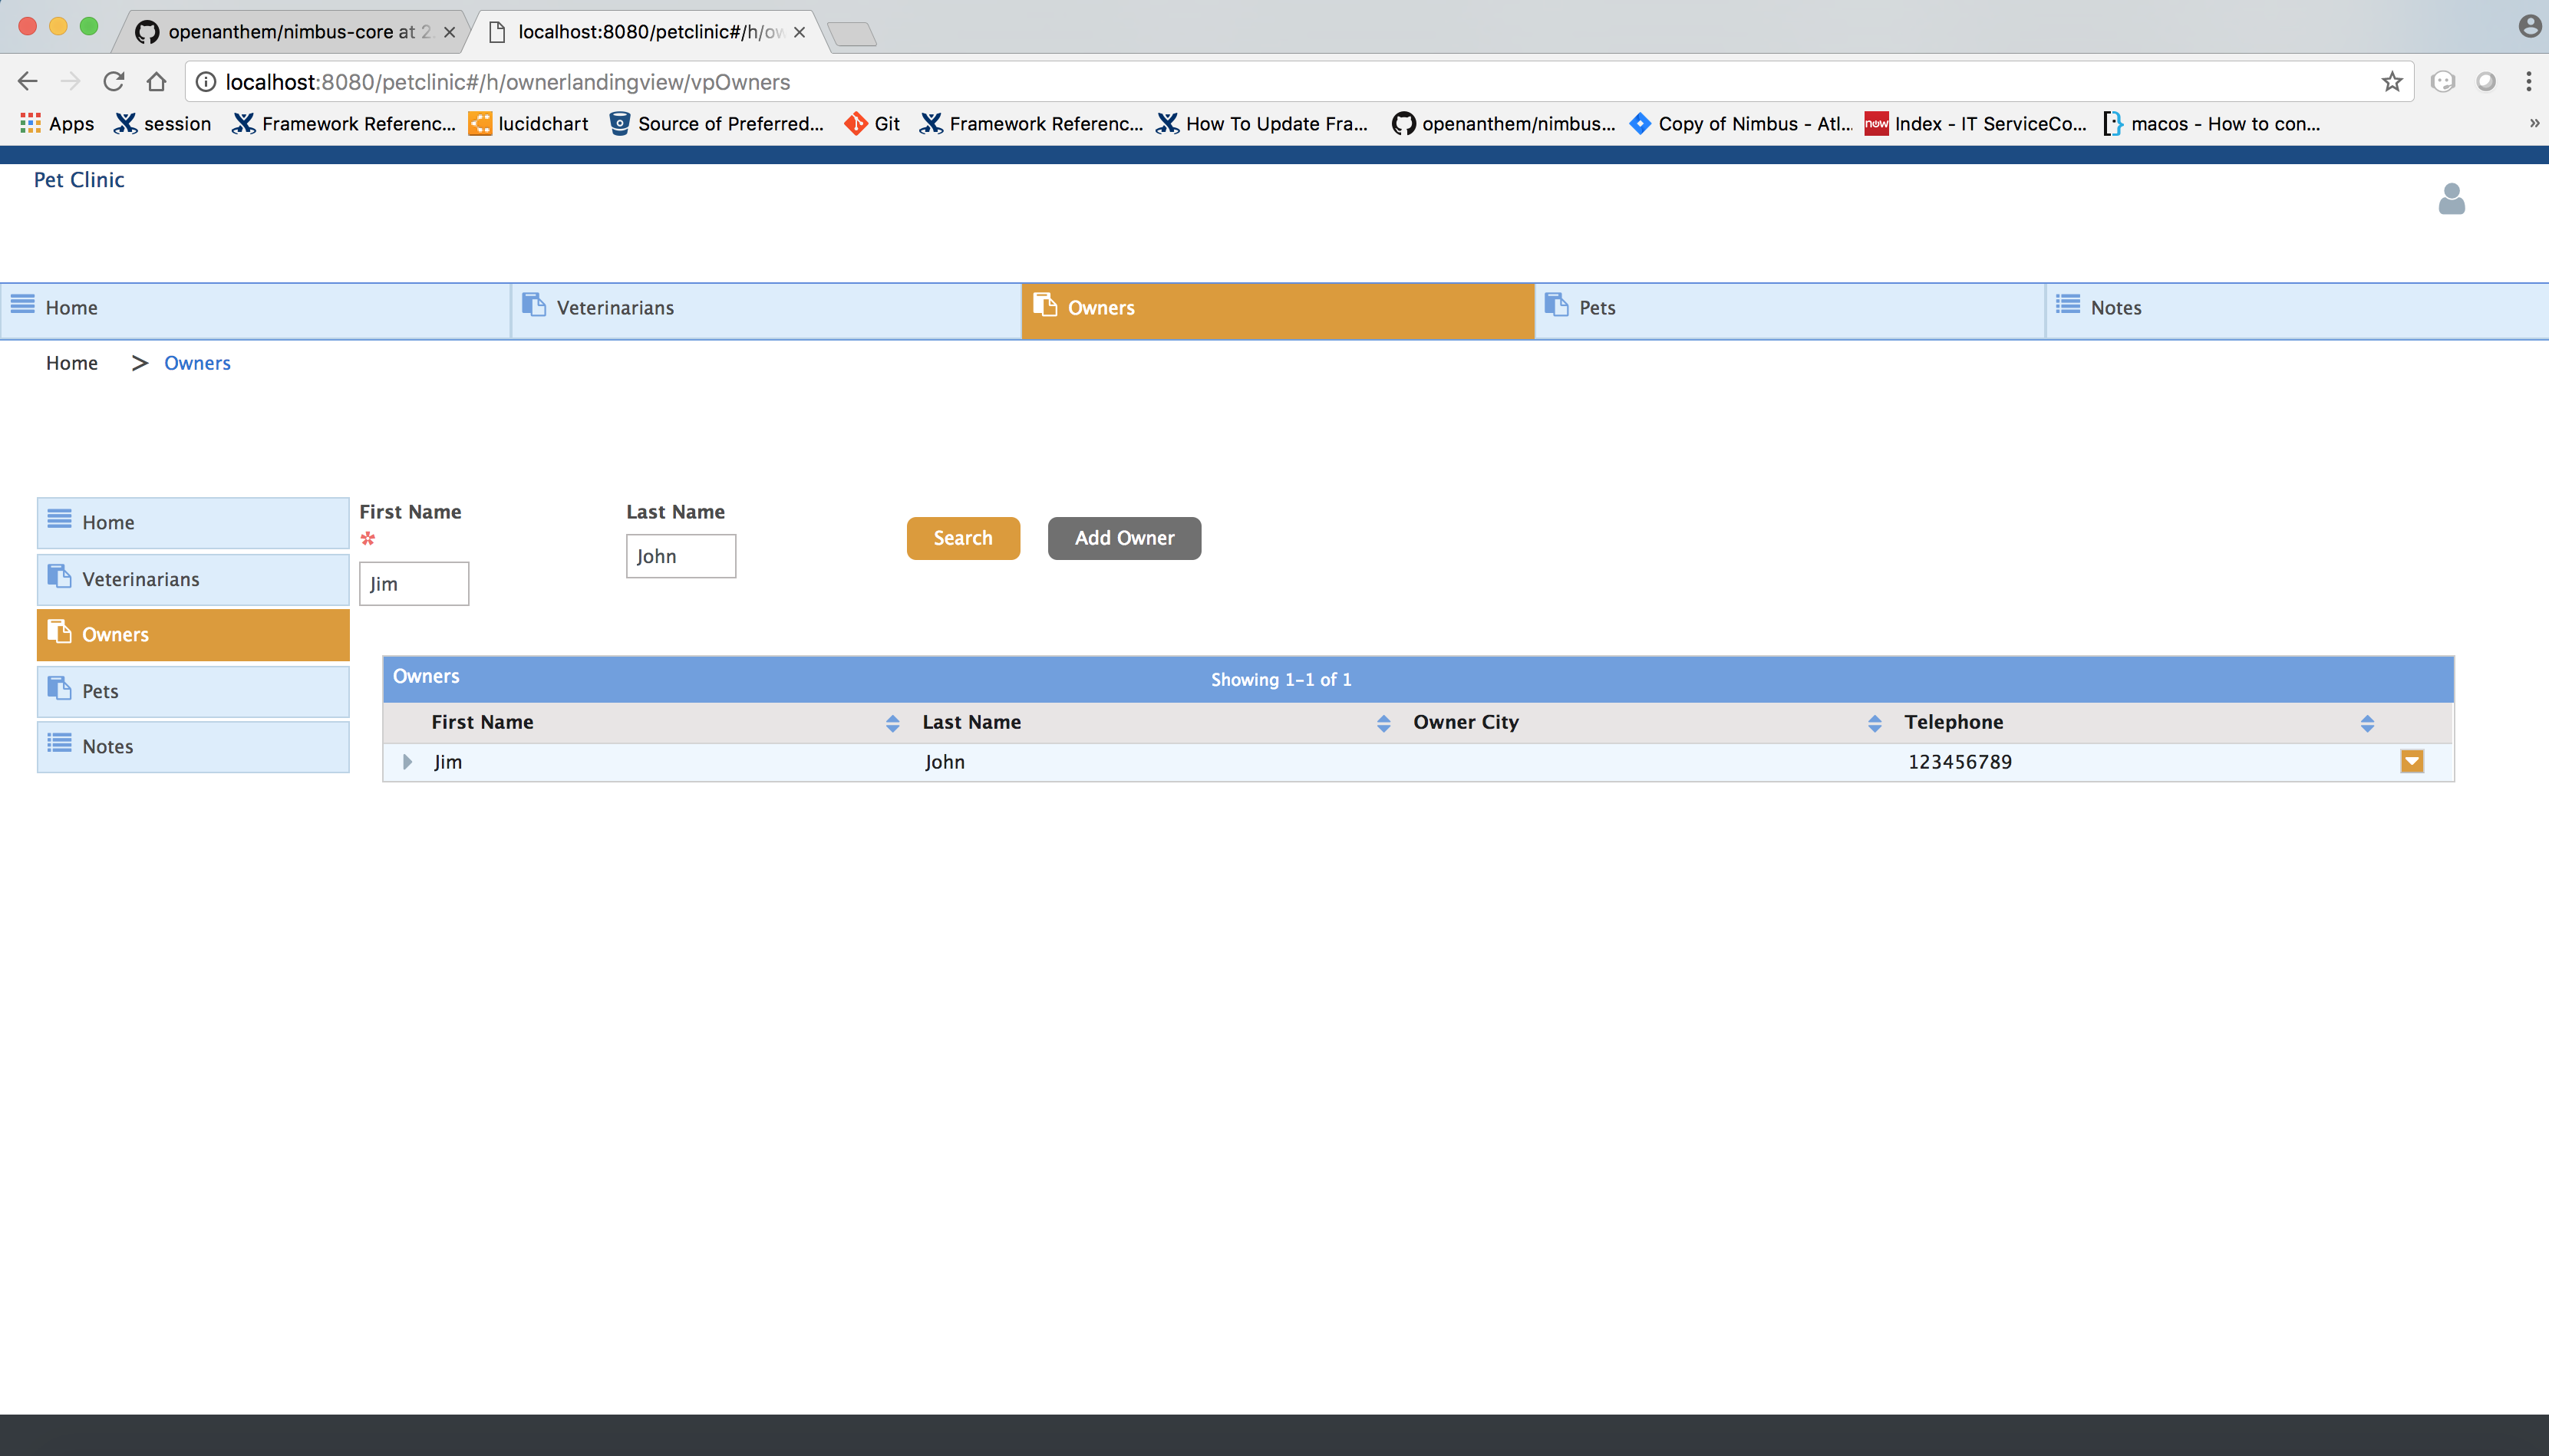
-
Conclusion:
Now you know got to know how to work with the pet-clinic application!